For some people, managing a fan or business page alone can be difficult. Even for us here at Advertisemint, it can be difficult! With a business to manage and a social and personal life to maintain, people might have very little time to review and respond to their fan mail and notifications, to post a status, or to monitor page insights. Fortunately, Facebook allows fan page owners to assign fan page roles to Facebook users to allow for easy coordination with a Facebook ads agency, for example. After all, two or three or four heads are better than one.
With different roles to choose from such as editor, advertiser, admin, and analyst, fan page owners can get the help they need in managing their accounts. Assigning a role is easier than you’d expect for a Facebook marketing company.
What is a Facebook fan page?
A Facebook fan page is a dedicated platform on Facebook that allows businesses, organizations, public figures, and brands to establish an online presence and engage with their audience.
Unlike personal profiles, fan pages are designed for promotional purposes, offering various tools and features to connect with followers. With over 2.8 billion monthly active users, Facebook provides an extensive global audience for fan pages to target potential customers and build a loyal community.
Fan pages offer insights and analytics to monitor page performance, track audience engagement, and measure the impact of content. Users can like, follow, and interact with fan pages, creating a dynamic space for sharing updates, promotions, events, and relevant content.
Facebook fan pages serve as a powerful marketing and communication channel, enabling businesses and entities to establish their brand identity, foster customer relationships, and expand their online reach.
Why should you add an admin to your Facebook fan page?
Facebook is the largest social media platform in the world, with over 2.9 billion active users. Having a Facebook fan page is a great way to connect with your target audience and promote your business. However, managing a Facebook fan page can be time-consuming, especially if you have a large following. That’s why it’s important to add admins to your fan page.
Adding admins allows you to distribute responsibilities, collaborate seamlessly, and respond to audience engagement promptly. Each admin can have specific access levels to post content, interact with followers, and analyze page insights.
Moreover, having multiple admins reduces the risk of losing control over the page if one admin loses access to their account. This ensures continuous page operation and protects your online presence.
Adding admins to your Facebook fan page empowers your team, improves page performance, and fosters a strong and engaged community.
How to add an admin to your Facebook fan page?
In this comprehensive guide, we will walk you through the step-by-step process of adding an admin to your Facebook fan page
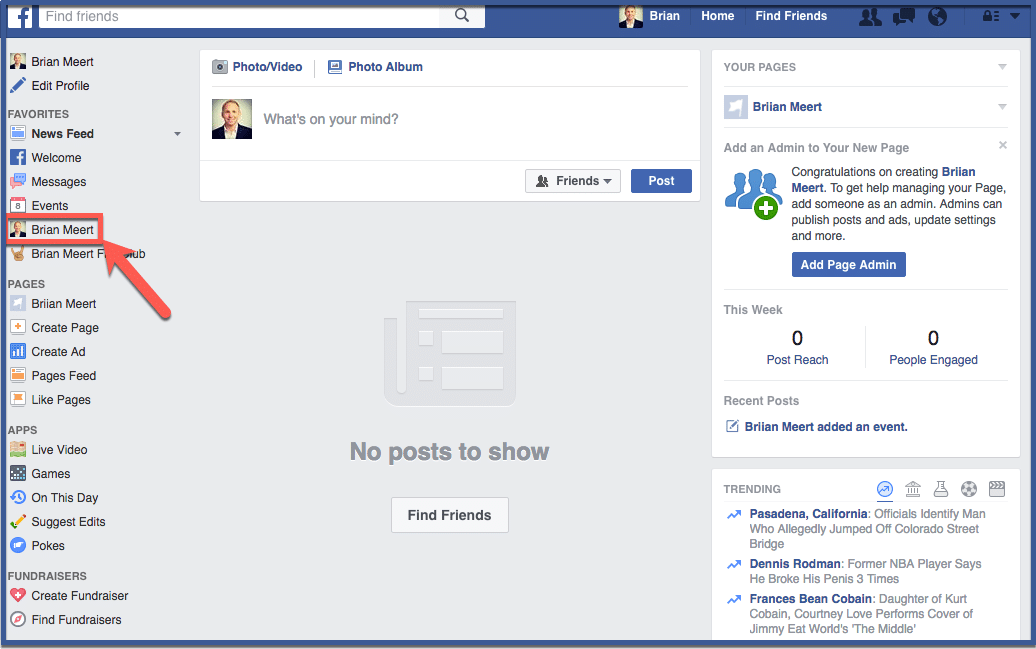
Step 1: Go to your Facebook fan page
To access your Facebook fan page, go to your news feed at facebook.com. If you saved your fan page under “Favorites” when you created it, you should find your fan page under “Favorites” on the left side of your news feed.
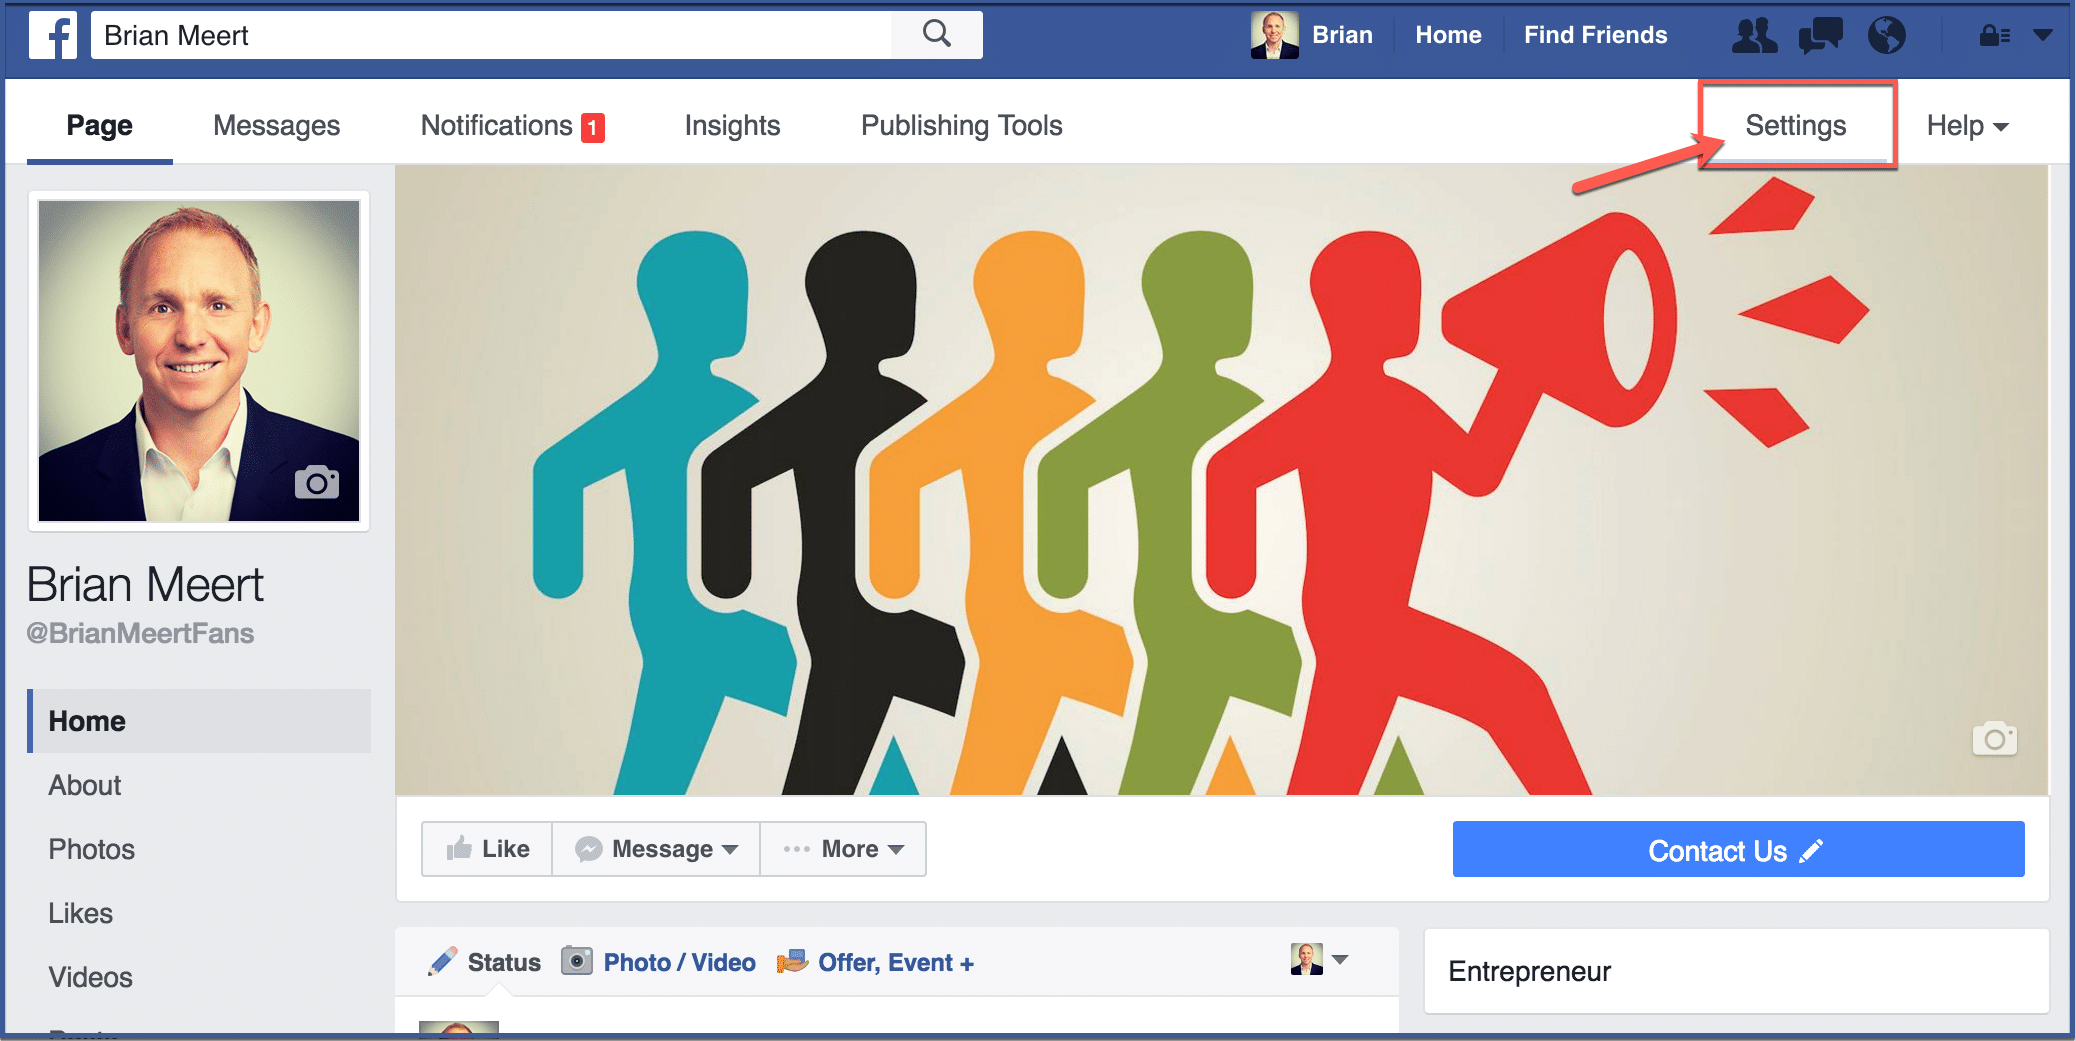
Step 2: Click Settings
Once Facebook directs you to your fan page, click “Settings” located on the right side of your screen above your Facebook cover image.
Step 3: Click “Page Roles”
Click “Page Roles” on the left side of your screen under the section “General“.

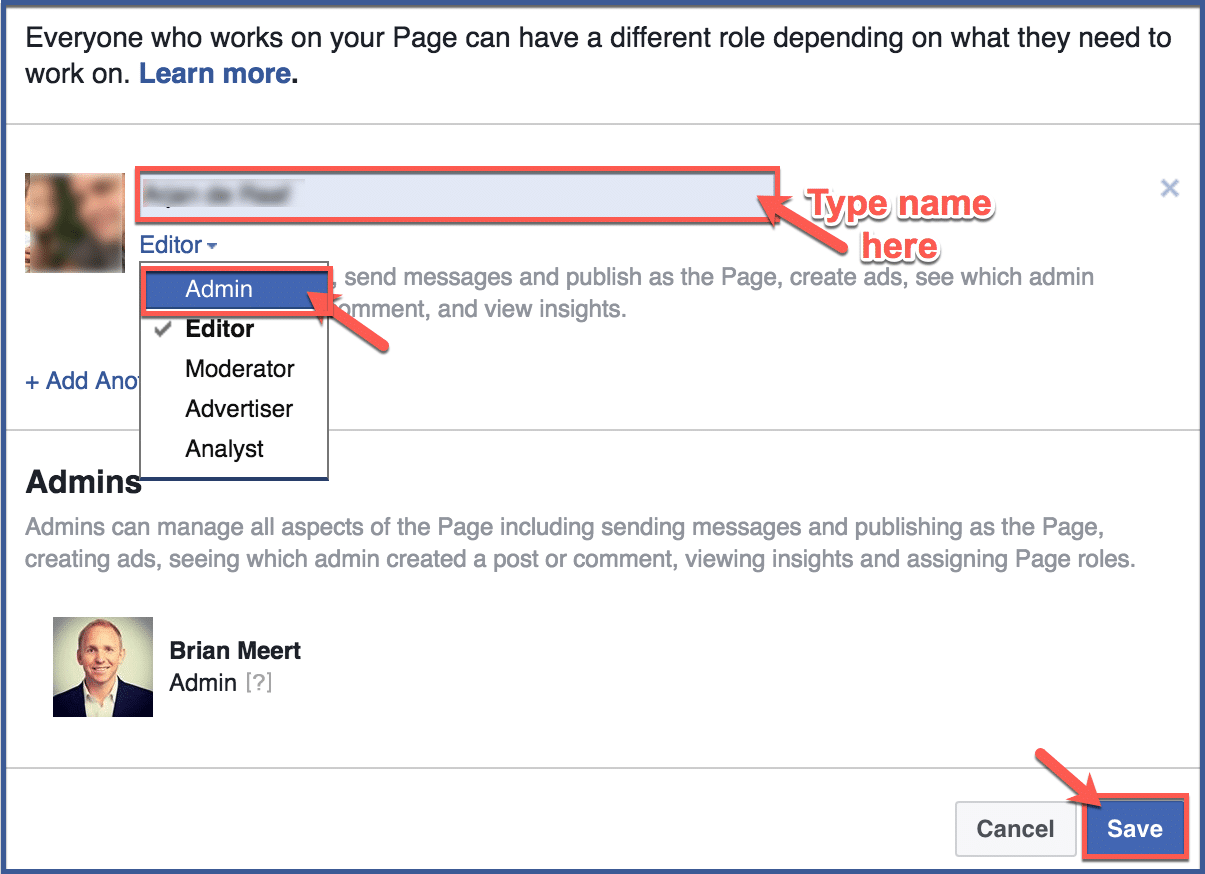
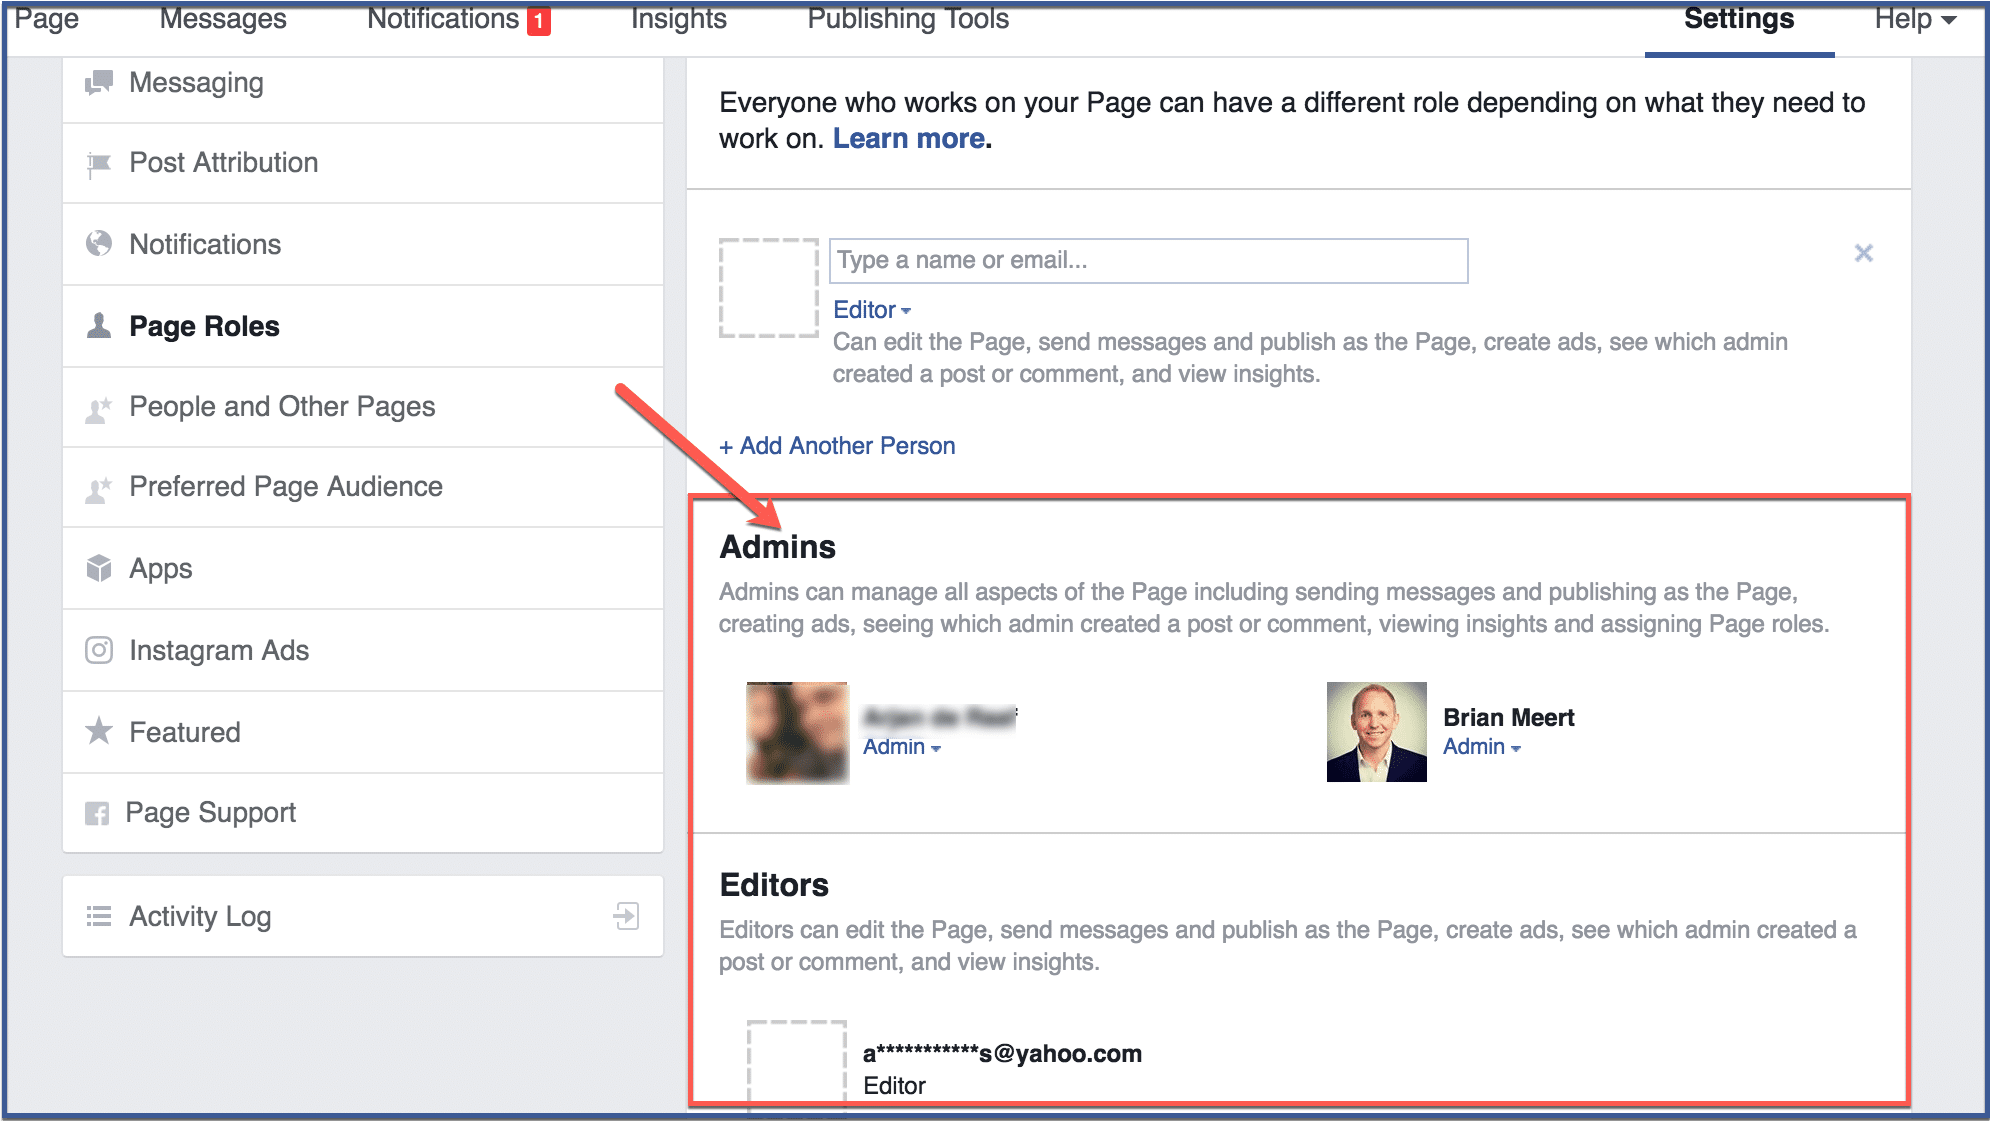
Step 4: Add an admin
To add an administrator, type the name or email of the person you want. Here, you can assign different roles to different people. For example, you can also assign someone to be an editor, advertiser, moderator, or analyst, whether they are a part of a Facebook marketing company or not.
After assigning roles, click “Save“.
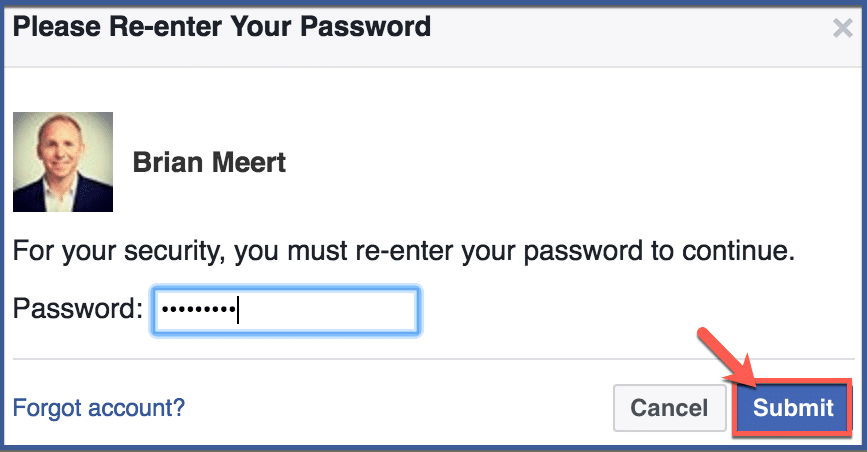
Step 5: Re-enter password
For safety purposes re-enter your password. Click “Submit“.
Step 6: You’re done!
The people with roles you’ve assigned should appear here.
Conclusion
Adding an admin to your Facebook fan page is a strategic move that brings numerous advantages. By following the step-by-step process outlined in this guide, you can expand your page’s reach, distribute tasks effectively, and enhance security.
As your page flourishes, the ability to collaborate and share responsibilities will prove invaluable. Whether you’re a business, organization, or individual, leveraging the power of multiple admins will undoubtedly contribute to a more successful and engaging Facebook fan page.
Start implementing these steps today and witness the positive impact on your page’s growth and performance.
FAQs
How do I access the settings to add an admin to my Facebook fan page?
To access the settings, log in to your Facebook account and navigate to your fan page. Click on the “Settings” tab located at the top right corner of the page. From there, you can manage roles and permissions for your page.
What are the different admin roles available for Facebook fan pages?
Facebook offers different admin roles, including “Admin,” “Editor,” “Moderator,” “Advertiser,” and “Analyst.” Each role has specific access levels and responsibilities, catering to various page management needs.
Can I add multiple admins to my Facebook fan page?
Yes, you can add multiple admins to your fan page. Multiple admins allow for better collaboration and efficient page management, especially for businesses and organizations with a team handling the page.
Do admins need a Facebook account to be added to a fan page?
Yes, admins need to have a valid Facebook account to be added to a fan page. You can add admins by entering their Facebook name or the email associated with their Facebook account.
Can I remove an admin from my Facebook fan page if needed?
Yes, as the page owner or another admin, you have the ability to remove an admin from the fan page. In the “Page Roles” section of your settings, you can manage admin roles, revoke permissions, or completely remove them from the page.
Was this article helpful? Leave your comments below!
