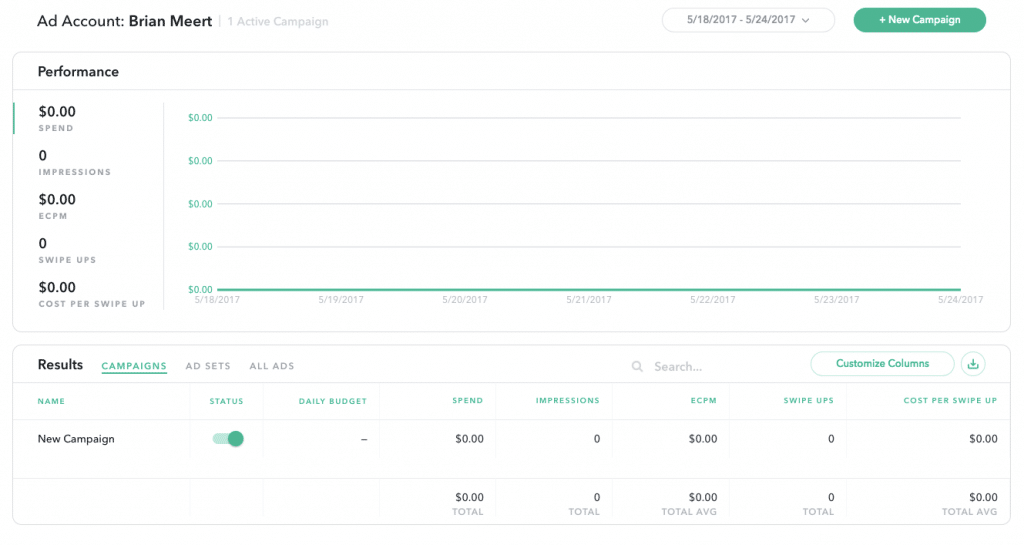
A few days ago, AdvertiseMint gained access to Snapchat’s Ad Manager. As we explored the dashboard, we took screen shots to give to you, our loyal readers. First we took screenshots to show you how to create a Snapchat ad account. Then we took screenshots to show you how to create your first Snapchat attachment ad, which will be easy for you if you’re already familiar with Facebook’s Business Manager dashboard. (You’d be delighted to see that Snapchat’s Ad Manager is a simpler version of Facebook’s.) Before you can learn how to create your first Snapchat attachment ad, however, you must first know what it is and how it works.
What Is a Snapchat Attachment Ad?
Attachment ads are 10-second video ads that allow you to attach a link to either a website, an app to install, a long-form video, or an article. There are four types of attachment ads: web view, app install, long-form, and article.
Web View
Web-view Snapchat ads allow you to attach your website URL to your ad. When your ad appears, users can swipe up on the CTA from the bottom of your screen to visit your website. From there, they can browse and make purchases without leaving the app
App Install
With an app install ad, you can attach a link to the app that you want users to download. Much like the web-view ad, users can swipe up on the CTA to download your app. While the app downloads in the background, users can continue exploring Snapchat.
Long-Form Video
When someone swipes up on the CTA of a short 10-second video ad, a long-form video will appear. You can attach any long-form video to the ad, whether that’s a movie or TV trailer, a preview of a new music video, or a behind-the-scenes footage.
Article
Article ads are the perfect ad formats for publishers promoting their latest articles. Like all Snapchat ad formats, the article format opens vertically, filling up the entire screen.
Now that you’re familiar with attachment ads, you can continue to the next phase: learning how to create them.
How to Create a Snapchat Attachment Ad
Step 1: Go to “Ad Manager” and start a new campaign
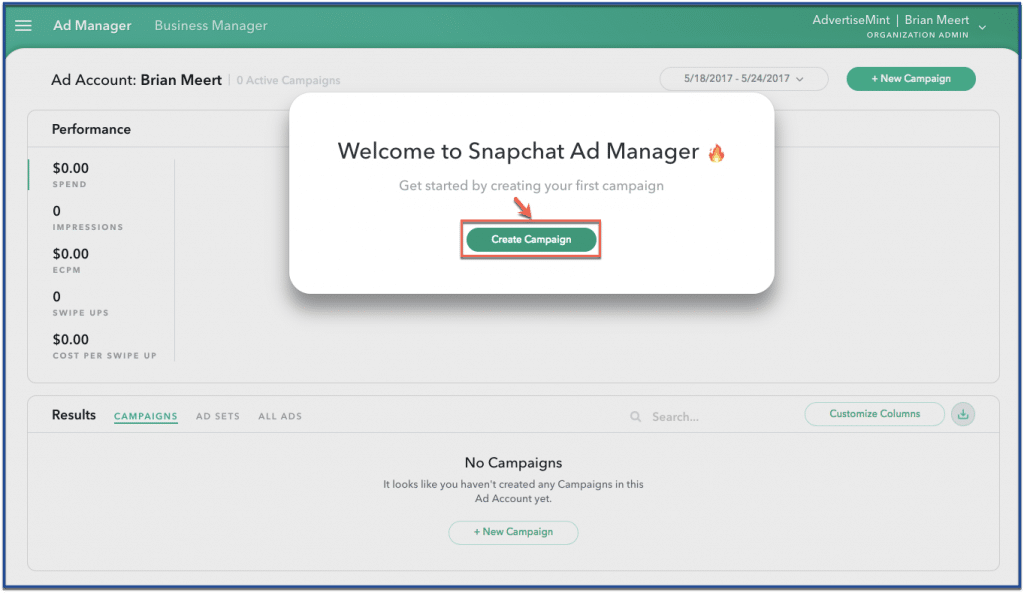
Once you’re in Ad Manager, you will receive a welcome message encouraging you to start a new campaign. Click “Create Campaign” to do so.
Step 2: Create an ad set name
If you’re not careful and attentive, you can easily skip the subtle section that allows you to name your ad set. This seemingly unimportant step is, in fact, very important if you want to keep your campaigns well-organized. Give your ad set a name that will help you easily identify it from a long list of campaigns.

Step 3: Choose your objective and schedule
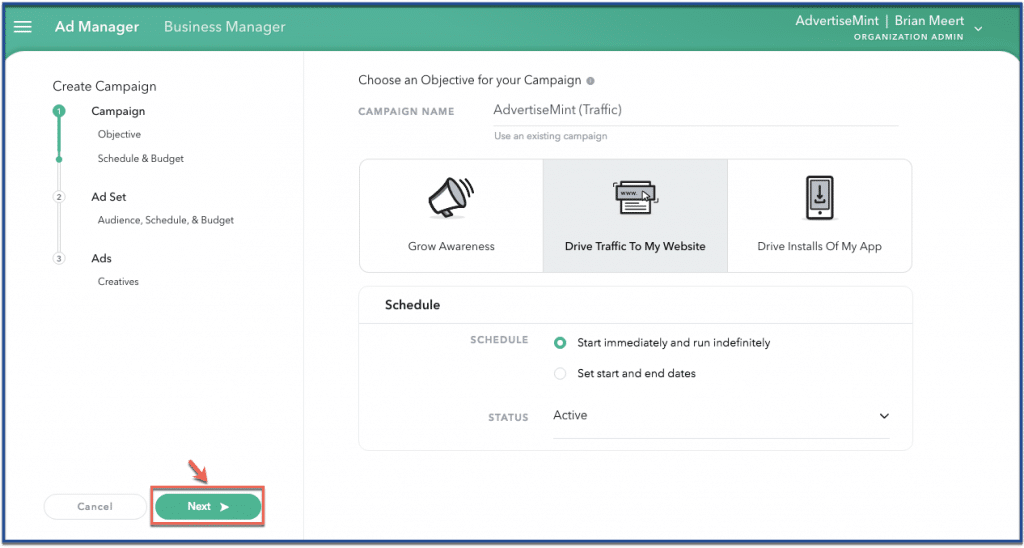
Snapchat only offers three objectives: awareness, traffic, and app installs. After you choose your objective, you can choose your schedule. You can either choose to start your campaign immediately or to set a start and end date. If choosing the former option, your campaign will go live as soon as you launch it. If the latter option, your ad will begin and end on the dates you provided.
After choosing your schedule, set your status to “Active” and click “Next.”
Step 3: Create your target audience
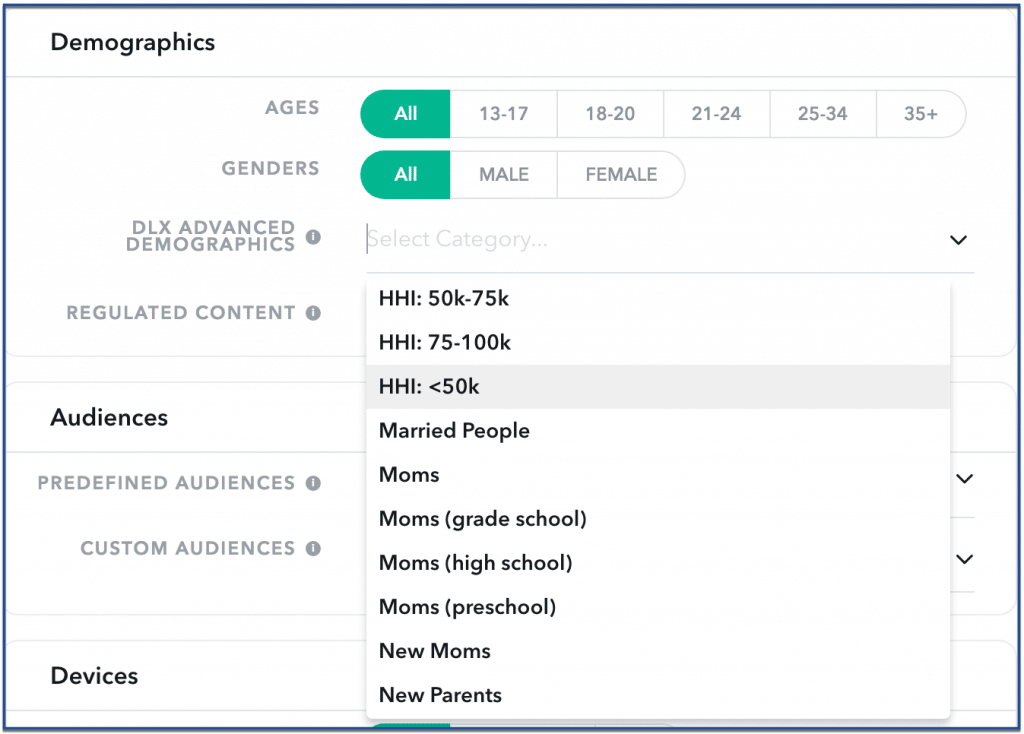
Snapchat’s targeting options are similar to Facebook’s. You can target an audience by geography, demographics, lifestyles; shopping, viewing, and visiting behaviors, custom audiences, devices, connection type, and carriers.
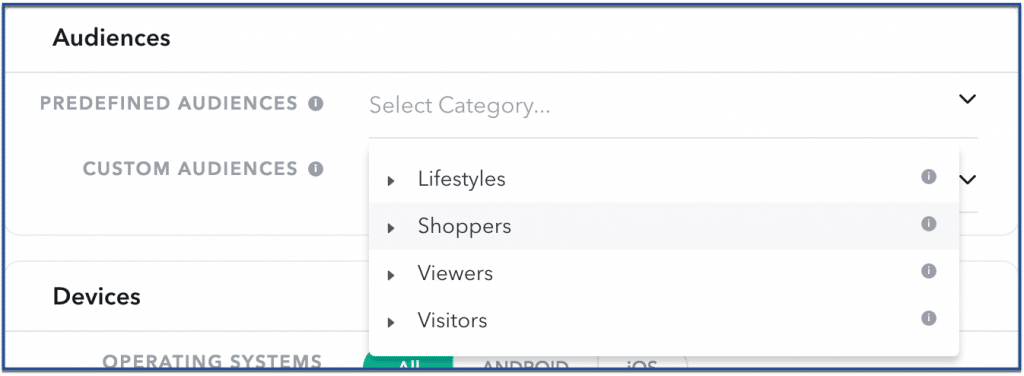
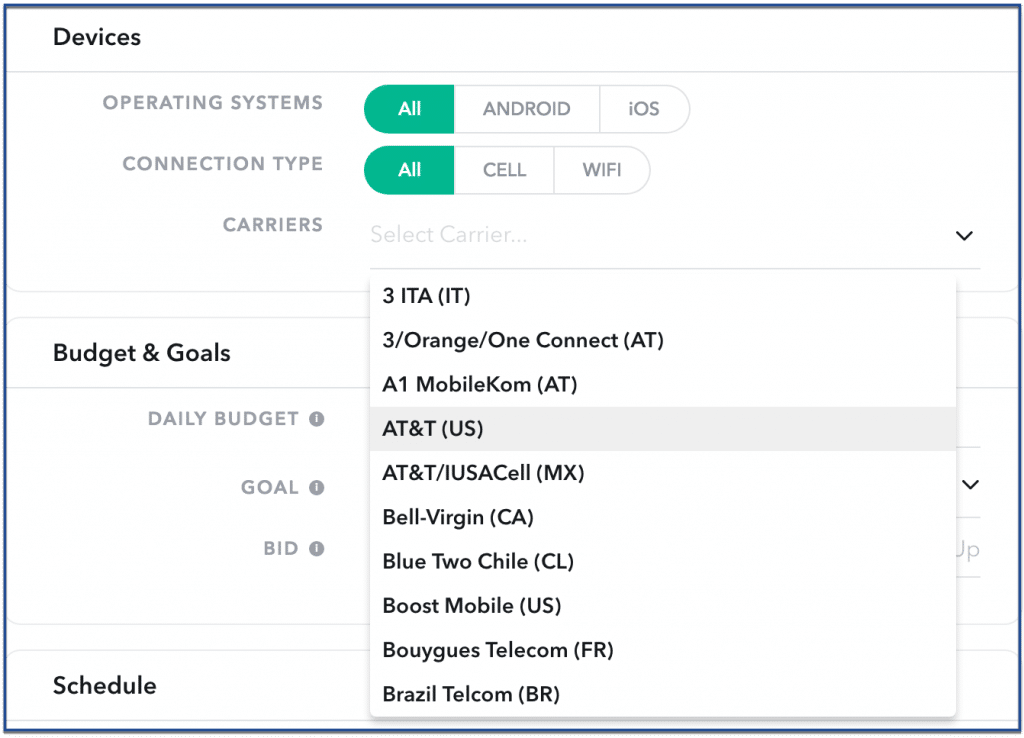
Step 4: Set your budget and goals
Much like Facebook, Snapchat bills you according to your daily budget, goal (or optimization), and bid. When you set your budget, you’re giving Snapchat the maximum amount you’re willing to spend each day for your ad set. When choosing your bid, you’re telling Snapchat the amount you’re willing to spend per goal. You have three goals to choose from: impressions, swipe ups, and installs.
In the example below, I set $100 as my daily budget, swipe ups as my goal, and $10 as my bid. In doing so, I will be charged $10 each time a user swipes up on my ad. My ad will stop running as soon as Snapchat has exhausted my daily budget.

Step 5: Upload your creative
To upload your creative, click “New Creative” on the upper right-hand corner of your screen.
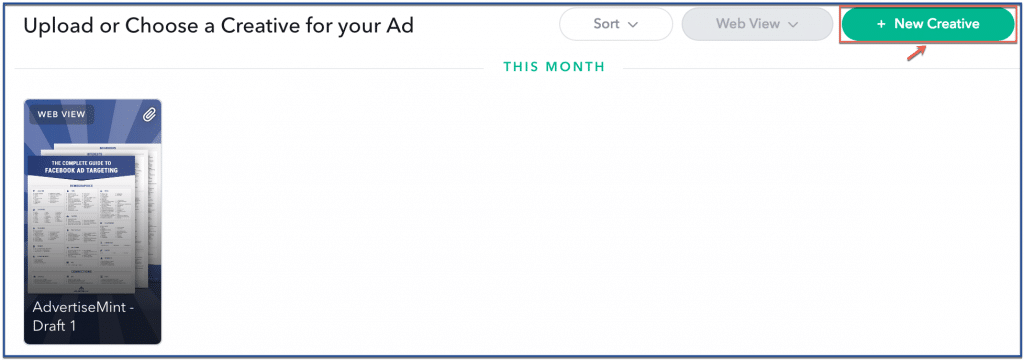
You’ll then be taken to a page where you can upload your 10-second video ad. If you want to successfully upload your creative to Snapchat, follow the ad specs below.
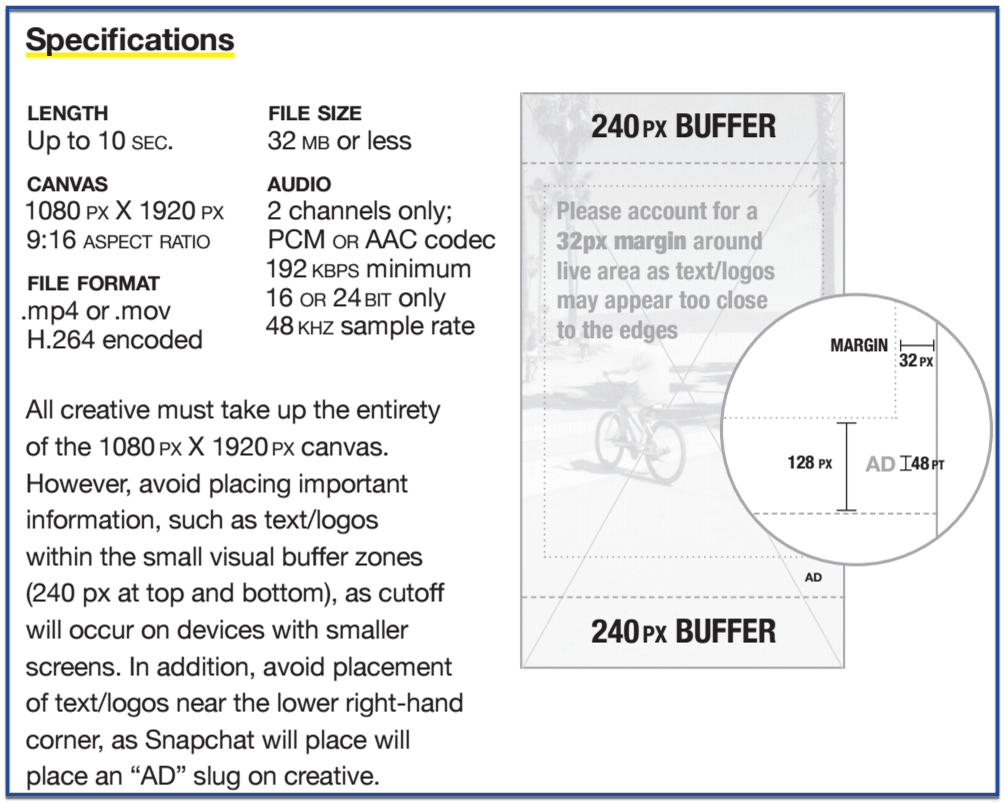
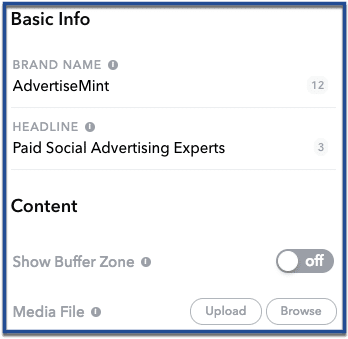
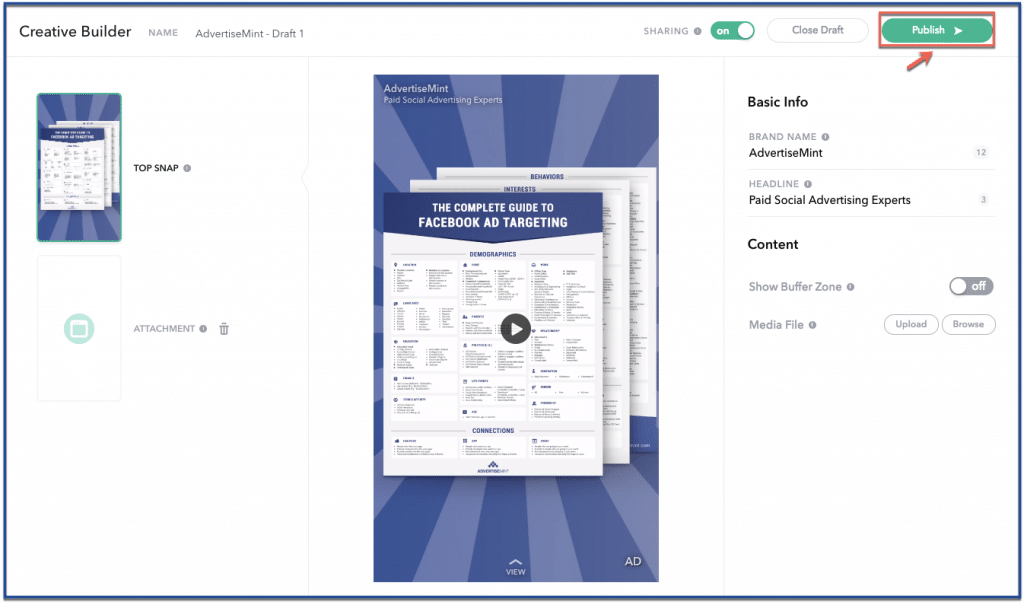
After you’ve uploaded your creative, give it a brand name and headline, both of which will appear on the ad once it goes live.
Step 6: Launch your campaign
To launch your campaign, click “Publish,” the button located on the top-right corner of the screen.
All of your campaigns should appear on this page. You can activate and deactivate campaigns at any time.
