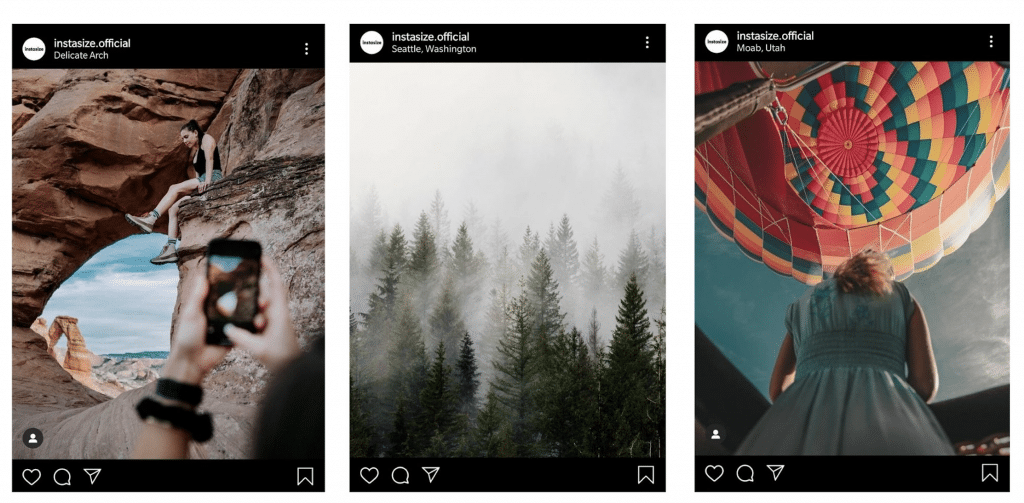
Photos and videos are posted on Instagram each day. You’ll need a beautiful feed and striking photos to stand out from everyone else.
Fortunately, you don’t need an expensive camera or a professional photo editor to capture great Instagram photos. You have what you need in the small yet powerful machine in your hands — your smartphone. Remember, an engaging Instagram post comprises a quality photo and smart editing.
Learn how to edit photos on Instagram with our easy-to-follow guide below, providing tips for both in app and third-party photo editor, Instasize.
Table of Contents
How to Edit Photos on Instagram?
Step 1: Start with a high-quality photo
A great Instagram post begins with a great shot. No amount of editing can save a badly taken photo. You don’t need a DSLR. Simply use the camera built into your smartphone.
Taking good photos requires the basic principles of composition and lighting. Here are three easy tips to take great photos on your phone:
- Avoid using flash and make use of natural light for brighter and richer photos.
- For scenic photographs, shoot at the right time of the day or during what photographers call the golden hour. This is the time shortly before sunrise or after sunset when there is warm natural light.
- Follow the rule of thirds for a well-balanced image. Divide your image into a three-by-three grid and align the subject in the photo with the grid lines to capture the eye of the audience.

You can add an automatic grid to your camera by turning on the Grid feature in your camera settings.

Step 2: Upload your photo to Instagram
Once you have a great photograph to work with, open your Instagram app and upload the photo.

Click on the plus sign on the bottom of your screen, and you will be redirected to the “All Photos” album of your camera roll. You can switch to your “Favorites” or other curated albums by clicking on the drop-down arrow at the top of the screen to easily locate photos.

Instagram automatically resizes your photo into a square. If you want to post the photo in its original width, click on the expand button on the bottom-left corner of the photo.
Step 3: Select a filter
Now, the editing begins! Filters are like condiments: They each have a unique flavor that adds something new to the dish. Take a methodical approach when selecting filters. Try out each and note which catches your eye and works best with your photo.
Do note that each filter has its own personality and changes the look and feel of your photograph. To give you a head start, check out the five most popular Instagram filters based on a global study of 40 million Instagram users.

Clarendon adds light to lighter areas and dark to dark areas. This makes the color in your photo stand out and pop off the screen. It’s an all-purpose filter that works on both selfies and landscape pictures.

Juno intensifies the red and yellow hues of your photo with a rich, deep tone. Use Juno to add contrast to city photographs.

Gingham sends your photos down a nostalgia trip. This filter washes out darker shots and adds more exposure to brighter shots for a vintage effect.

Lark increases exposure and warmth while desaturating the reds and purples of your photograph. The result is a brighter and cooler photograph that is easy on the eyes. Lark is a good option for outdoor and landscape photos.

Valencia brings out the intensity of even dull photography by adding warmth to the colors of your photo. It’s the ideal filter for nature shots.

Instead of scrolling through every filter available, reorder your Instagram filters by selecting the “Manage” options. Put your favorite filters on top.
Step 4: Adjust the Lux

What is Lux? If you’ve edited a photo on Instagram before, you’ve most likely played around with Lux. This feature tempers the contrast and exposure of your photos to make them vibrant and burst off the screen. Once you’ve added a filter, adjust the Lux setting by clicking the wand icon at the top of your screen.

Adjust intensity of the Lux from 0 to 100 by moving the scale from left to right. You can see the effect of Lux in the photo above.
Step 5: Use Instagram’s simple editing tools

Next, open Instagram’s editing tools by clicking the “edit” button on the lower right side of the screen. From here, you can modify settings including brightness, contrast, structure, warmth, saturation, highlights, shadow, and sharpness.

A comprehensive strategy is to go through each setting and adjust the photo to your liking. To adjust, simply slide the scale from left to right to increase the effect of each setting until it hits the sweet spot.
Step 6: Edit an album of photos

Instagram allows you to upload up to 10 photos in a single post. To do this, tap on the album icon when selecting the photos you want to edit to add more than one.

Then, tap on the Venn diagram icon in order to edit each photo individually. If you don’t, the edits you make on your first photo will be applied to the whole album
Step 7: Post to Instagram or save it for later

If your photo is good to go, write your caption, include hashtags, and tag relevant accounts. Click “share” on the upper right hand corner to send this to the feed of your Instagram followers.

You can also download the photo after editing by clicking the “download” button on the editing screen if you’re just looking to get a head start on your photos.
How to Edit Instagram Photos Using a Specialized Photo Editor?
Now that you know how to edit on the Instagram app, use a specialized photo editor, such as Instasize, to generate a picture-perfect post.
Instasize is a photo- and video-editing toolkit with an arsenal of features. Develop a signature look for your brand or create artwork for a follow-worthy Instagram. Find out how easy it is to use Instasize in the demo below.
Step 1: Choose a great photo

First things first, always start with a well-shot photo, using the tips mentioned at the beginning of the article. Upload your photo by tapping the plus sign button at the bottom of the screen.
Step 2: Crop your photo
Once your photo is uploaded to Instasize editor, you can crop it. Simply pinch the screen with your fingers to increase and decrease the size of the photo.

Instasize has automatic crop options for different social media sizes, which include Instagram Stories, Landscape, Portrait and even for Facebook and Twitter photos. This saves time and ensures your photo is the perfect size for each social media channel.
Step 3: Pick a filter
A great filter is critical to your photo’s success. Instasize has more than 130 premium filters to change the style and tone of your image. Based on your picture, Instasize even recommends which filters will work best.
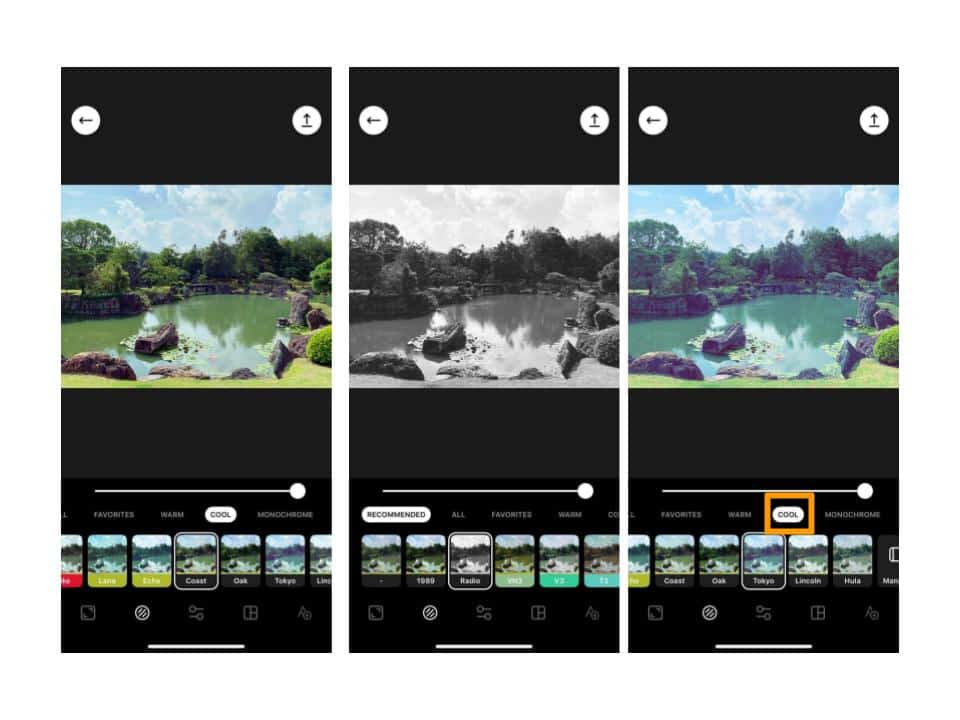
Instead of rifling through each and every filter, you can select whether you want your photos to be warm, cool, or black and white. Instasize has a plethora of options to choose from! To organize filters, click on the “manage” option to select your favorites.

Simply tick the “heart” button to select the filters you use most often and “hide” those you don’t plan to use. You can even reorder their position by dragging them to your preferred placement.
Step 4: Adjust photo settings

Similar to Instagram’s editor, you can play around with the photo’s brightness, contrast, saturation, and other settings.

Instasize takes editing to a whole new level, particularly for selfies and groufies, with its “retouch” feature, which can smooth skin and whiten teeth.
Step 5: Add texts and borders

To finish off your photo, add text by clicking the “A” button to communicate a message or place a title. You can customize text with more than 25 popular font options and play with the variety of colors.
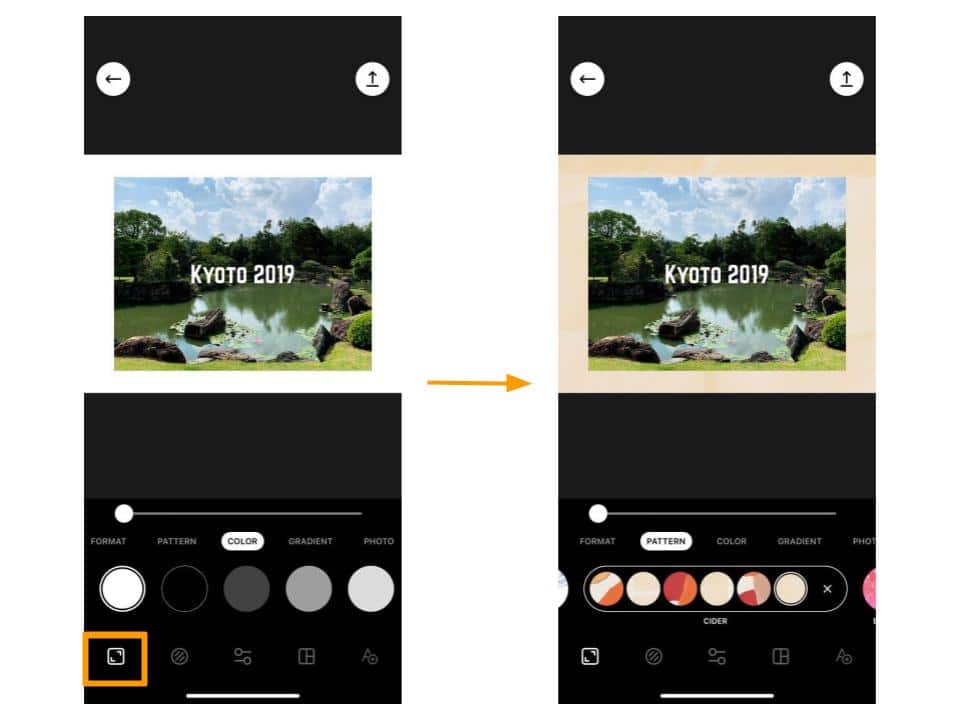
Let your photo pop off the screen by adding a border. Click on the square icon and open Instasize’s gallery of more than 80 borders. Select from ready-made patterns, bold colors, or even create your own design by uploading photos. We recommend selecting a pattern that contrasts with your photo to further highlight your image. You can select the collage option to post multiple pictures in one go.
Step 6: Post your photo to Instagram

Once you’ve created an Instagram-worthy photo, tap the “Instagram” button to post it directly on your feed. You can even share your artwork directly to Facebook or Twitter by clicking the “share” button. If you simply want to store the photo and post it at another time, click “save to camera roll.”
These are just the basics of what you can achieve with Instasize. You can download Instasize on the App Store or Google Play Store. The Standard version is free to use and the Premium version is $4.99/month.
Go Forth and Edit Your Photos
Instagram’s in-app editing tools and Instasize are just two of the many photo-editing apps you can use. The trick is to try out different tools online and experiment with settings and filters to discover your signature style. From there, build an eye-catching Instagram presence and grow your following.
