Facebook Live lets you broadcast in-the-moment videos from a mobile device or computer. Marketers (and this Facebook ad agency) love this feature for its simplicity: No editing is required, and the authenticity of the footage appeals to viewers. Authentic content reigns supreme (any Facebook advertising agency would tell you that), and Facebook Live lets you be real and unpolished. However, just because the content itself is candid doesn’t mean Facebook Live is a no-brainer. The more you understand the feature’s nuances, the more you’ll get out of it. Here’s what we here at Advertisemint think you need to know to make the most of Facebook Live:

Table of Contents
How to Use Facebook Live on Mobile
Here’s how to stream live on Facebook and get the most from your broadcast. Note that these screenshots are from an iPhone. If you’re using an Android, your phone may look a bit different.
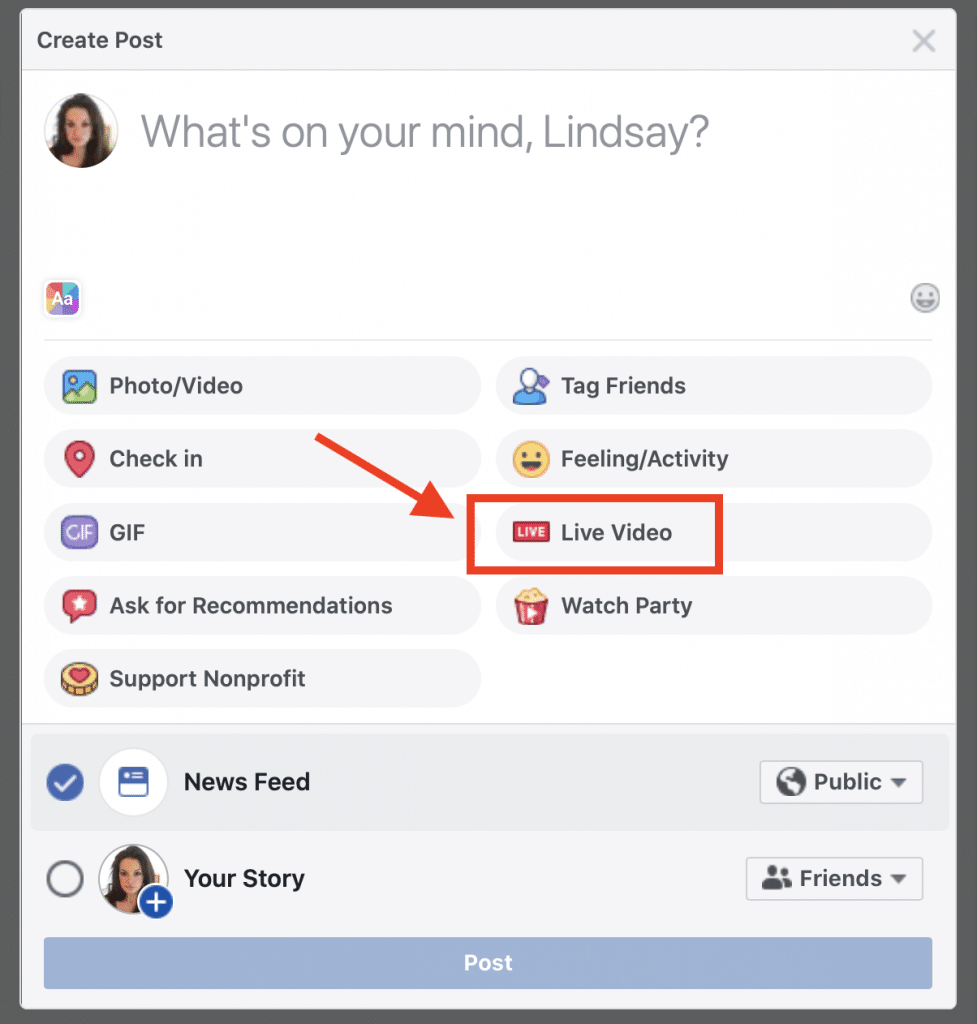
Step 1: Choose the “Live Video” option.
From the News Feed, tap the “Live” icon.
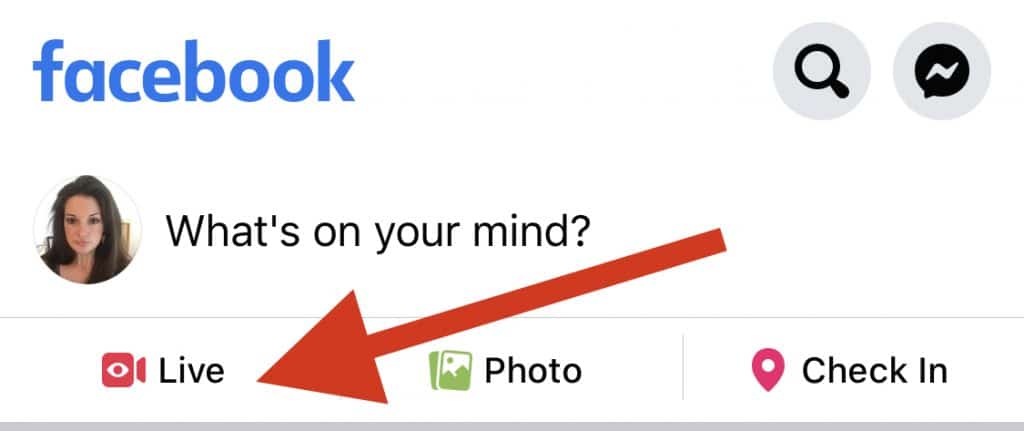
Alternatively, you can go to your profile, click on the “What’s on your mind?” field, then scroll down to choose “Live Video.”

If you’re prompted, allow Facebook to access your camera and microphone.
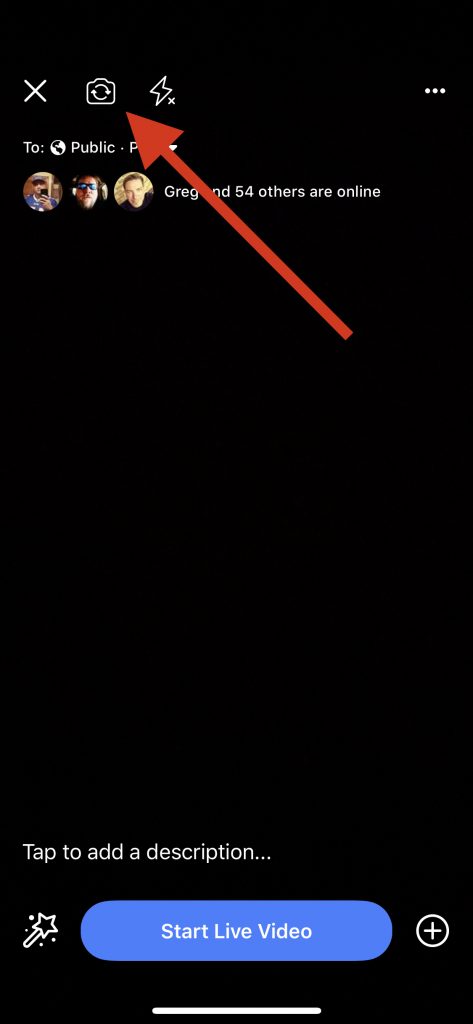
Step 2: Set the camera orientation.
Choose either the front- or rear-facing camera. All Facebook Live videos are in square format, so you don’t have to worry about switching between horizontal or vertical.
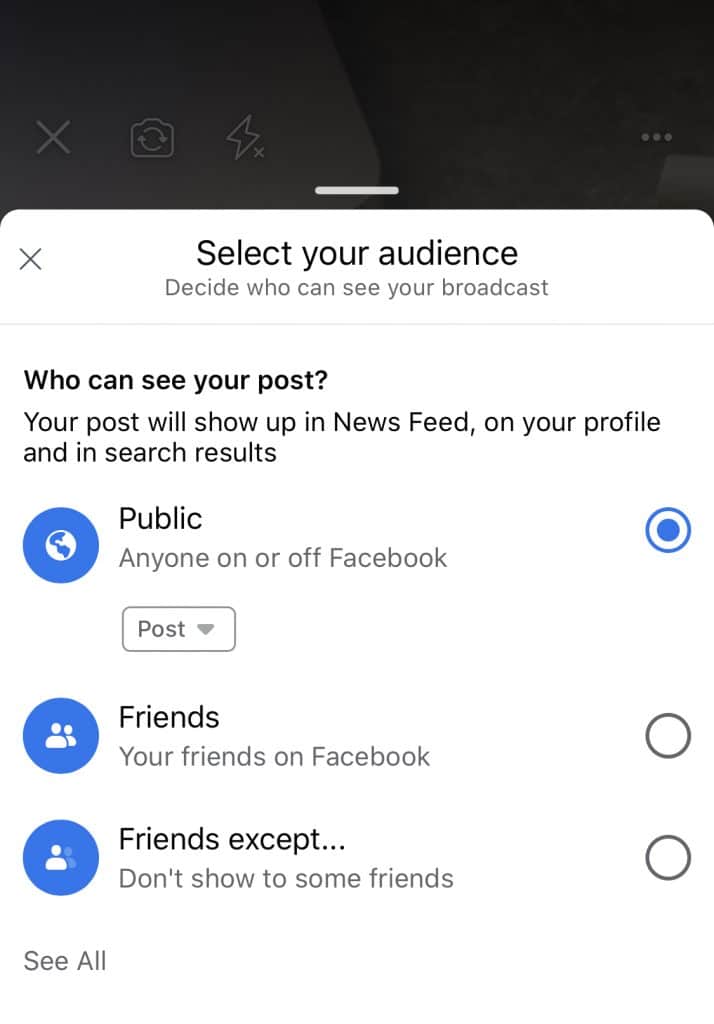
Step 3: Choose your privacy setting.
Choose who will be able to view your live stream. If you want to try out Facebook Live before you broadcast to an audience, choose the “Only me” privacy setting, which is nestled under “See All.”
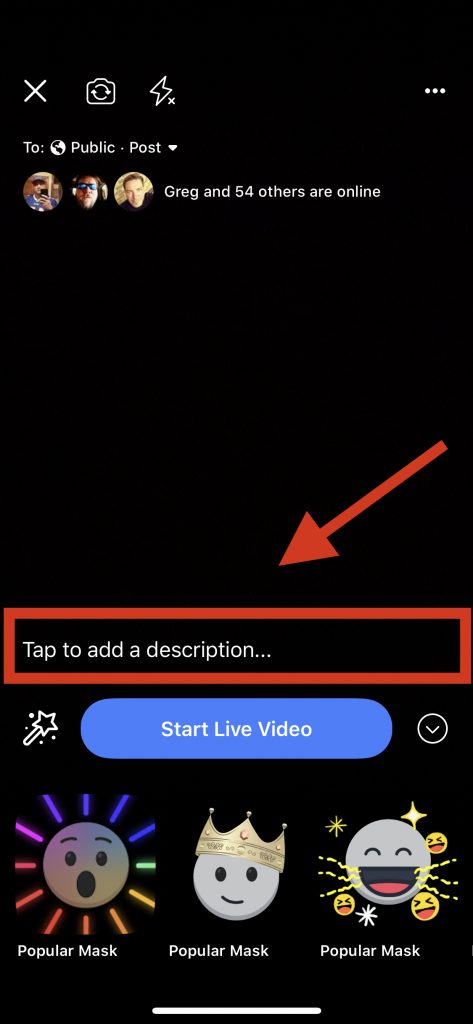
Step 4: Write a description.
The description will appear on News Feed, above the video. Since you want people to watch the live broadcast, your headline should be compelling and action-oriented.
Step 5: Add tags, feelings, or activities.
Tag people by using the @ symbol or clicking the tag icon. You can also tag a location and add a feeling or activity. By adding these details, you can improve your broadcast’s reach and engagement.

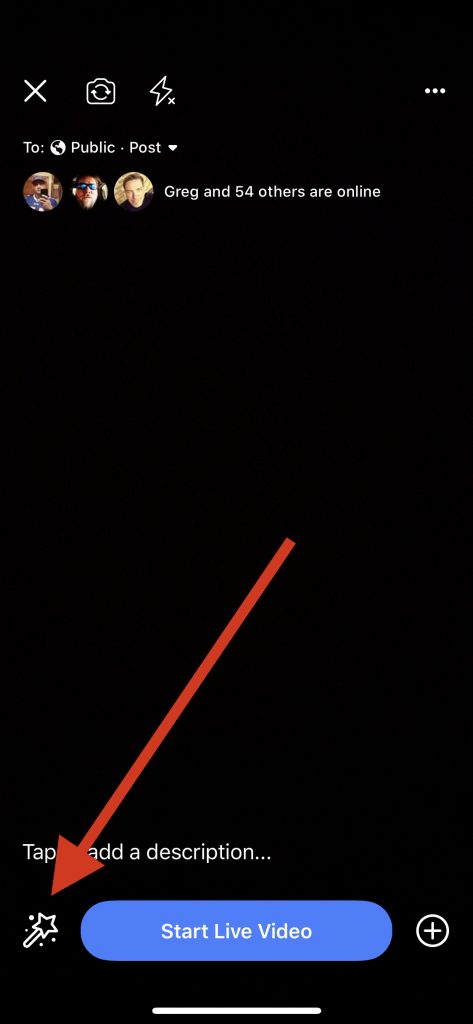
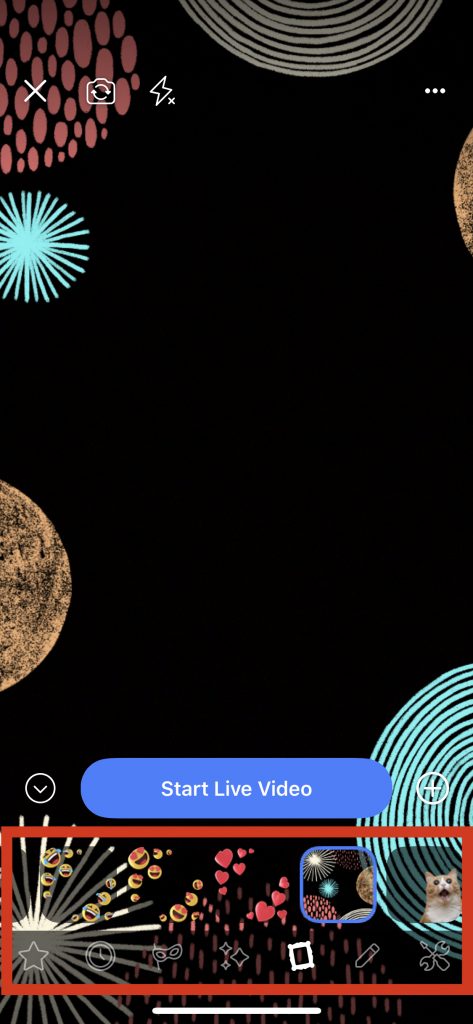
Step 6: Add fun additions to your video.
Tap the wand on the bottom left to access filters, lenses, and tools to draw or write on your video.
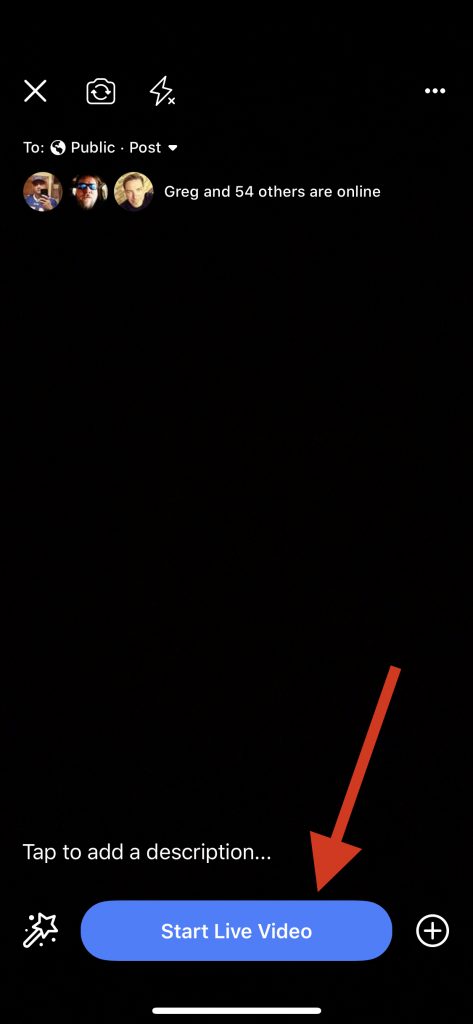
Step 7: Start broadcasting live.
Once you have everything set up, you can start your Facebook Live broadcast. Hit the “Start Live Video” button. You’ll see a countdown and then you’ll begin filming.
Step 8: Introduce yourself and the topic.
At the beginning of your broadcast, introduce yourself and give an overview of what you’re posting. Throughout the broadcast, briefly reintroduce yourself and the topic for new viewers who are just tuning in.
Step 9: Interact with your viewers.
As you broadcast, you can view the elapsed time on the top left of the screen, and you’ll also see how many people are viewing your broadcast. Comments will appear on the bottom of the feed in reverse chronological order. Greet your viewers by name and reply to their comments by speaking to them throughout the broadcast.
Step 10: End the broadcast.
Tell your viewers you’re signing off, thank them for watching, and leave them with a call to action. To end the broadcast, click “Finish.” You can then choose to post the video replay if you want. Like with other Facebook posts, you can return to edit the description or privacy settings, or you can delete it at some point.
How to Use Facebook Live on Desktop
There are times when it’ll be easier to broadcast from your computer than a mobile device. For example, for a roundtable discussion, a computer is more convenient. Many of the steps for using Facebook Live on your desktop are the same as with mobile, but you’ll start out a bit differently.
Note that when I used Safari on a Mac, I was prompted by Facebook to use Chrome instead; otherwise, I wouldn’t be able to stream from my laptop’s camera.
Step 1: Choose the Facebook Live option.
From your News Feed, click on the “What’s on your mind” window. Click the three-dot icon. This will open a menu, where you’ll find the “Live Video” option.
Step 2: Choose the device you’ll use for filming.
Choose between filming from your computer or connecting your computer to an external recording device.
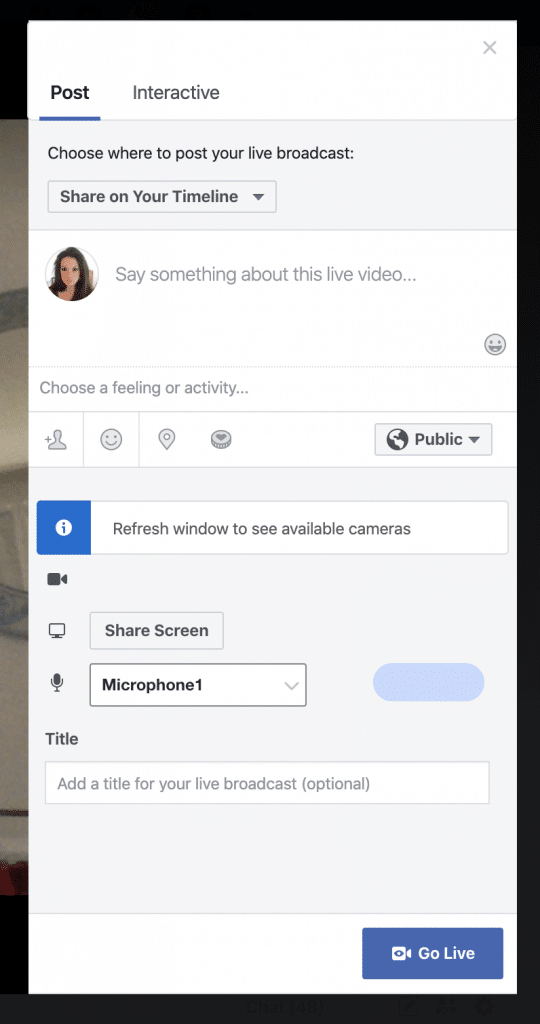
Step 3: Set up your broadcast.
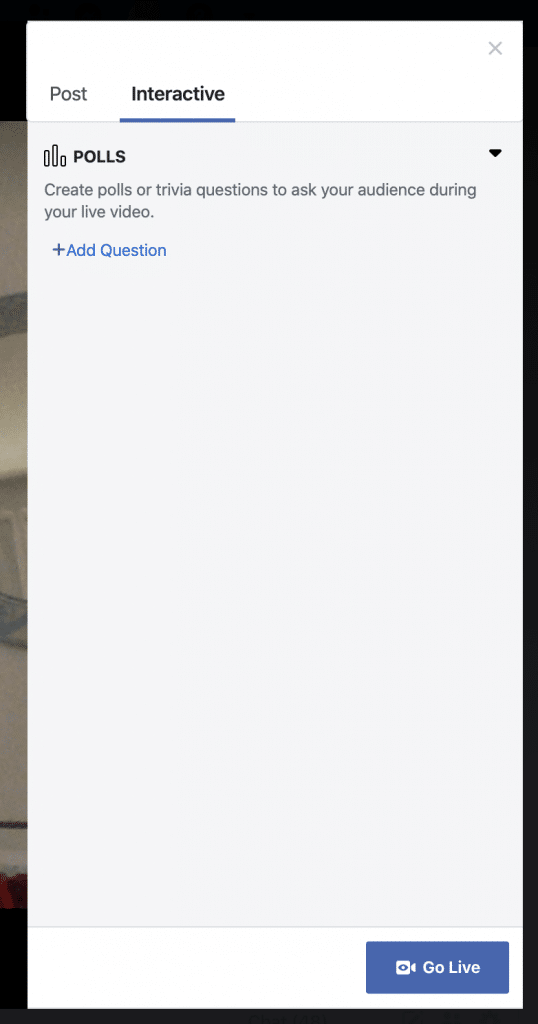
The Facebook Live options look a bit different on desktop than on mobile, and you don’t have as many options when it comes to tools like filters and masks. You can choose where to share your broadcast, such as on your timeline or in a group. You can write the description and tag people or locations, or add a feeling or activity. You can also opt to add a poll.
Step 4: Go live.
Click the “Go Live” button on the bottom right of the screen. The countdown will appear, then you’ll be live.
How Can I Get More Facebook Live Viewers?
Here are three quick tips to attract more viewers from a Facebook advertising agency:
- Your broadcast should be 10 minutes or more, and it can be as long as 90 minutes. The longer you broadcast, the more people will see it.
- Keep the camera moving so viewers don’t get bored.
- As people interact with your broadcast, it’ll rank higher in News Feed. Encourage interactions by asking questions or for feedback.
Don’t be discouraged if people don’t comment at first. When viewers are interested in a broadcast, they can be focused on watching, not acting. Get specific with your requests. For example, ask them to share your video with friends.
Wrapping Up
The point of Facebook Live is to be unfiltered, the opposite of scripted and edited. If your equipment goes haywire, you lose your train of thought, or have a sneezing attack, just roll with it. That’s exactly why people love to watch live streams.
