If you want to track which web pages your customers are visiting using the Facebook Pixel, look no further. The Facebook Pixel has been integral to the success of plenty of marketing tactics, ask any Fb advertising agency. Installing the Facebook Pixel to Shopify requires only three steps. Read below to learn how to install the Facebook Pixel to Shopify.
What is Meta Pixel?
The Facebook Pixel is a small piece of code that you put on your website. It helps you understand what people do on your site after they click on your Facebook ads.
This code tracks actions like purchases or sign-ups, and then sends that information back to Facebook. With the Facebook Pixel, you can see how effective your ads are, target specific groups of people, and make smarter decisions about your advertising strategy.
It’s like a digital tool that gives you insights into how your ads connect with your website visitors.
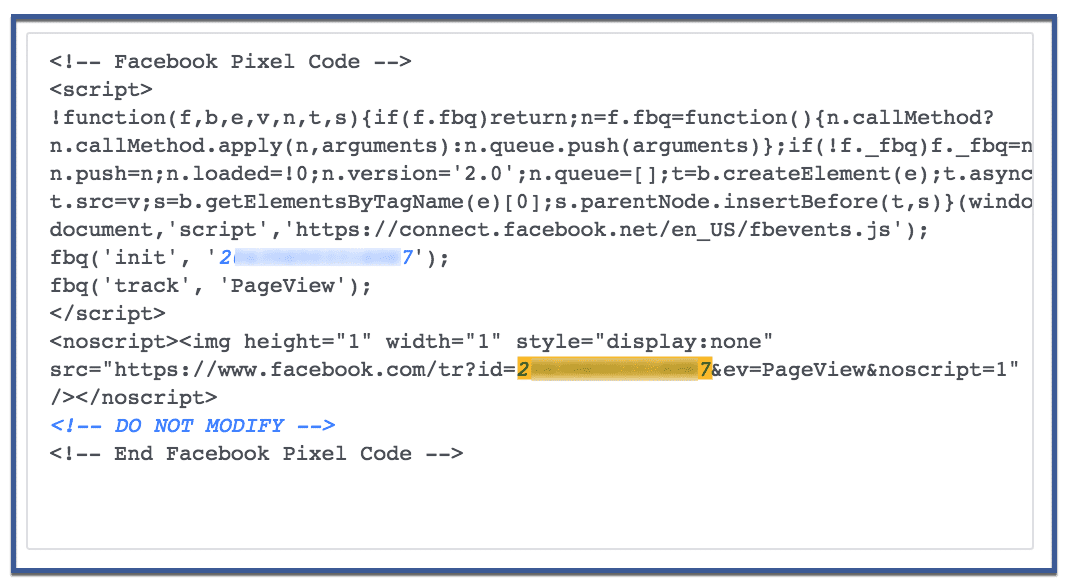
Step 1: Find Your Pixel ID
Your Pixel ID is the highlighted number indicated below. Copy only that number then paste it into the space shown in Step 2. If you don’t know how to find your pixel code or if you haven’t created one yet, read How To Create a Facebook Pixel.

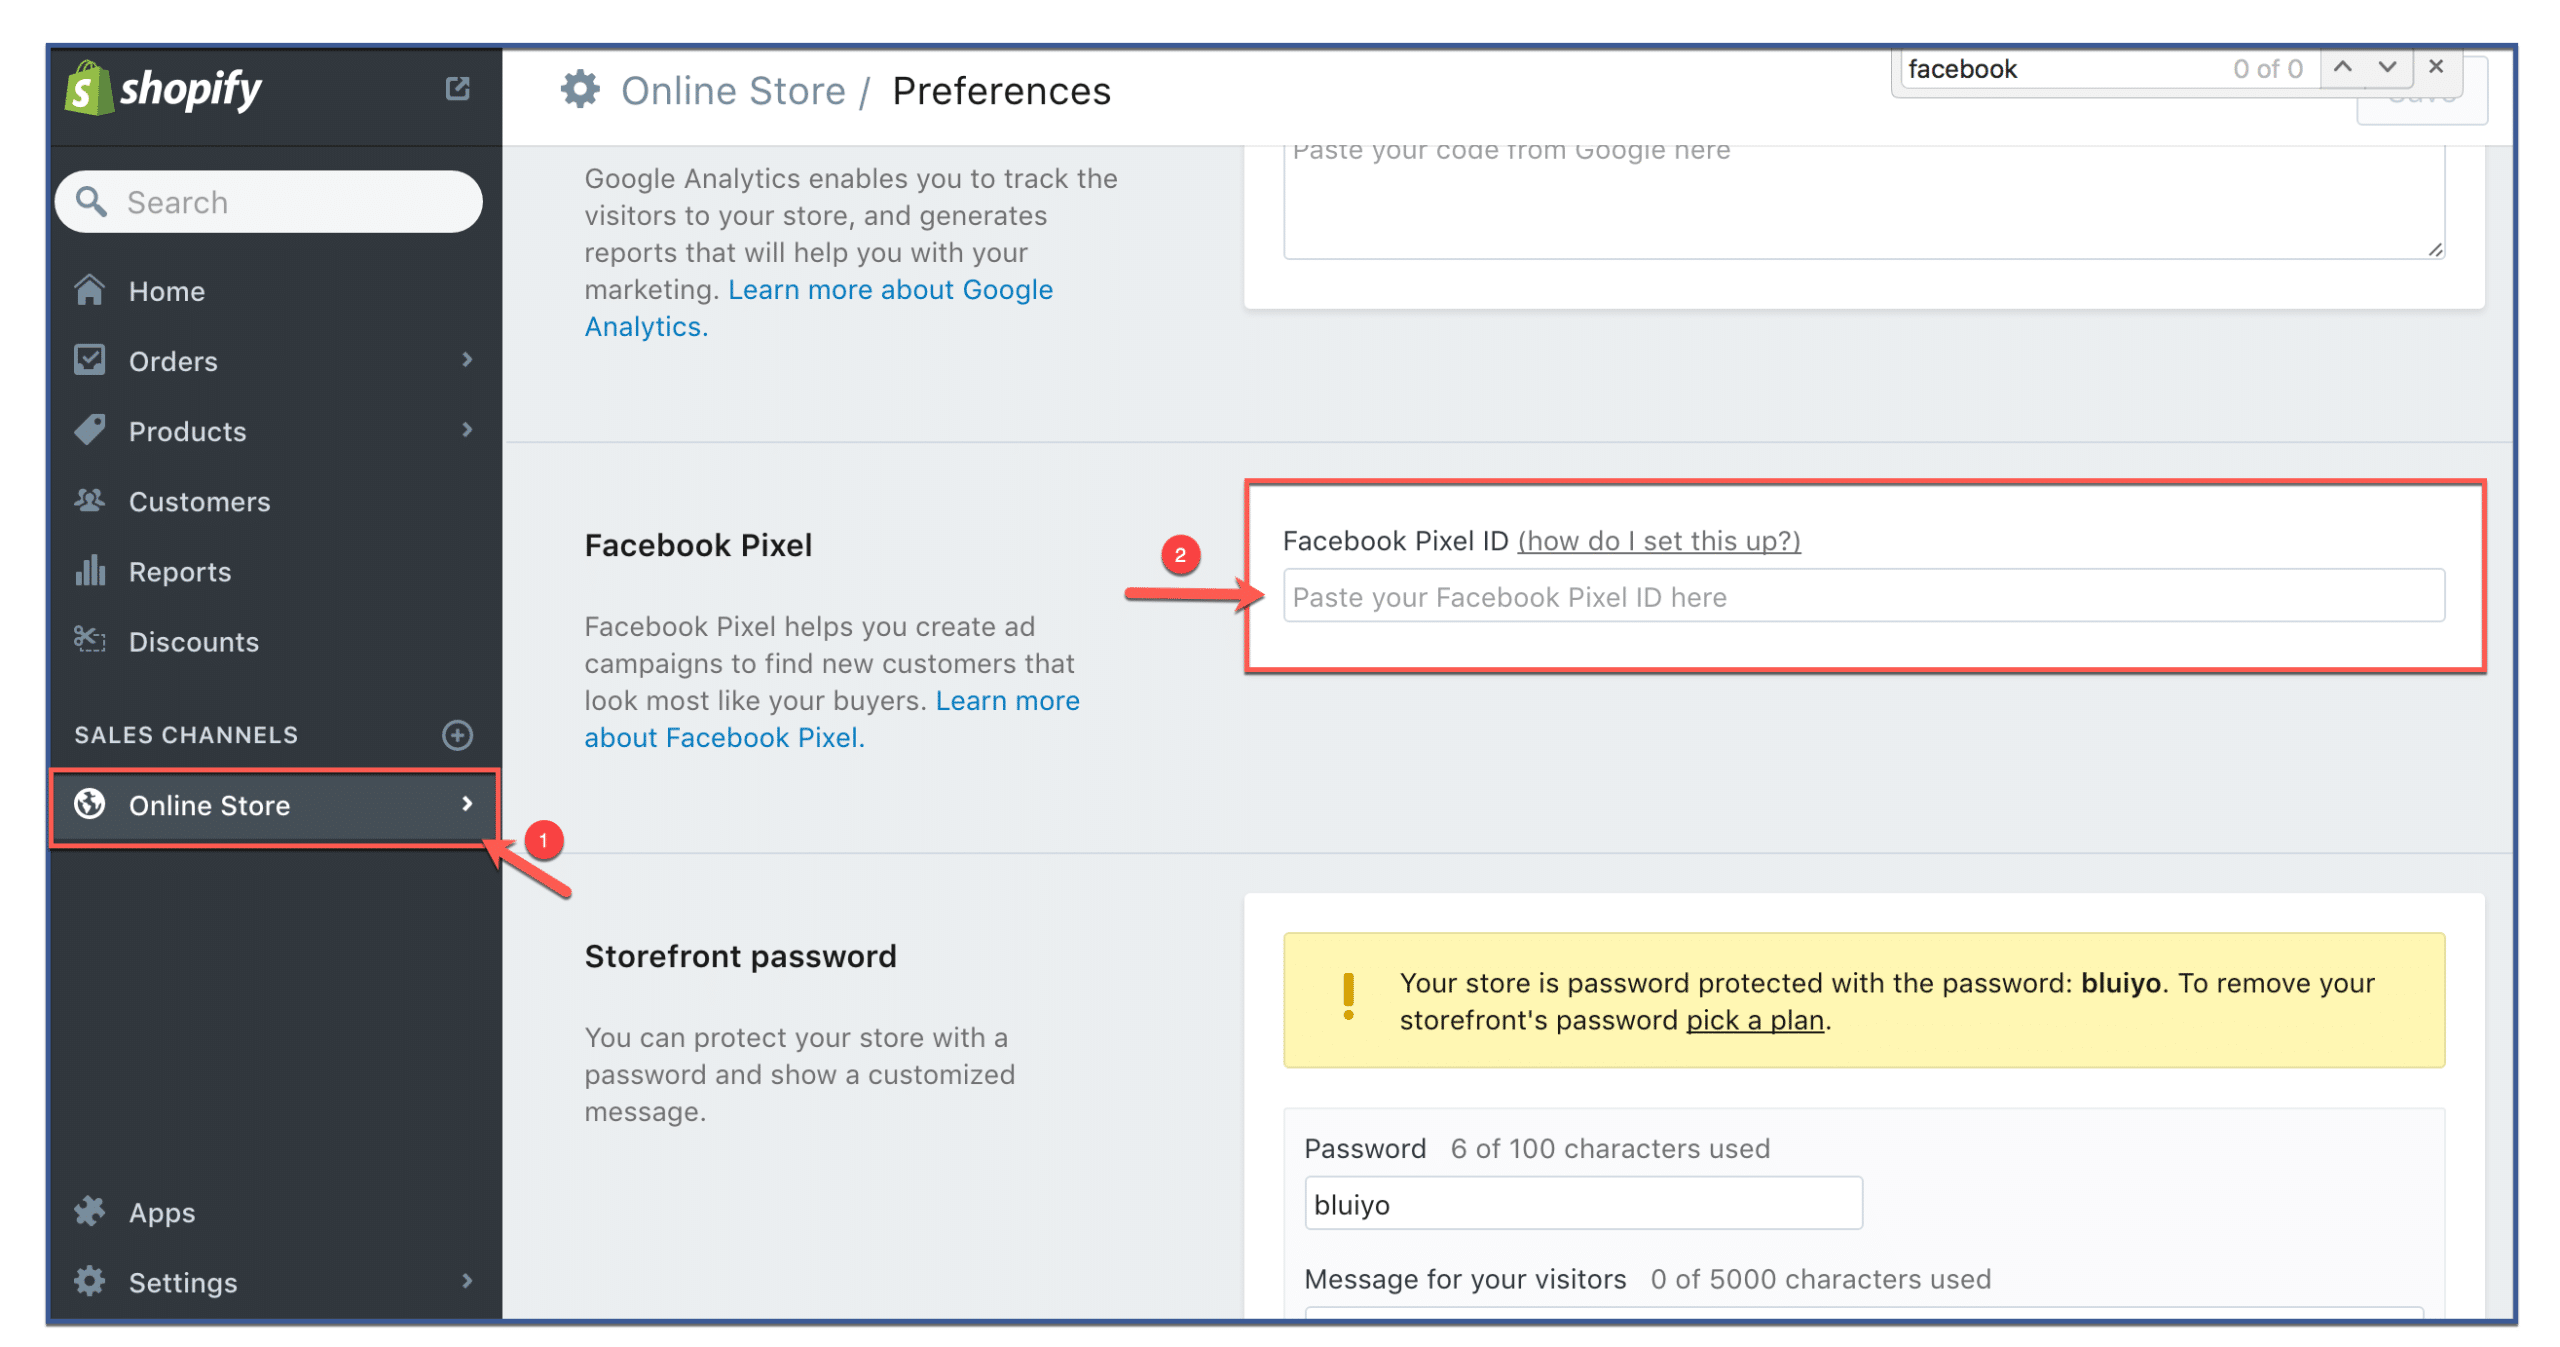
Step 2: Go to “Online Store”
Once logged in to Shopify, look to the left column. Under “Sales Channels,” click “Online Store.” Scroll down until you find “Facebook Pixel.” Paste your Facebook Pixel ID on the space indicated below.

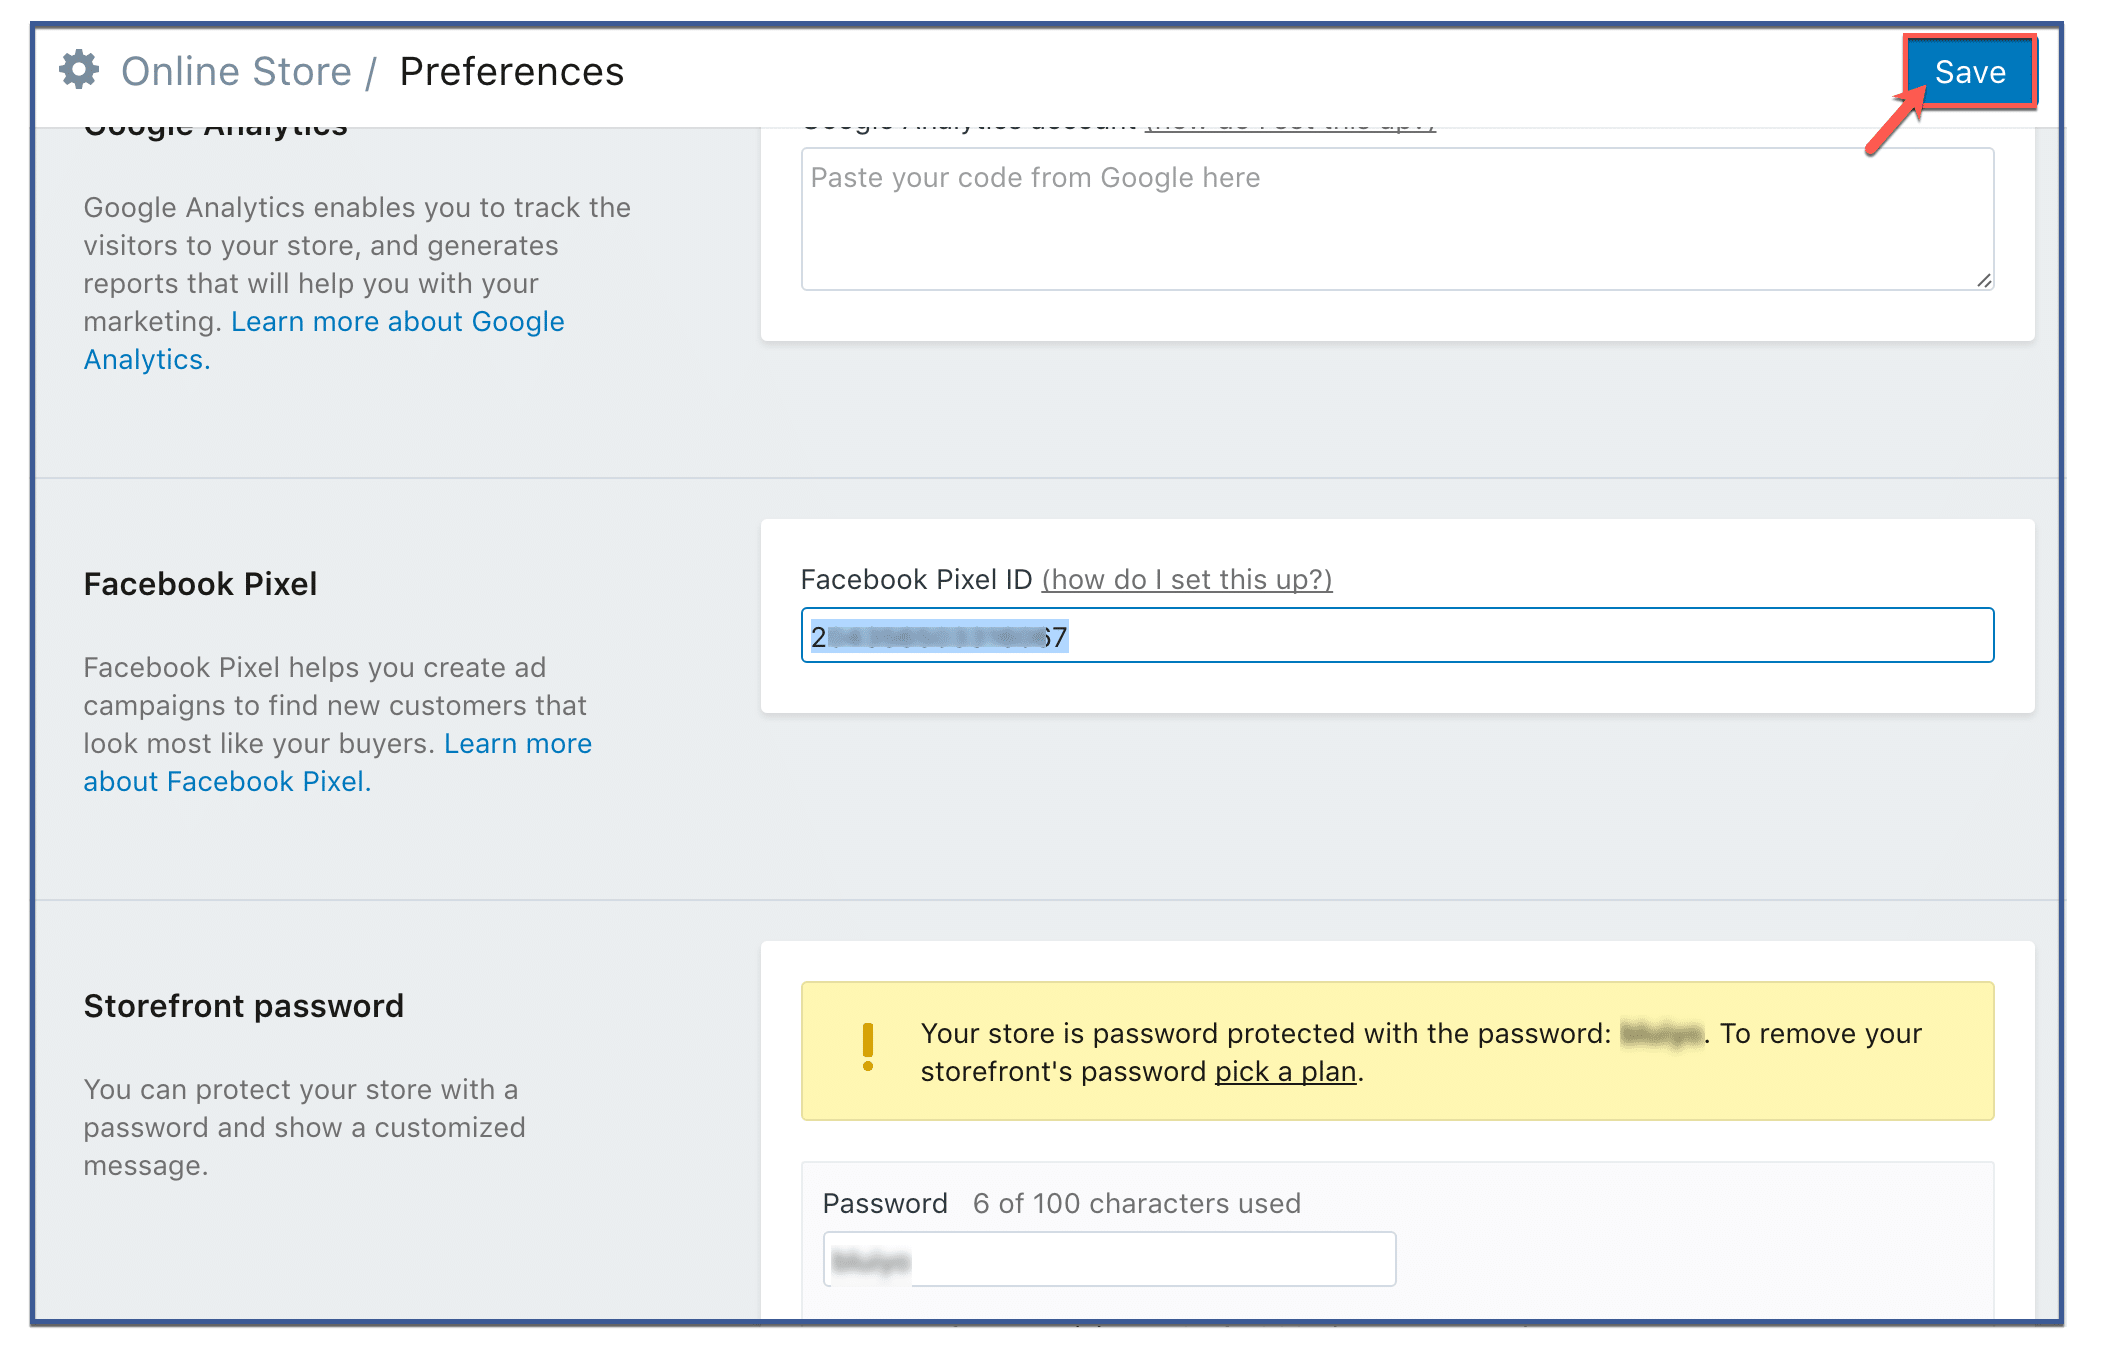
Step 3: You’re done!
To save your pixel, click “Save” located on the upper right corner of the screen.

Why Install the Meta Pixel to Shopify?
Installing the Meta Pixel on Shopify is a great way to track the performance of your Facebook ads and optimize your campaigns.
Enhanced Tracking and Insights
The Meta Pixel allows you to track user interactions on your Shopify store, providing invaluable insights into user behavior. It captures data on actions such as page views, purchases, and sign-ups.
Precise Targeting and Retargeting
By installing the Meta Pixel, you unlock the power of targeted advertising. You can create Custom Audiences based on specific actions users take on your website, like adding items to their cart or completing purchases.
This precision targeting enables you to retarget users who have shown interest in your products or services, increasing the likelihood of conversions and driving higher ROI for your ad campaigns.
Optimization of Ad Campaigns
The insights gathered through the Meta Pixel allow you to optimize your ad campaigns for better results. You can analyze which ads, products, or landing pages are resonating most with your audience, and adjust your strategies accordingly.
This data-driven approach helps you allocate your budget more effectively and maximize the impact of your advertising efforts.
Personalized Advertising
The Meta Pixel facilitates the creation of Dynamic Ads, which automatically showcase products or services that users have previously engaged with on your Shopify store.
This personalized approach enhances user experience and increases the chances of driving conversions.
Seamless E-Commerce Integration
Integrating the Meta Pixel with Shopify is a seamless process. This integration ensures that you can take full advantage of the Pixel’s capabilities without significant technical challenges.
It’s a plug-and-play solution that opens the doors to powerful data insights without disrupting your e-commerce operations.
Data-Driven Decision-Making
With the Meta Pixel in place, you’re equipped with data that informs your decision-making process.
You can identify trends, preferences, and areas for improvement, allowing you to improve your marketing strategies based on real user actions and behaviors.
Meta Pixel targeting options
Custom Audiences from Your Website
Custom Audiences allow you to create target groups based on user interactions with your website. Installing the Meta Pixel on your website lets you track visitors’ actions, such as page views, purchases, or sign-ups.
This data is then used to create Custom Audiences, allowing you to show ads to users who have already engaged with your site.
Custom Conversions
Custom Conversions enable you to track specific actions users take on your website, such as completing a purchase or signing up for a newsletter.
Unlike predefined Facebook pixel events, custom conversions let you define your own criteria for what constitutes a conversion. This flexibility is particularly useful when tracking unique actions that may not align with standard events.
Standard and Custom Events
Events are specific actions users take on your website, and they provide deeper insights into user behavior. Standard events, such as ‘Add to Cart’ or ‘Purchase,’ are predefined by Facebook and offer a consistent way to track common actions.
Custom events, on the other hand, allow you to define and track actions that are specific to your business goals.
Dynamic Ads
Dynamic ads are a powerful way to showcase personalized products or services to users interested in your offerings. By using data from the Meta Pixel, dynamic ads automatically display relevant products based on users’ browsing behavior.
Conclusion
Installing the Facebook Pixel on your Shopify store is a great way to track the performance of your Facebook ads and optimize your campaigns.
By following the steps in this outline, you can easily install the Facebook Pixel on your Shopify store and optimize your ad campaigns to maximize the return.
FAQs
What is the Meta Pixel?
A Meta Pixel, also known as a Facebook Pixel, is a small snippet of code provided by Facebook that you integrate into your website, such as a Shopify store. It enables you to track user interactions and actions on your site, allowing you to gather valuable data for targeted advertising, audience segmentation, and campaign optimization.
How Can Installing the Meta Pixel Benefit My Shopify Store?
Installing the Meta Pixel offers several benefits. It helps you understand your audience’s behavior, allowing you to create more effective ads. It enables retargeting, meaning you can show ads to audiences who have previously engaged with your store, increasing the likelihood of conversions. Additionally, the Meta Pixel supports the creation of lookalike audiences, expanding your reach to users similar to your existing customers.
Is Installing the Meta Pixel Complicated?
Installing the Meta Pixel on Shopify is relatively straightforward and doesn’t require extensive coding skills. Facebook provides step-by-step instructions, and Shopify also offers user-friendly integration options. You’ll need to copy and paste the pixel code into your store’s theme, which can be done even without advanced technical knowledge.
Can the Meta Pixel Help Improve My Ad Campaigns?
Absolutely. The Meta Pixel’s data-driven insights can significantly enhance your ad campaigns. By understanding how the audience interacts with your site, you can refine your targeting, create more compelling ads, and allocate your budget more effectively. The ability to track conversions and specific actions also enables you to measure your campaigns’ success accurately.
Does Installing the Meta Pixel Have Any Privacy Implications?
The Meta Pixel tracks user actions on your website, providing insights to improve your marketing efforts. It’s important to ensure compliance with relevant privacy policies and inform users about the data collection through your website’s privacy policy.
