If you’ve been an avid Facebook junkie for years, breaking into the topsy-turvy Snapchat network can be intimidating. What’s a Story? Why do your Snaps disappear? What in the world is an AR lens?
The best way to really learn all the features is to dive right in and play around with the app yourself. But here are some pointers and terminology you should know as a new Snapchatter.
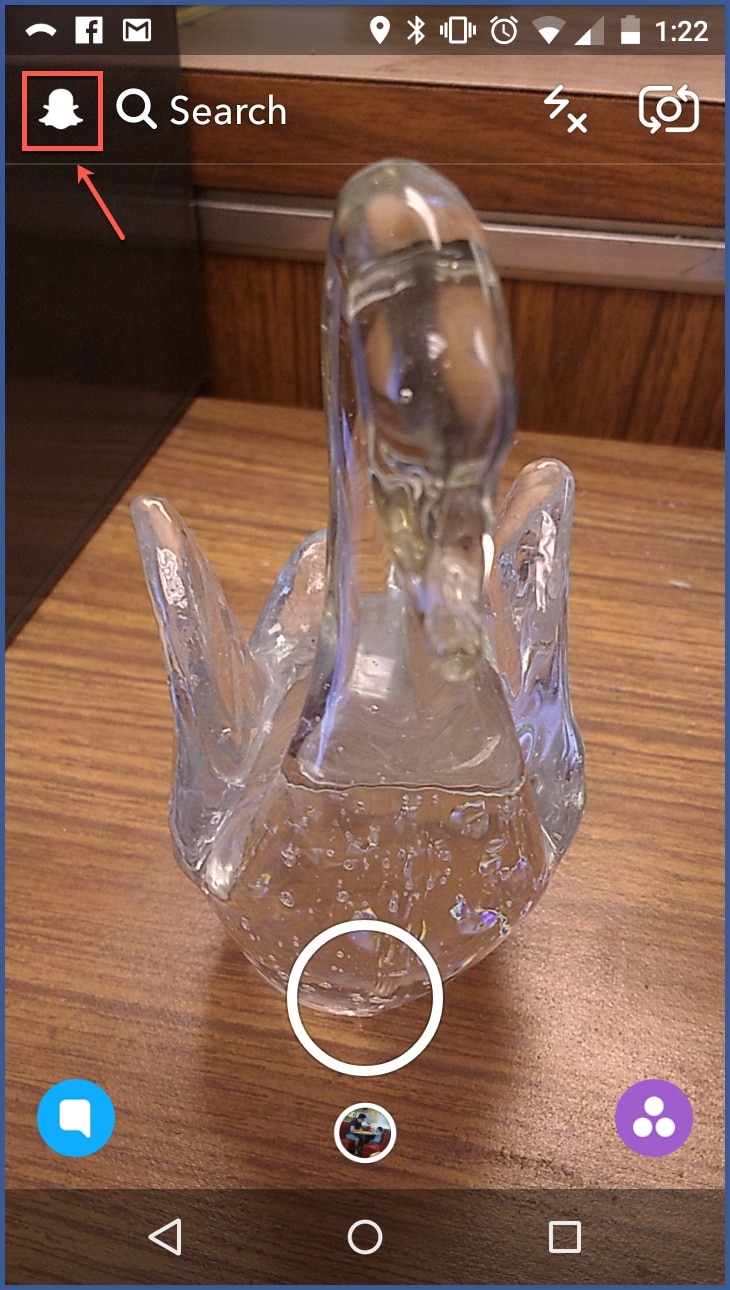
1. The Ghost in the Top Left
After you’ve opened the Snapchat app, you’ll notice a small, white ghost located at the top of the screen. If you tap that ghost icon, you will see where you can add friends, view existing friends, adjust settings, and edit your Snapcode.
2. Create a Snapcode
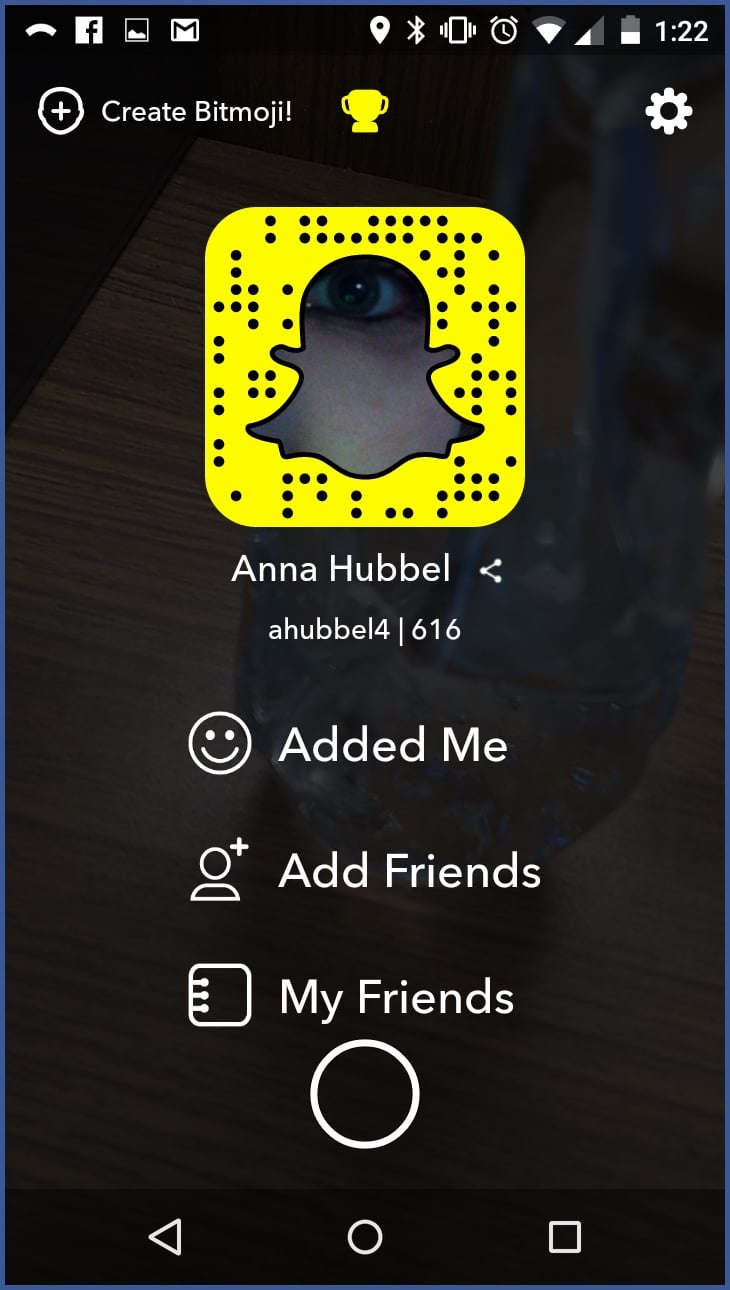
Just like you create a profile pic for Facebook, you create a Snapcode for Snapchat. You take a Snap of yourself to fill up the ghost-shaped space of your Snapcode, which is located within a yellow Snapchat box. You’ll notice black dots are also located within the yellow box. Those dots coordinate to create a QR code that allows other Snapchatters to “add” you as a friend.
3. The Large Circle vs. the Small One
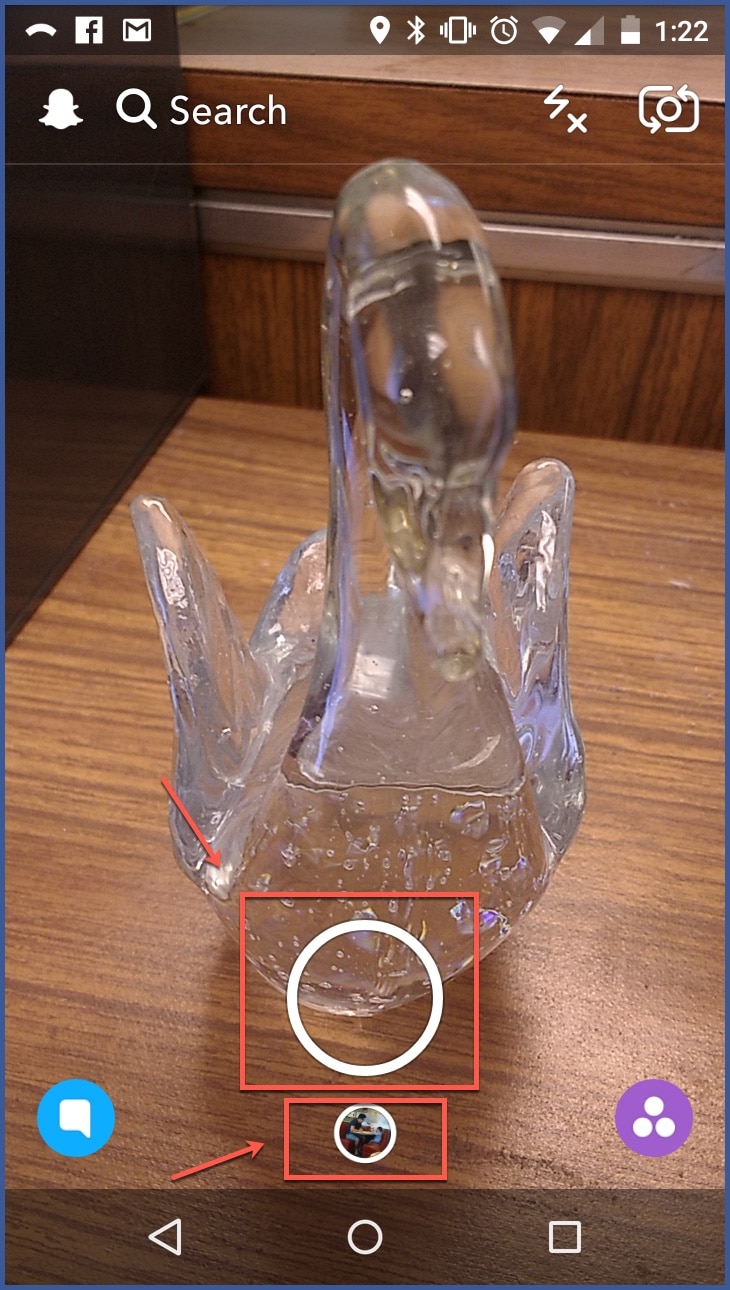
With the Snapchat app open, you’ll notice two circles located at the bottom center of the camera view. The large one is what you either tap to take a Snap or hold to take a video. Note that a red ring starts to encircle the button as you hold it while you are taking a video. Although you can let go of the button anytime before the circle turns entirely red, the video automatically stops recording once the ring is fully red.
After you’ve taken a Snap or a video, you can preview and edit it with the tools located along the right side of the screen. Tools include text, a magic eraser, stickers, scissors, and a timer.
The small circle—located below the larger one—is where your Snap Memories are located. This is where you store those Snaps you aren’t as willing to let disappear (as Snaps are prone to do). To save a Snap in your Memories, after you’ve taken your pic or video, you’ll see two icons at the bottom left of the preview. The one with the arrow allows you to save your Snap to Memories. Simply tap it and wait for a checkmark to replace the arrow to confirm that it was saved. Then you can view that Snap in your Memories whenever you like.
4. Conversations
After you’ve taken a Snap, you can send it to a friend or multiple friends. Simply press the blue circle that appears on the bottom right of the screen when previewing your Snap. You will then be directed to a list of friends you can send your Snap to.
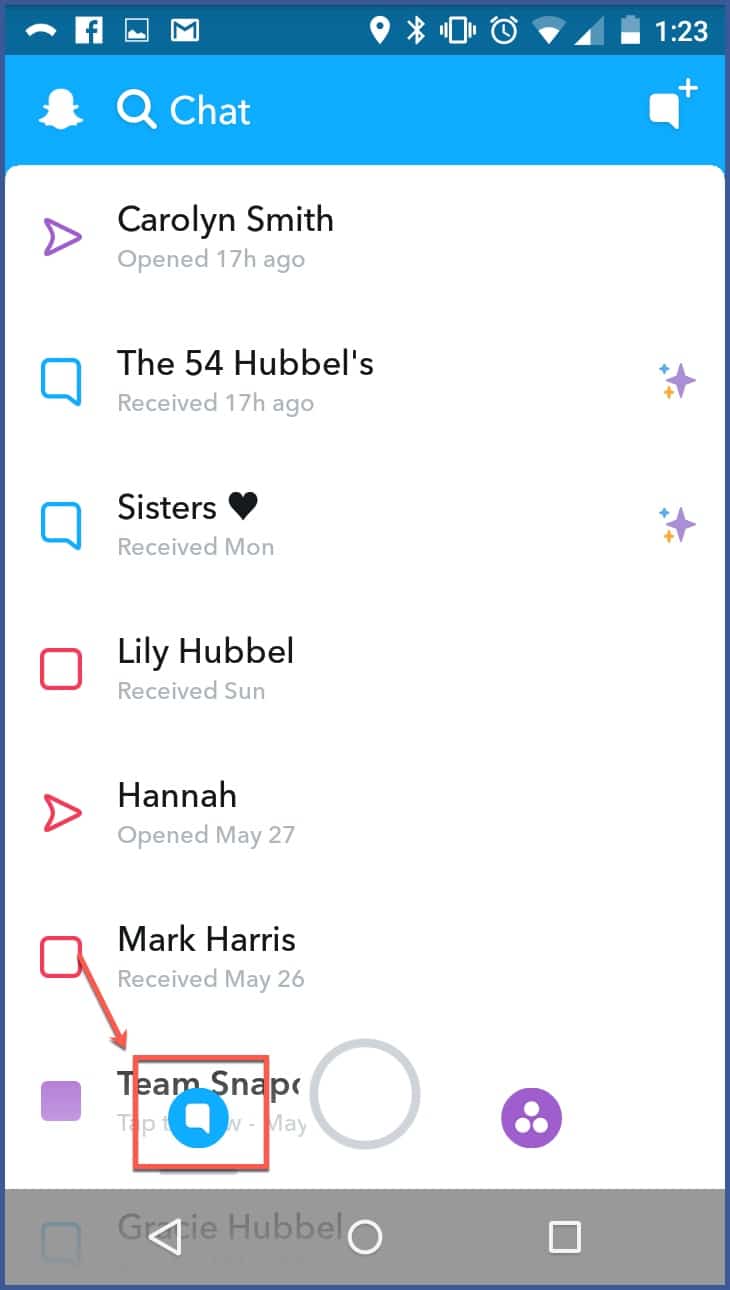
If you want to view a Snap that someone has sent you, select the blue circle with the white conversation bubble located at the bottom left of your screen while in camera mode. This will direct you to your Snapchat conversation inbox.
When someone has sent you a video Snap, the square located next to that person’s name will be purple. When they’ve sent you a pic, the square will be red. If they sent you a text message, the square will be blue.
But remember that the Snaps you receive often disappear after you’ve viewed them. And there’s no getting them back! Sometimes, however, you are able to replay a Snap.
You can also see whether someone has viewed or replayed your Snap.
5. Your Story
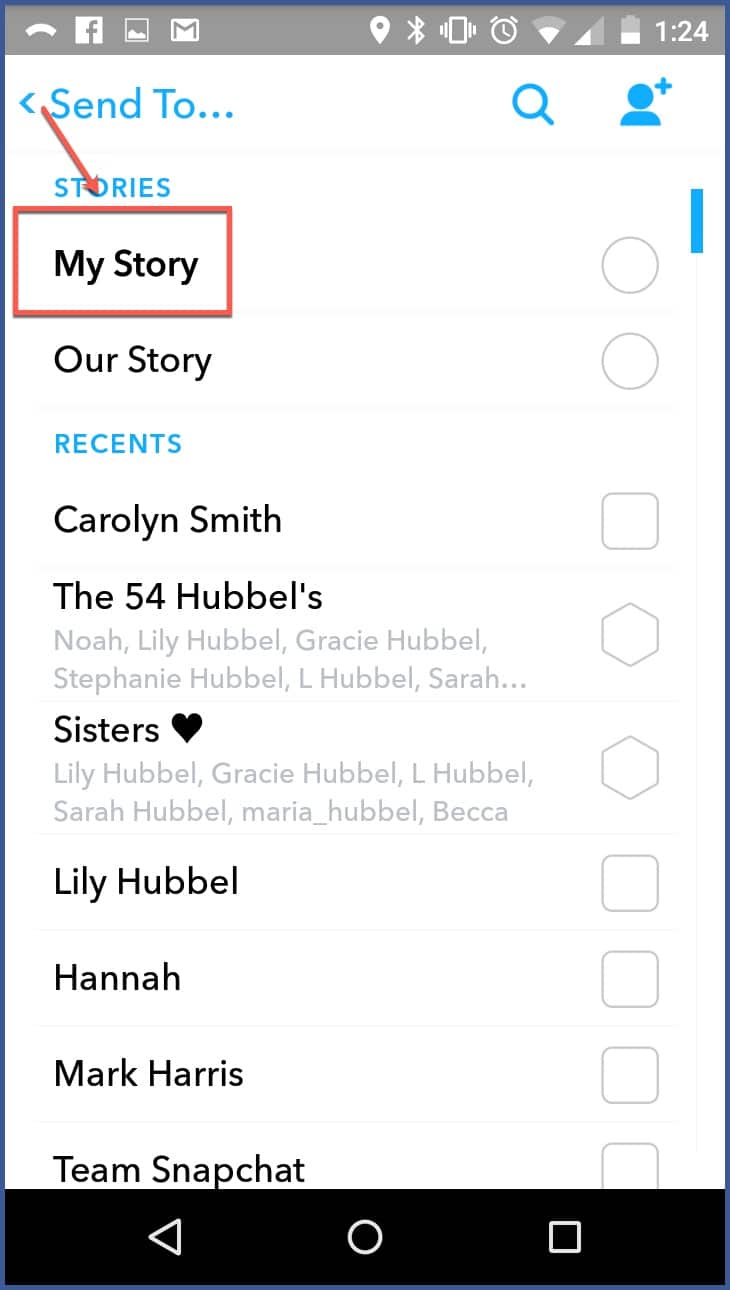
You also have the option to post a Snap as your Story. It’s very similar to posting a Facebook status. Everyone you are friends with can see it. To do so, simply select the same send button you use to send a Snap to friends, only select “My Story” instead.
6. Discover
In camera view, you’ll notice a purple circle with three white circles located to the right of the camera button. Select this to view your friends’ Stories, view featured news stories, or browse Discover. Discover is similar to a magazine stand; you can browse various gossip and news covers as well as keep up with the latest brands and trends.

7. Filters and Lenses
Last but not least, liven up your Snaps with various filters and AR Lenses. To access filters, simply swipe to the left in your preview. You’ll have choices of basic filters (e.g., lighter colors, time, weather, speed up, slow down, etc.) as well as special filters (e.g., if you’re near a Dunkin’ Donuts, you may have access to their “Freeze, Drink, Repeat” filter).
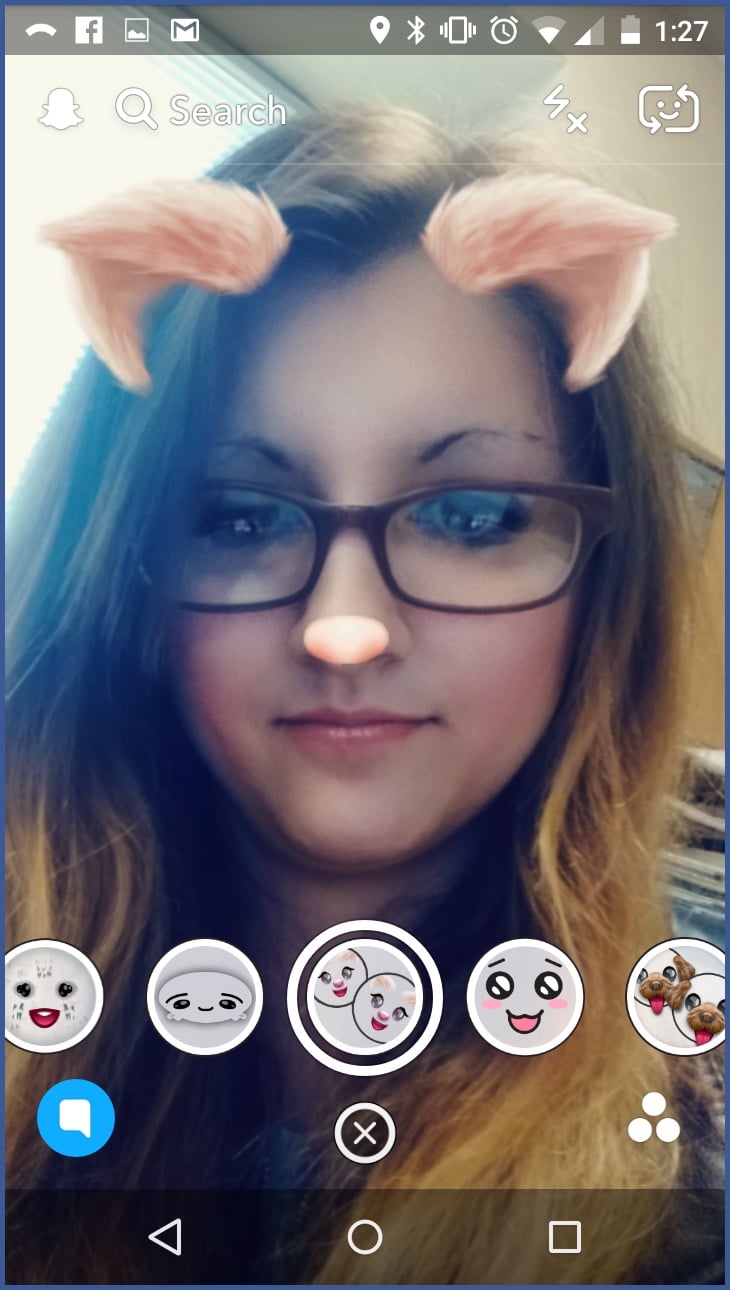
To access AR Lenses, before taking your Snap, center your face in the screen and press your finger to the center of the screen. The camera will recognize the shape of your face and you’ll see a library of lenses appear across the bottom of your screen. Play around with these to change your face shape, add effects, and even change your voice (for video Snaps).
