
Use Facebook’s extensive user base of over two billion potential customers to build a list of subscribers for your email marketing list. You can do this by adding a MailChimp sign-up form to your Facebook page. It’s quick to integrate and an even quicker way to build up potential leads that this FB ad agency loves.
Here’s How It Works
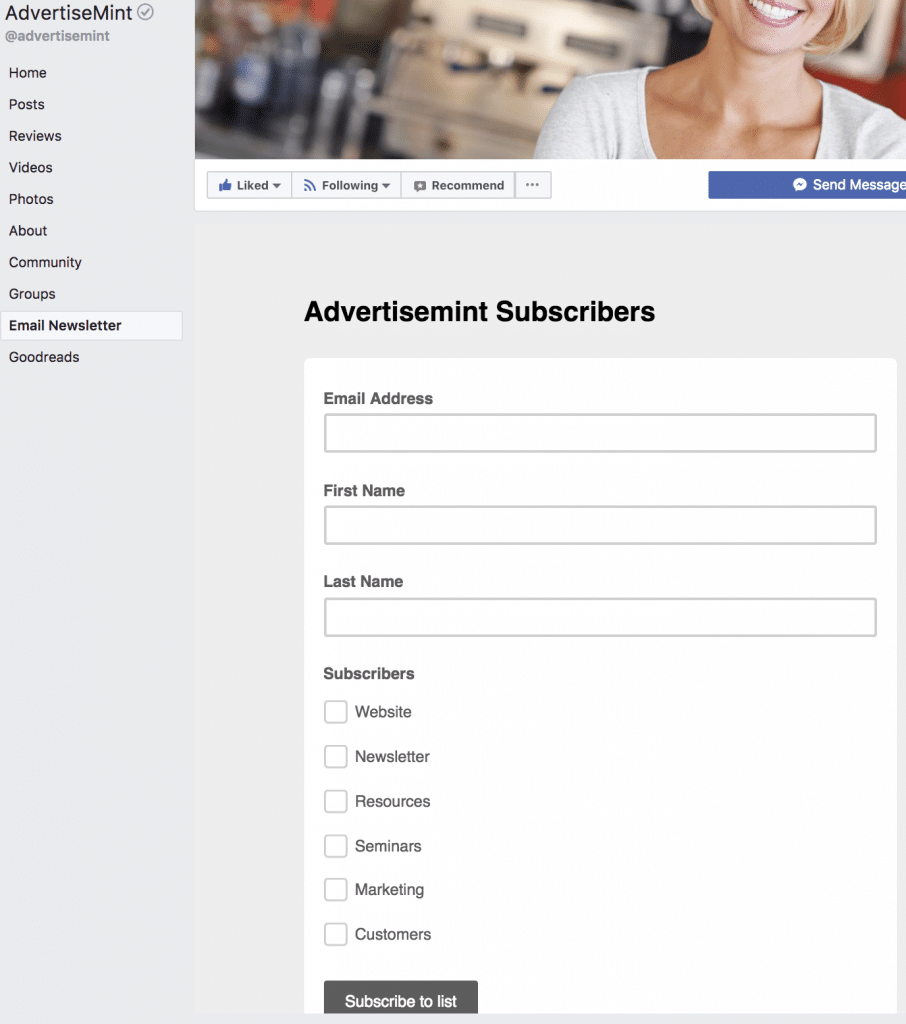
When users fill out the sign-up form through your Facebook page, their information will be added to your MailChimp subscribers list. After you set up the form, users can select the Email Newsletter tab from the left column of your page to fill it out.
The admin of your Facebook page is the only one who can add the sign-up form. You must first integrate Facebook with your MailChimp account to add a form. Also note that sign-up forms are only visible on the desktop version of Facebook, not mobile. This means that if the bulk of your Facebook traffic is over mobile, consider opting for another sign-up form.
How to Add a MailChimp Sign-Up Form?
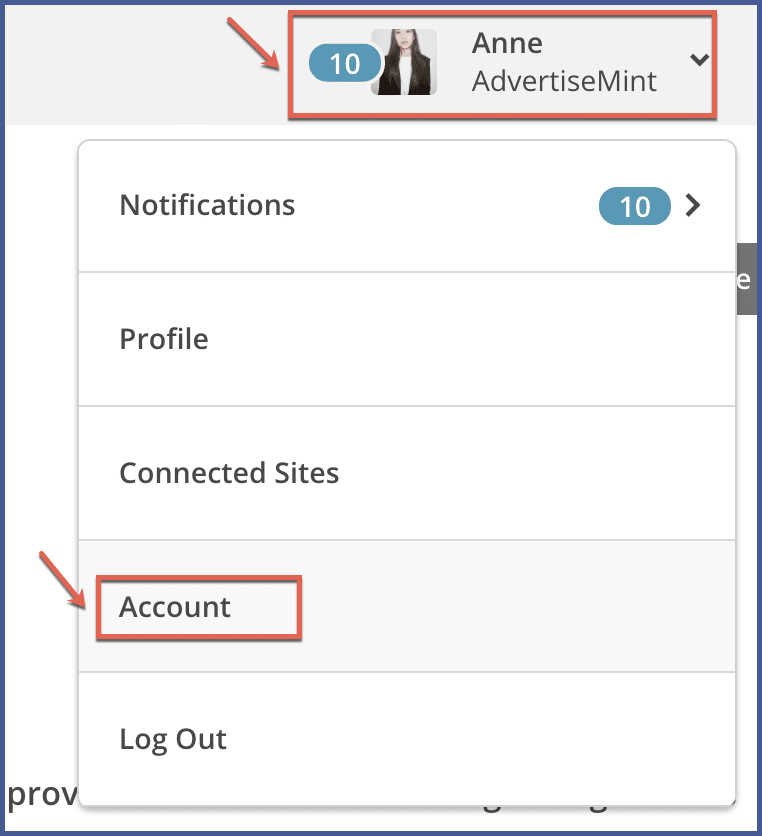
Step 1: First you’re going to want to integrate your MailChimp with your Facebook. You do this by logging in to your MailChimp account, selecting your profile name, and then selecting “Account” from the dropdown menu.
Step 2: Select “Integrations.”

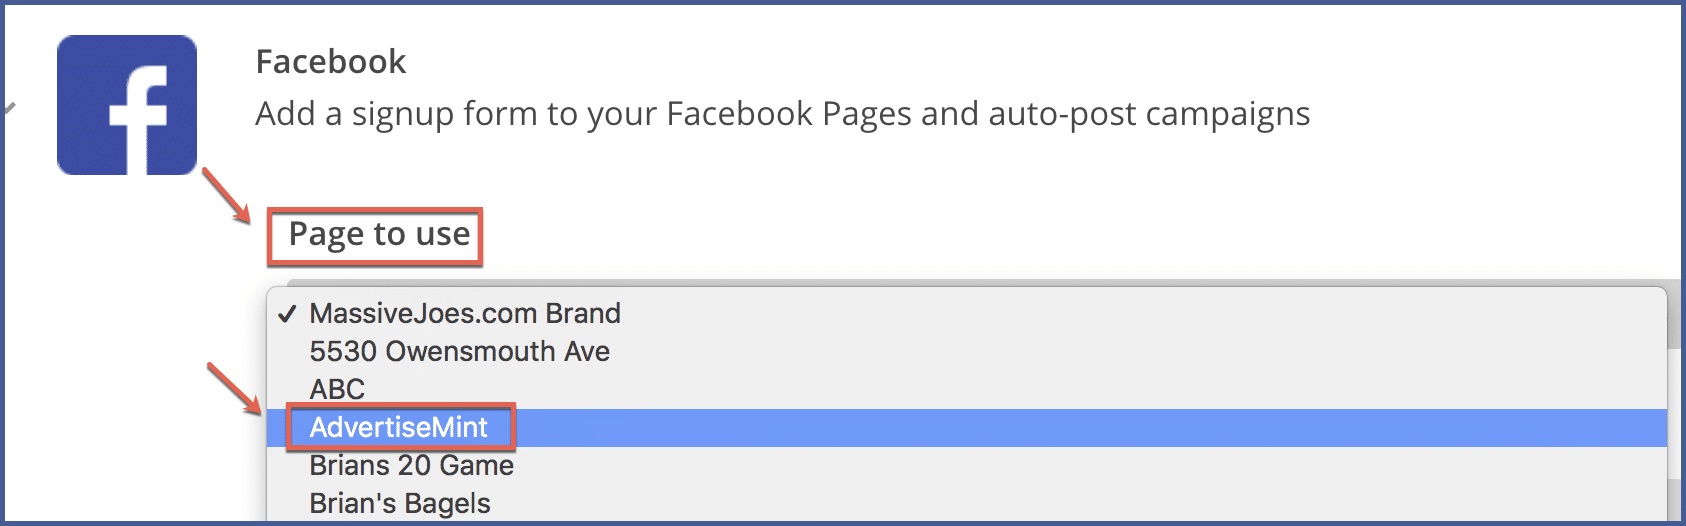
Step 3: Select the Facebook page you want to use from the “Page to use” dropdown menu.
Step 4: Choose which list you want to add your Facebook subscribers to from the “List to use” dropdown.

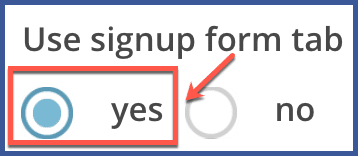
Step 5: Select “Yes” under the “Use signup form” tab.
Step 6: In the “Form theme” dropdown, select which style you want to use for your form. You can either choose your MailChimp theme or the Facebook-esque theme, which matches Facebook’s look and design.

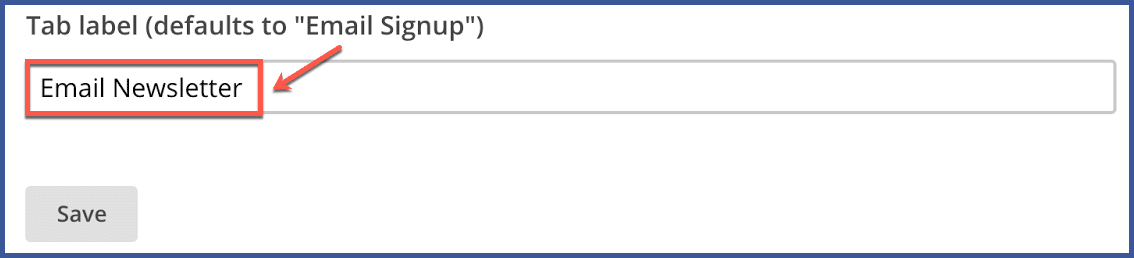
Step 7: Type in the name you want to give your tab label.
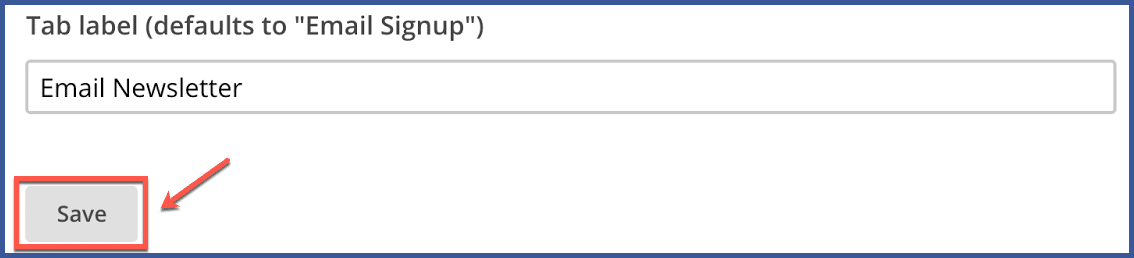
Step 8: Save your form.
MailChimp is a valuable resource when used with Facebook. Not only can you create sign-up forms, but you can also create Facebook ads on MailChimp.
Promote Your MailChimp Sign-Up Form and Maximize Your Conversions
Paid Mailchimp Promotion
What good is a sign-up form with no sign-ups? If your form is not getting any hits, consider running a Facebook ad that promotes your Mailchimp sign-up form. You can do this by logging into Mailchimp directly and have it be promoted for $5 a day on Facebook which is an extremely common and popular tactic for email marketing. After choosing the promotion option, choose which audience you would like the ad to target.
Then it’s time for the creative aspect of ad building. You will be prompted to fill out a short blurb of content to entice your audience to click on the ad, then the link to the sign-up form itself, choose whether you want a subscribe or sign up button label, and watch your leads grow!
Consider Segmentation
After you went ahead and followed the earlier steps, you can go ahead and track your leads via segmentation, a common and extremely helpful email marketing tactic. Segmentation refers to the process of separating your new contacts based on the information you may have collected from them (which could be a pretty hefty bit of information) and sending them different emails based on that information that they share.
With standard Mailchimp, you can build up to five segmentations– and even more if you have the premium plan. Whether you choose to send automated emails, follow Mailchimp’s pre-filled templates that send to sign-ups that meet your pre-determined criteria, or do a mix of the above that works the best for you, segmentation might lead you the conversion rate of your dreams.
You can make segments based on when you received their information or more complex options such as matching answers in the original sign-up form. Then, make sure to name your segment accordingly so you can distinguish between them as easily as possible.
Can I Remove a Sign-Up Form?
Did all of this sound great and then in practice you found the form itself lackluster and you want to try something new? No worries, removing a sign-up form is just as quick and easy as embedding one on your Facebook page. Simply go to the Facebook integration tab on your Mailchimp account and click “no audience connected” and this should remove the form from your page.
