
Late last month MailChimp announced that its users can create Facebook ads through its dashboard. This new capability allows users to target Facebook ads to their MailChimp contacts lists without switching back and forth from one platform to the other.
Although creating Facebook ads on MailChimp is a similar process to creating ads on Ads Manager, MailChimp’s platform offers less capabilities. For instance, it doesn’t offer Facebook’s ad objectives, and it doesn’t allow you to create certain Facebook ad formats. Here are the main differences between creating ads on MailChimp and Ads Manager:
- You can only choose automatic placements.
- You can only create page post ads using either the single image or the carousel format.
- You can’t use Custom Audience and Facebook’s detailed ad targeting options.
- You can’t place ads on Instagram, Instagram Stories, and in-stream videos.
If these difference don’t bother you, then you can start your own Facebook ad campaign through MailChimp. Here’s how.
Table of Contents
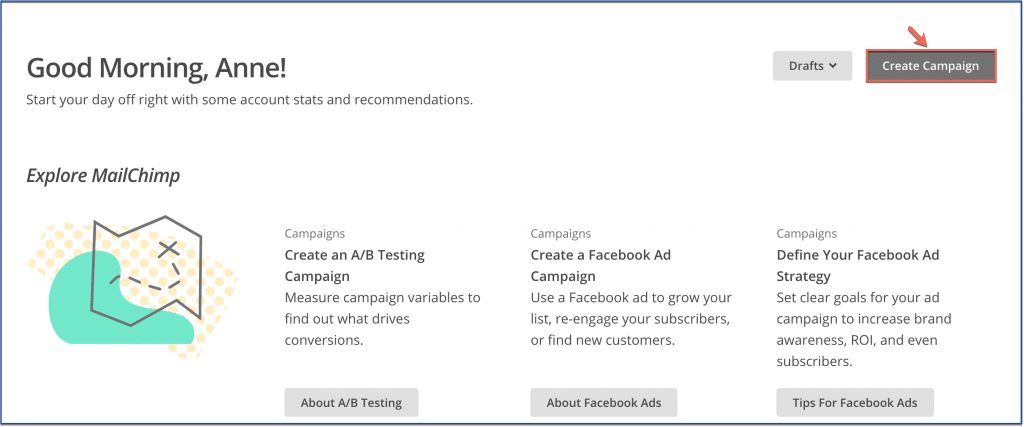
Step 1: Click “Create Campaign”
Click the “Create Campaign” button located on the upper right corner of the screen.
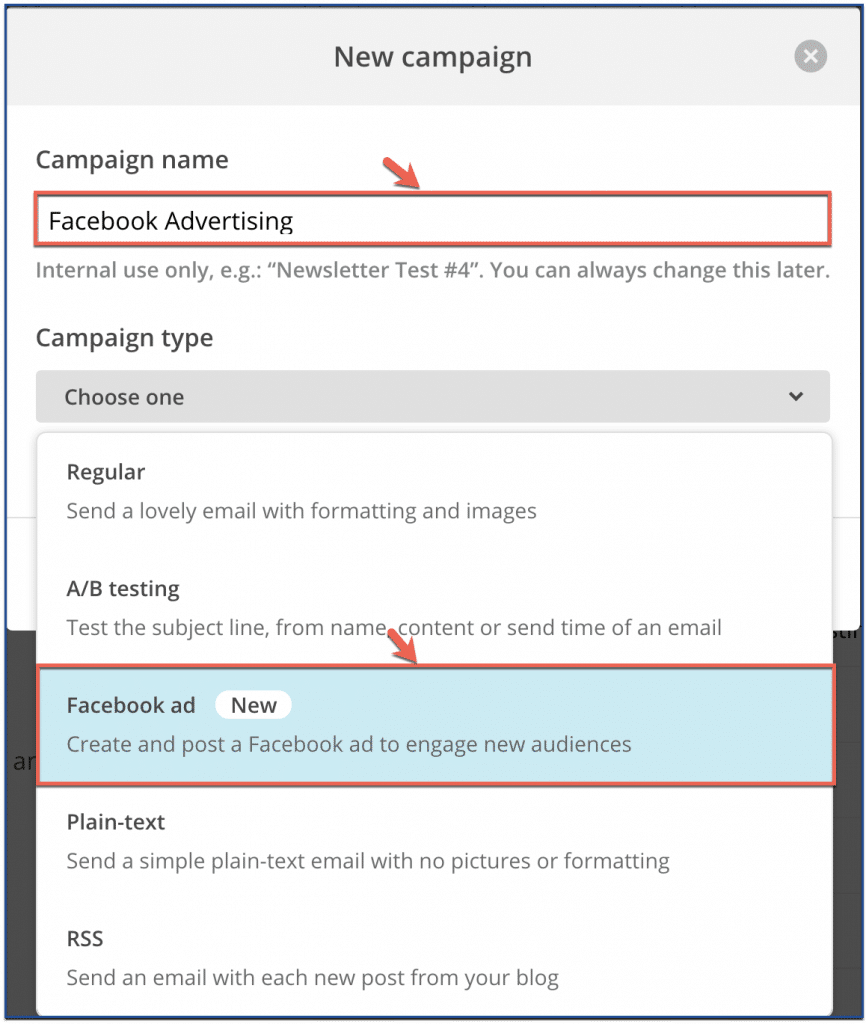
Step 2: Name and choose your campaign
Next, name your campaign. Then choose your campaign type. Since you’re creating a Facebook ad, choose “Facebook ad.”
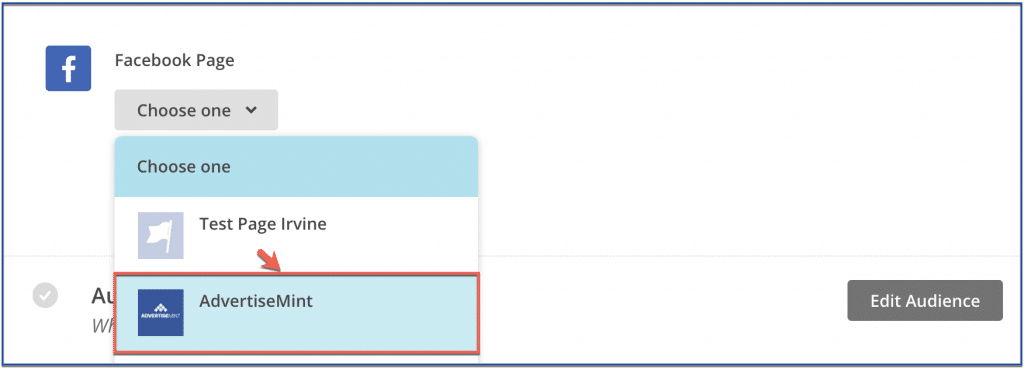
Step 3: Choose a Facebook page
Choose the Facebook page that you want to be associated with your ad.
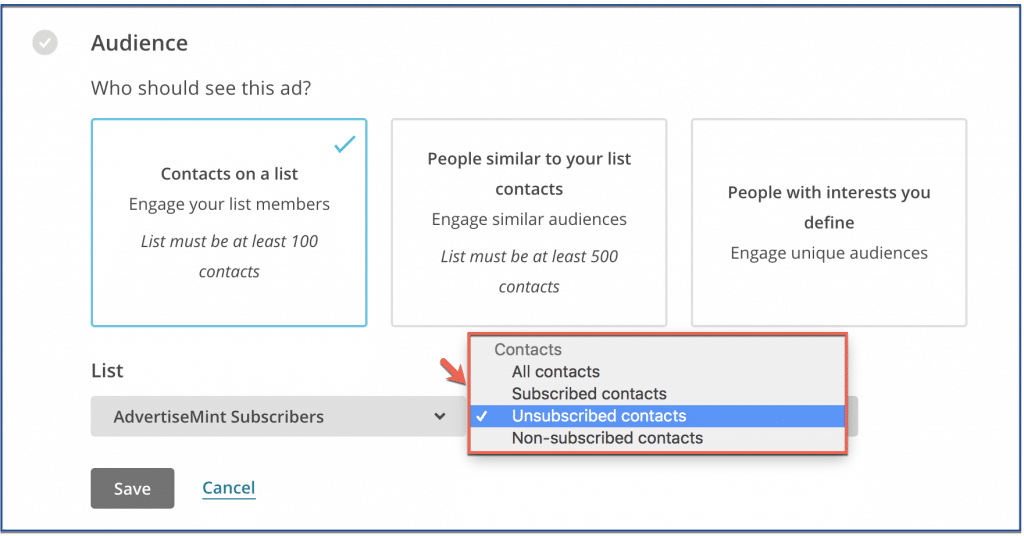
Step 4: Choose your audience
You can choose your contact list as your audience. This means MailChimp will show your ad to people who are in your contact list.
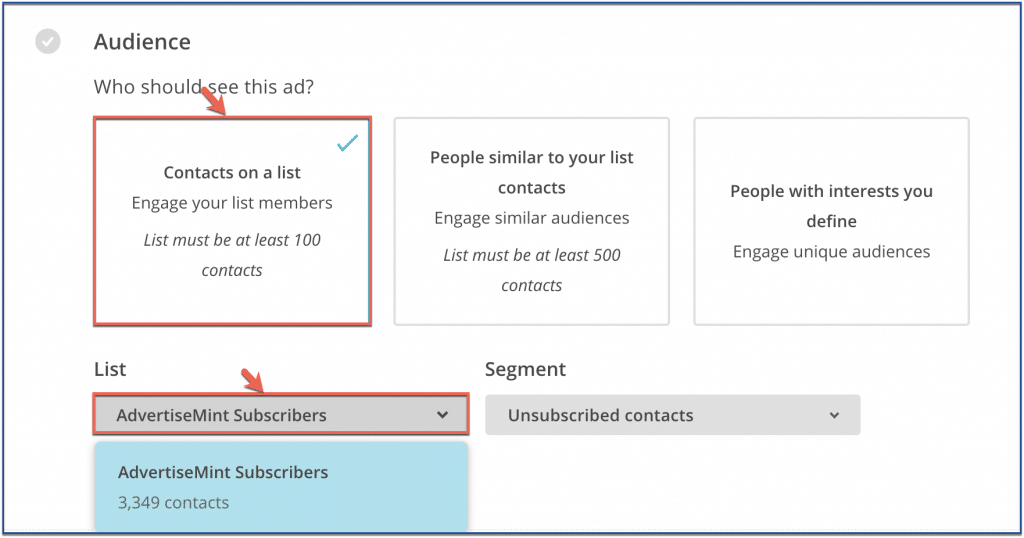
After you choose your list, you must choose your contact type. You can choose to show your ad to people who are subscribed, unsubscribed, or not subscribed.
Subscribed: If you want a higher chance of getting conversions, choose this option. Those who are subscribed are high-interest customers because they are evidently interested in your business. If they weren’t, they would have unsubscribed.
Unsubscribed: If you want to draw the customers you lost back to your business, then choose this option.
Not Subscribed: If you want to encourage customers to subscribe to your business, this is the best option.
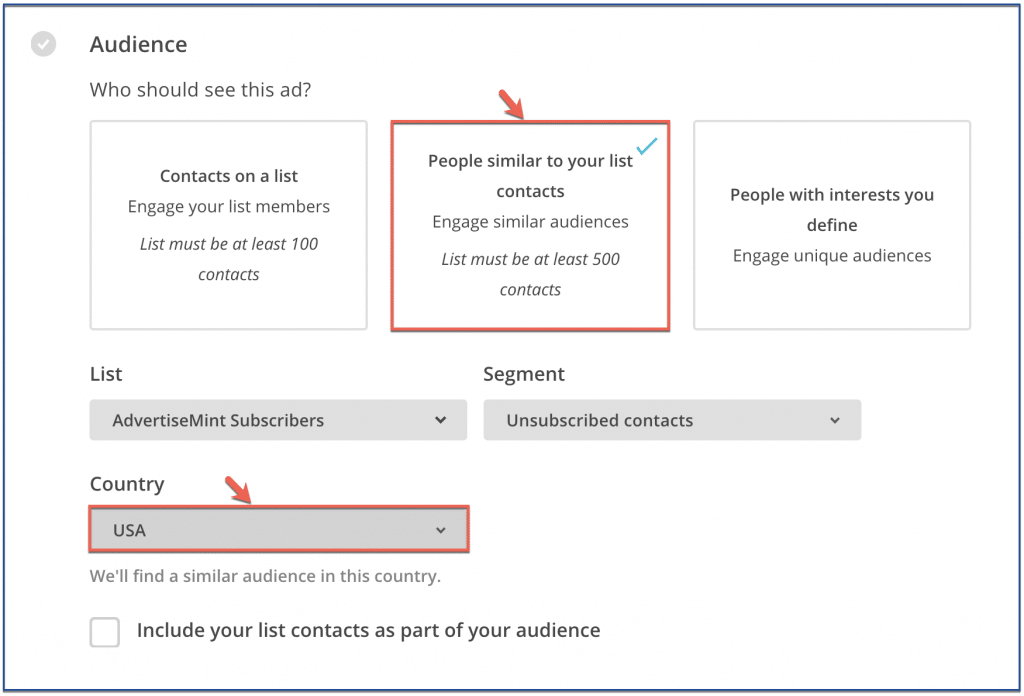
If, however, you want to expand your current customer list, then choose the option “People similar to your list contacts.” When you choose this, MailChimp will show your ad to people who share similar interests, behaviors, and demographics to your current customers from your contact list. With this option, you will need to choose the country you want your ad to appear in.
If you want to show your ad to an audience that isn’t in your contact list and that doesn’t share similarities to your current customers, then choose “People with interests you define.”
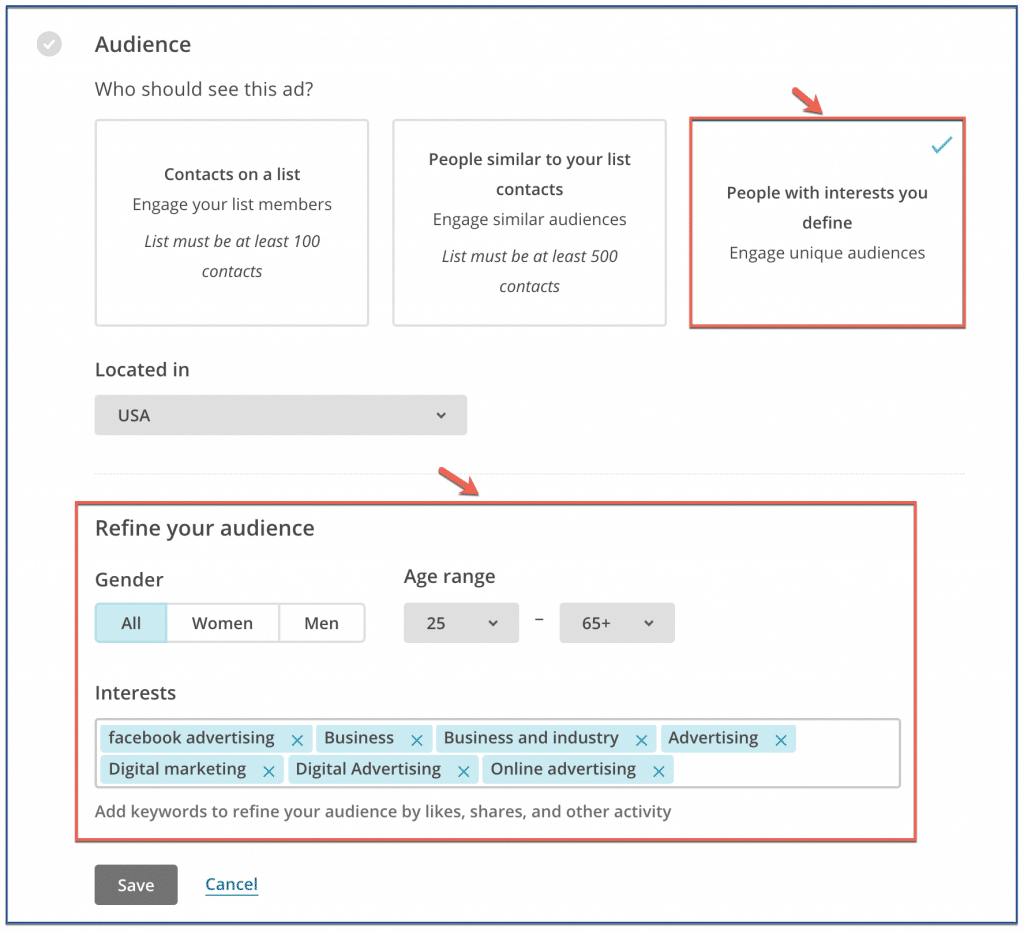
With this option, you must define your audience’s gender, age, and interests.
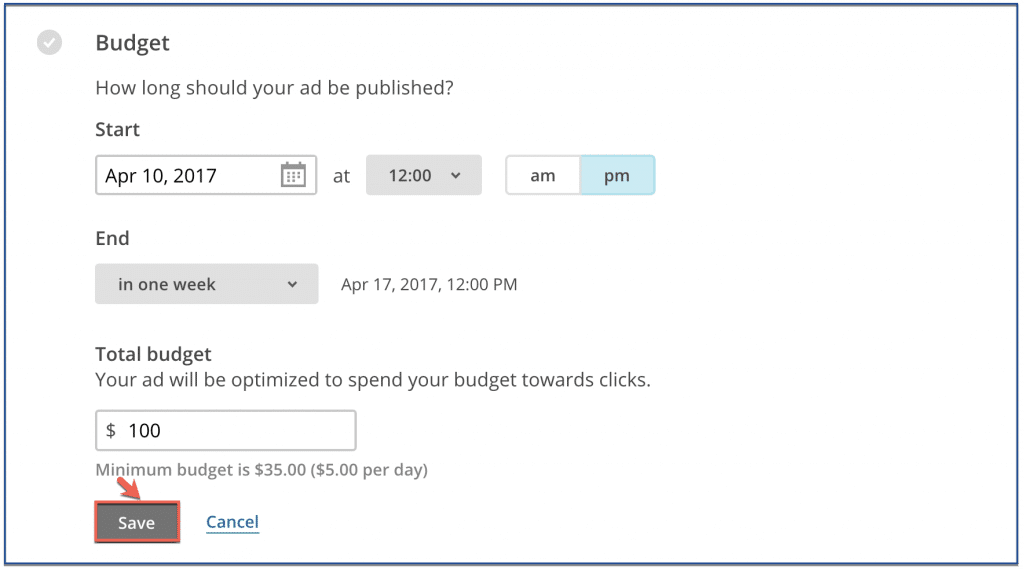
Step 5: Create your budget
When you create your budget, you must also set your schedule. That is, you must choose how long you want your ad to run. Next, you must indicate how much money you want to spend during your campaign. In the example below, the budget is set to a maximum of $100 for a week-long campaign.
Step 6: Write your copies
In this section you must write copies for your ad. Remember to keep your message concise: get to the point quickly by only including the most important part of your message. Your landing page will provide more details.
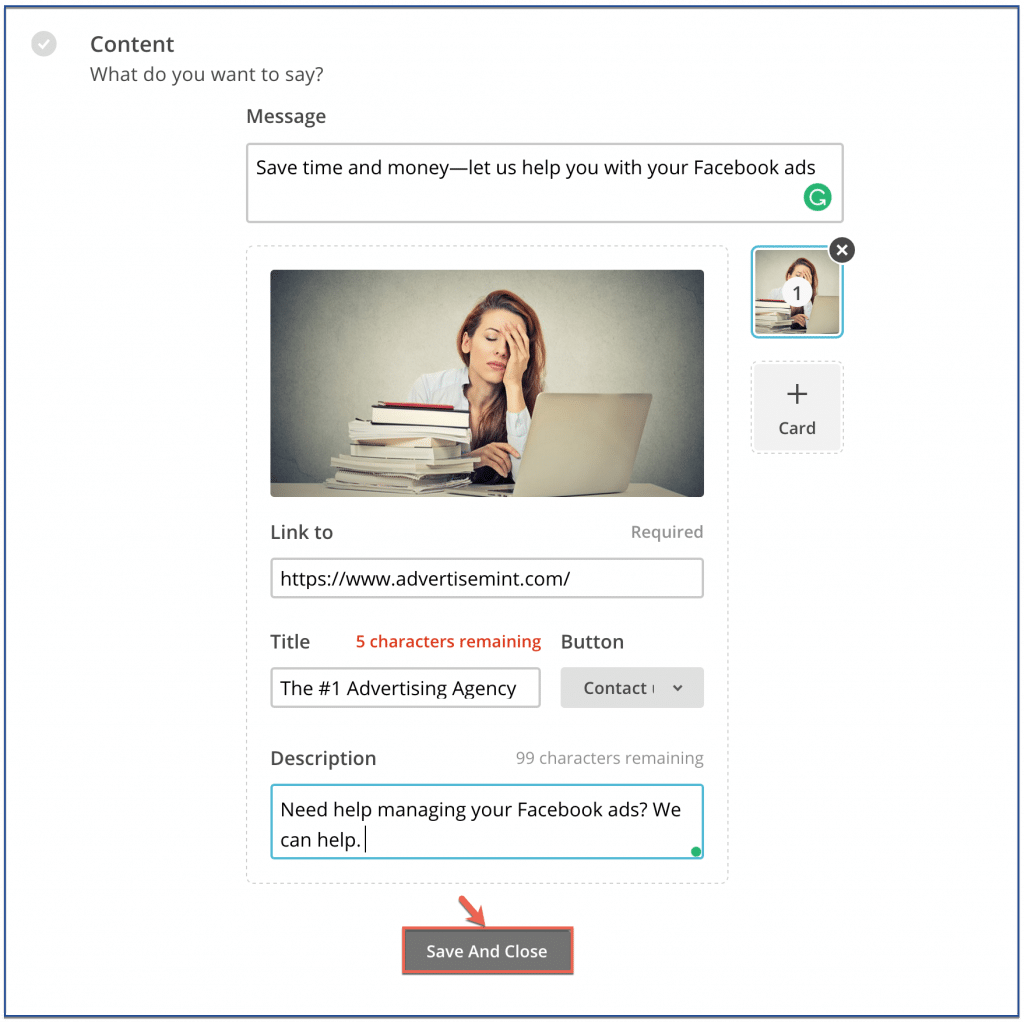
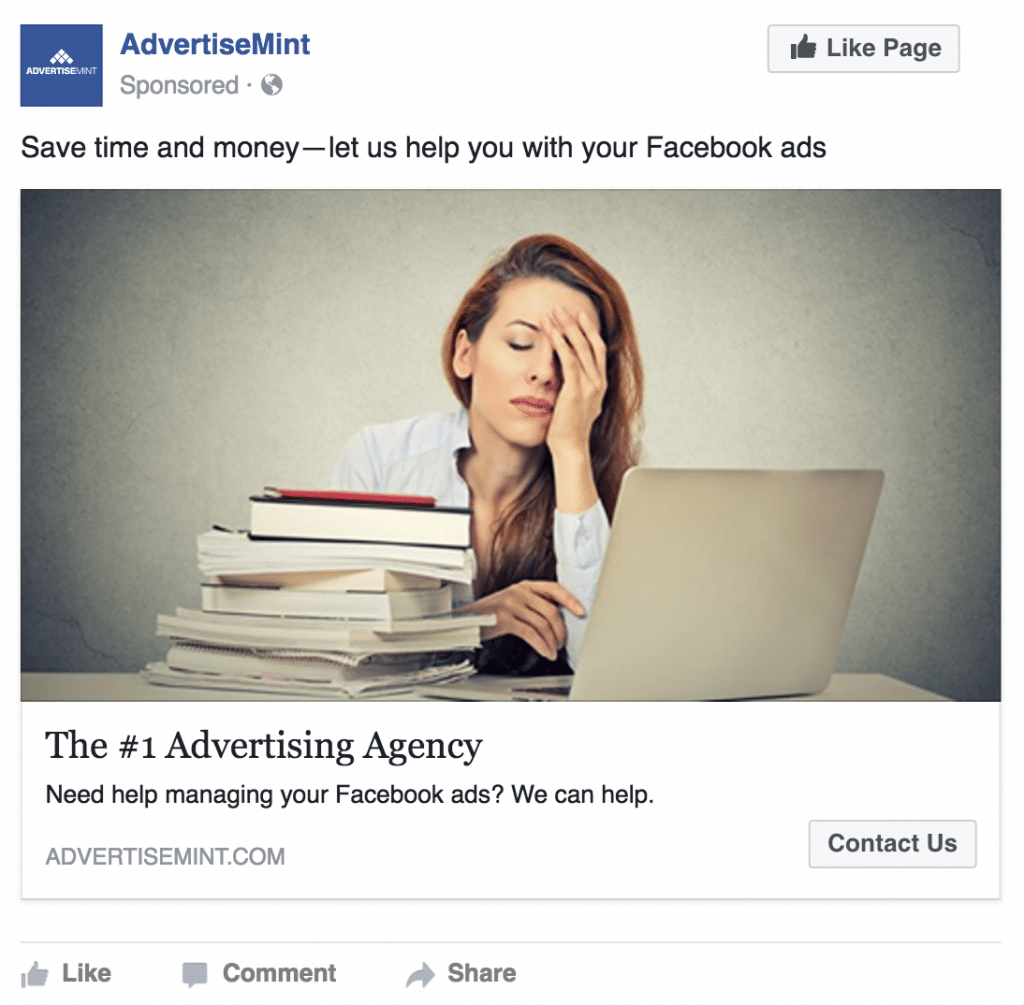
Once you’re done creating your ad, you will get a preview of your creation.
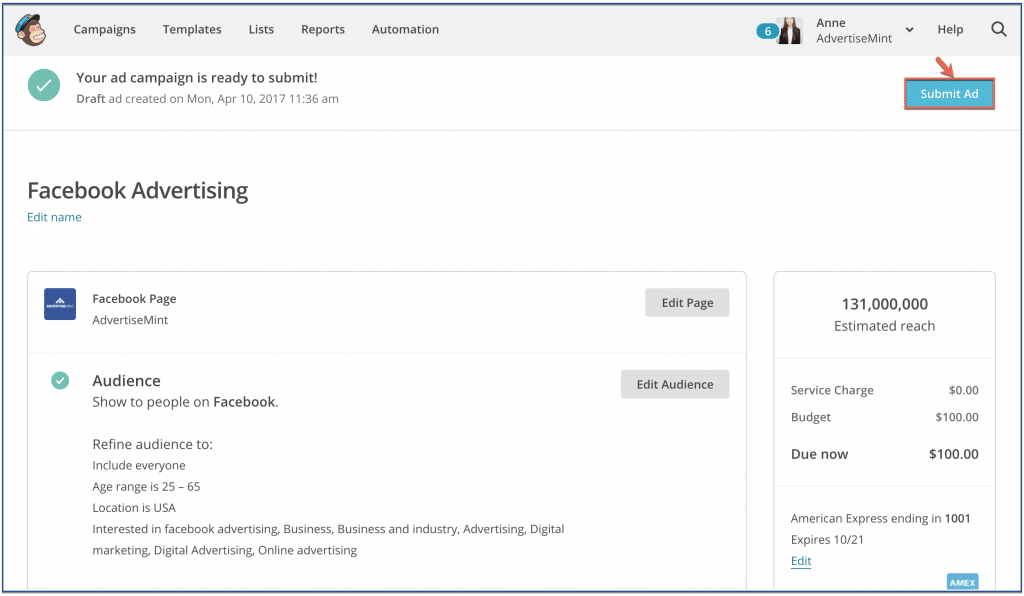
Step 7: You’re done!
Once you’re satisfied with your ad, you can scroll up and click “Submit ad” located on the upper right corner of the page. After submission, MailChimp will send your ad to Facebook for a review. If approved (MailChimp will notify you via email), your ads will start running, and you’ll be able to view your ad’s performance under the Reports section of your account.
Finished up creating your Facebook Ads on MailChimp? It’s time to start creating your Instagram Ads on MailChimp. Want to learn more about the other ad formats and options? Read all about Facebook’s carousel ad format, or check out what you can do with messenger ads.
