Maybe you’ve created a boosted post before, but you now want to graduate to the harder, more exciting ads. Or perhaps this is the first time you’ve ever created an ad and you need additional guidance. Either way, this article exists for those who need a step-by-step guide to creating a Facebook ad. Keep in mind, however, that with different types of ads (carousel, single-single image, and so on), may require different steps. Even ads of the same kind with different objectives (as you will see below) often contain different fields. With that said, some steps in this article may not be applicable to your particular ad and objective although the process is very similar.
Without further ado, below are the step to create a Facebook ad.
Table of Contents
Step 1: Go to Ads Manager
Click the “Business Manager” tab then click “Ads Manager” on the drop down menu.

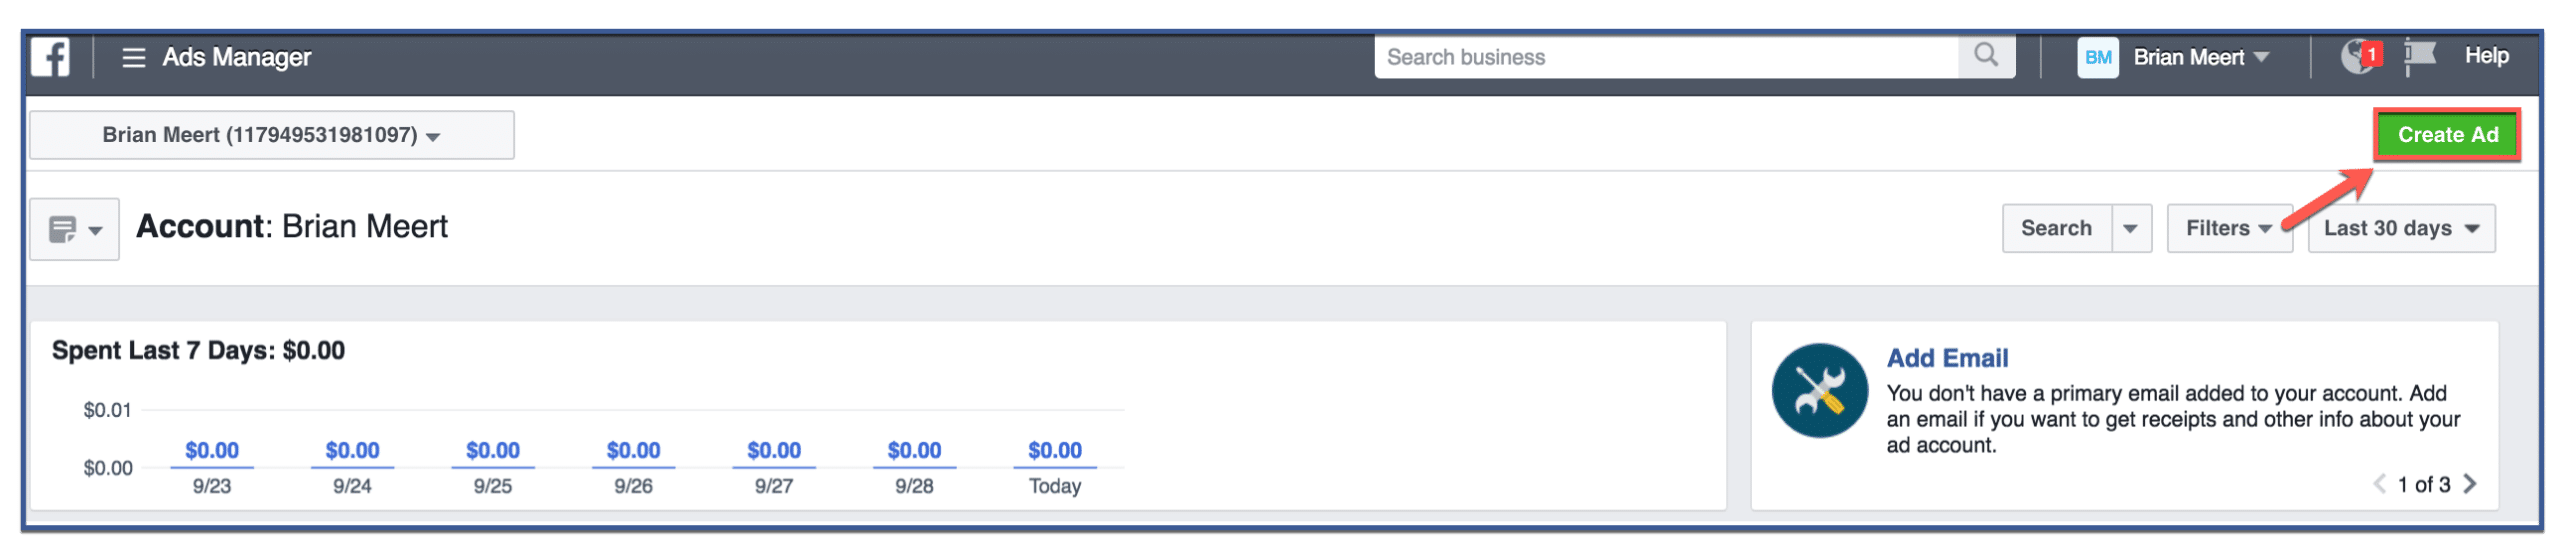
Step 2: Click “Create Ad”
Once in Ads Manager, click the green button that says “Create Ad” to create a new ad.
Step 3: Choose your objective
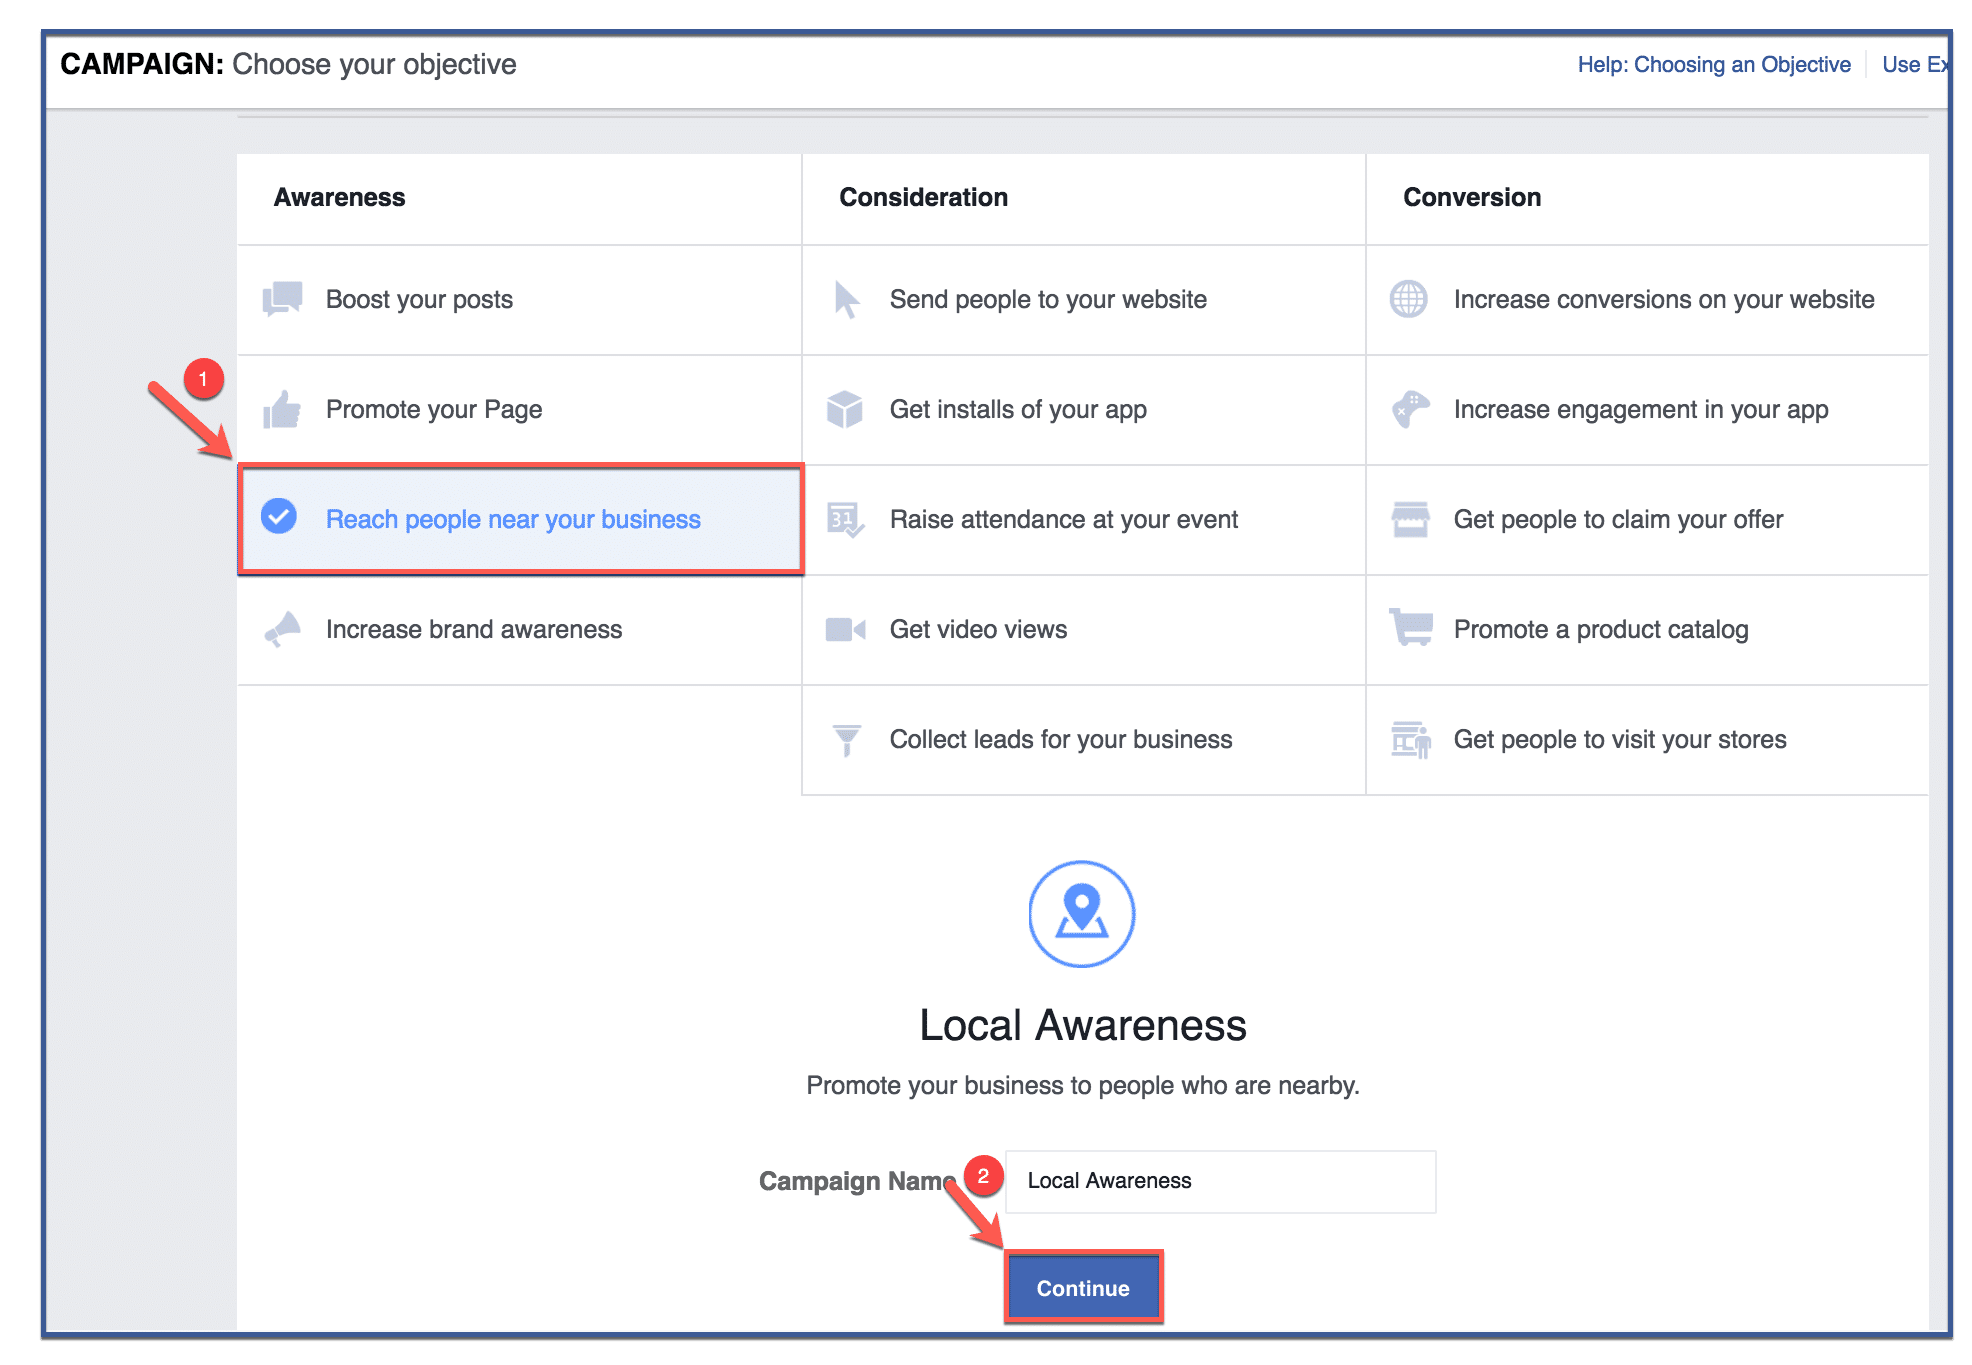
Choosing an objective lets Facebook know what you want your ad to achieve. Do you want to direct people to your website? Do you want to get customer’s information? In my example, I’m choosing “Reach people near my business” to direct customers to my brick-and-mortar store.
After you’ve chosen your objective, click “Continue.”
Step 4: Choose the page you want to promote
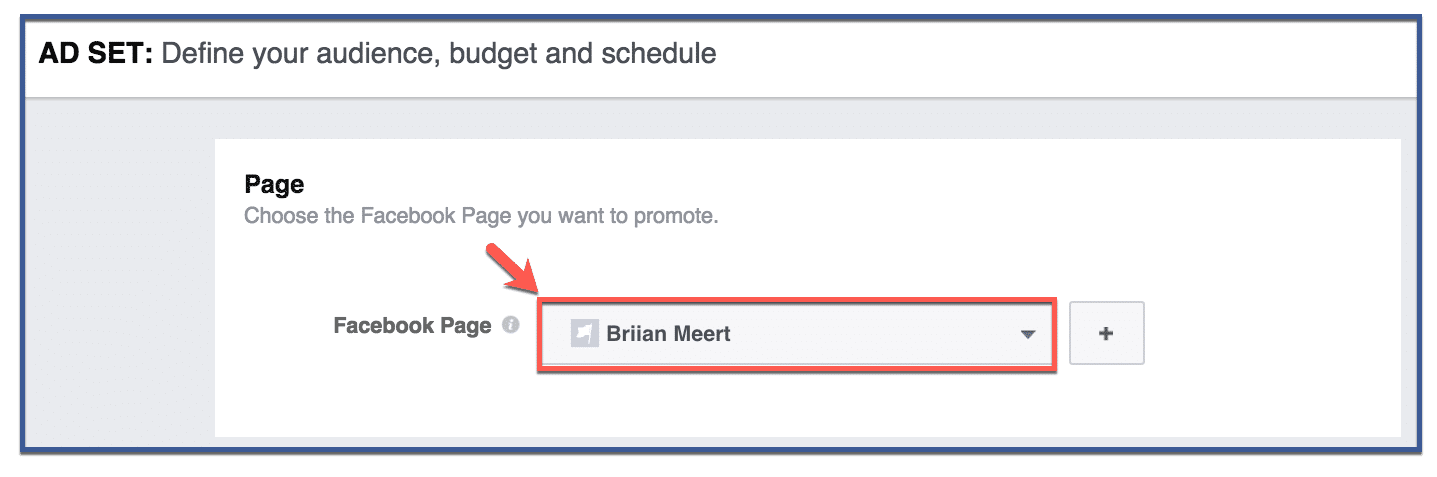
Because of my objective, I’m given the option to choose the page I want to promote. For some objectives, such as “send people to my website,” this option may not be available. If your page does not give this option, ignore. Otherwise, click “Choose the page you want to promote.”
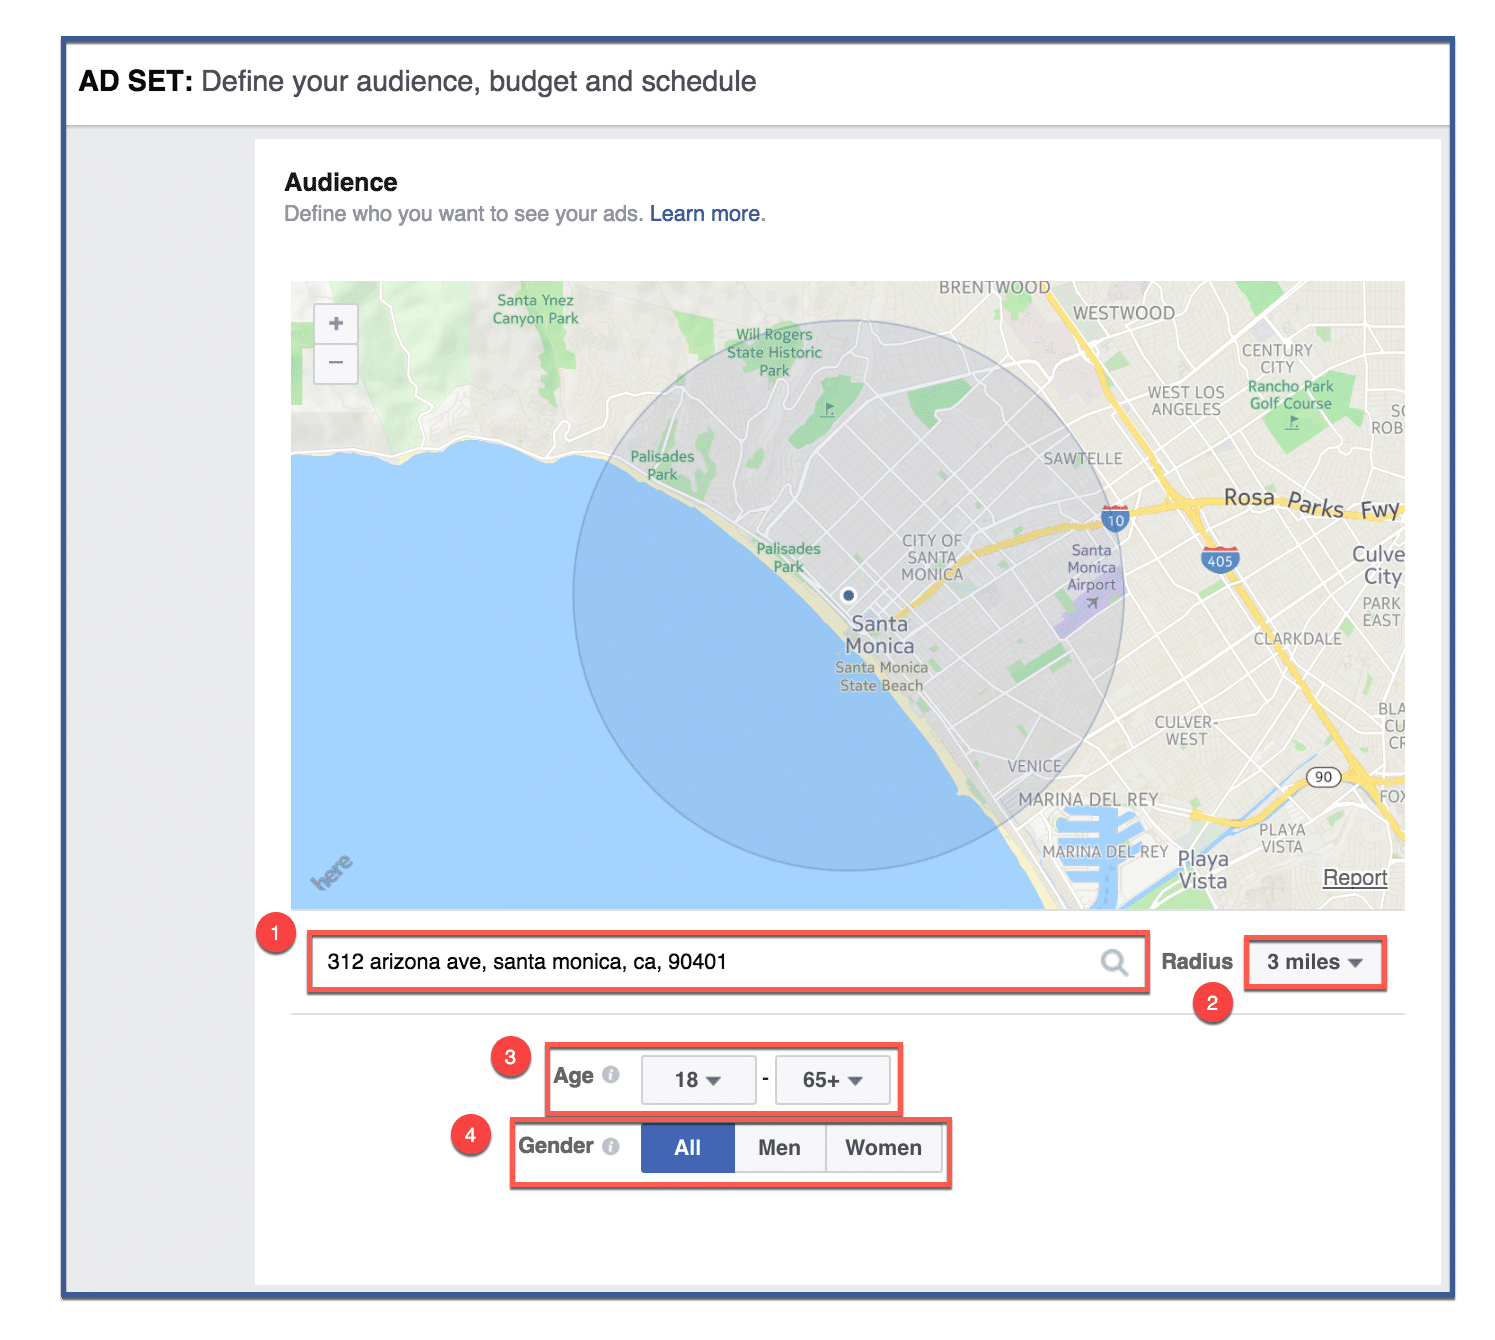
Step 5: Choose your audience
For my ad, I’m required to provide the address where I want my customers to go. Again, if you chose a different objective, this option may not appear to you. With all ads, however, you must provide the age, gender, location, and language of your audience.
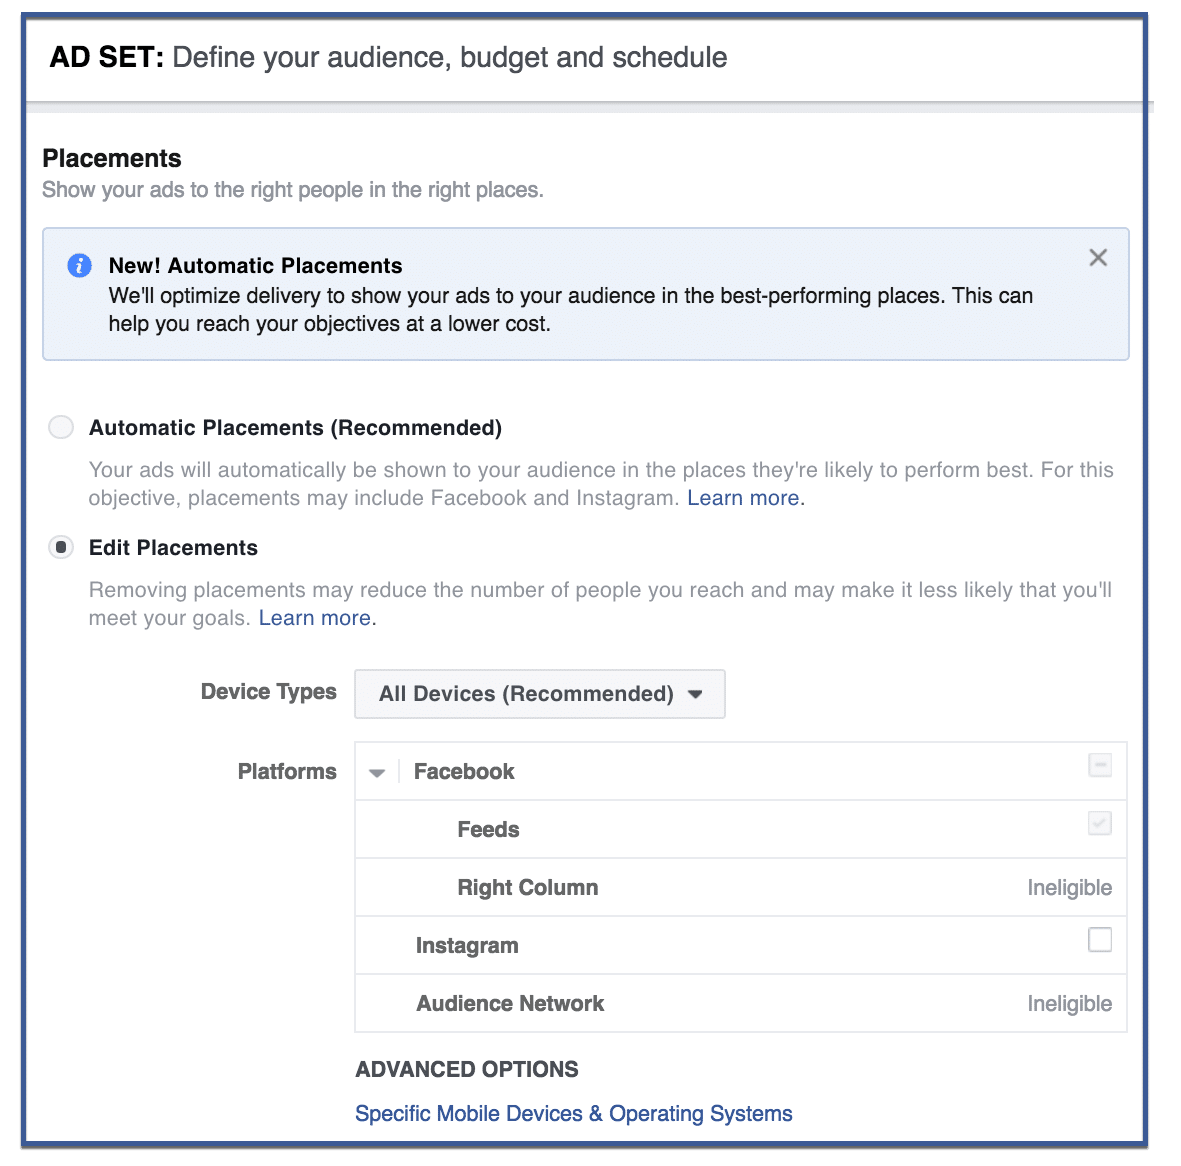
Step 6: Choose a placement
Where do you want your ad to appear? On Instagram, on Facebook, or on both? If you want your ads to appear on Facebook, do you want it to appear on the right column or the news feed? Do you want your ads to appear on mobile and on the audience network? These are questions you must ask when choosing placements for your ad. For this example, I chose Facebook to place my ads on its website. Note, however, where it says “Ineligible.” This means that my ad with my objective cannot be placed on the right column and the audience network. For most ads, this option is available.
If you don’t want to choose your own placements, you can also choose “Automatic Placements,” which gives the decision making to Facebook. With “Automatic Placements,” Facebook will place your ad where it deems it will perform the best.
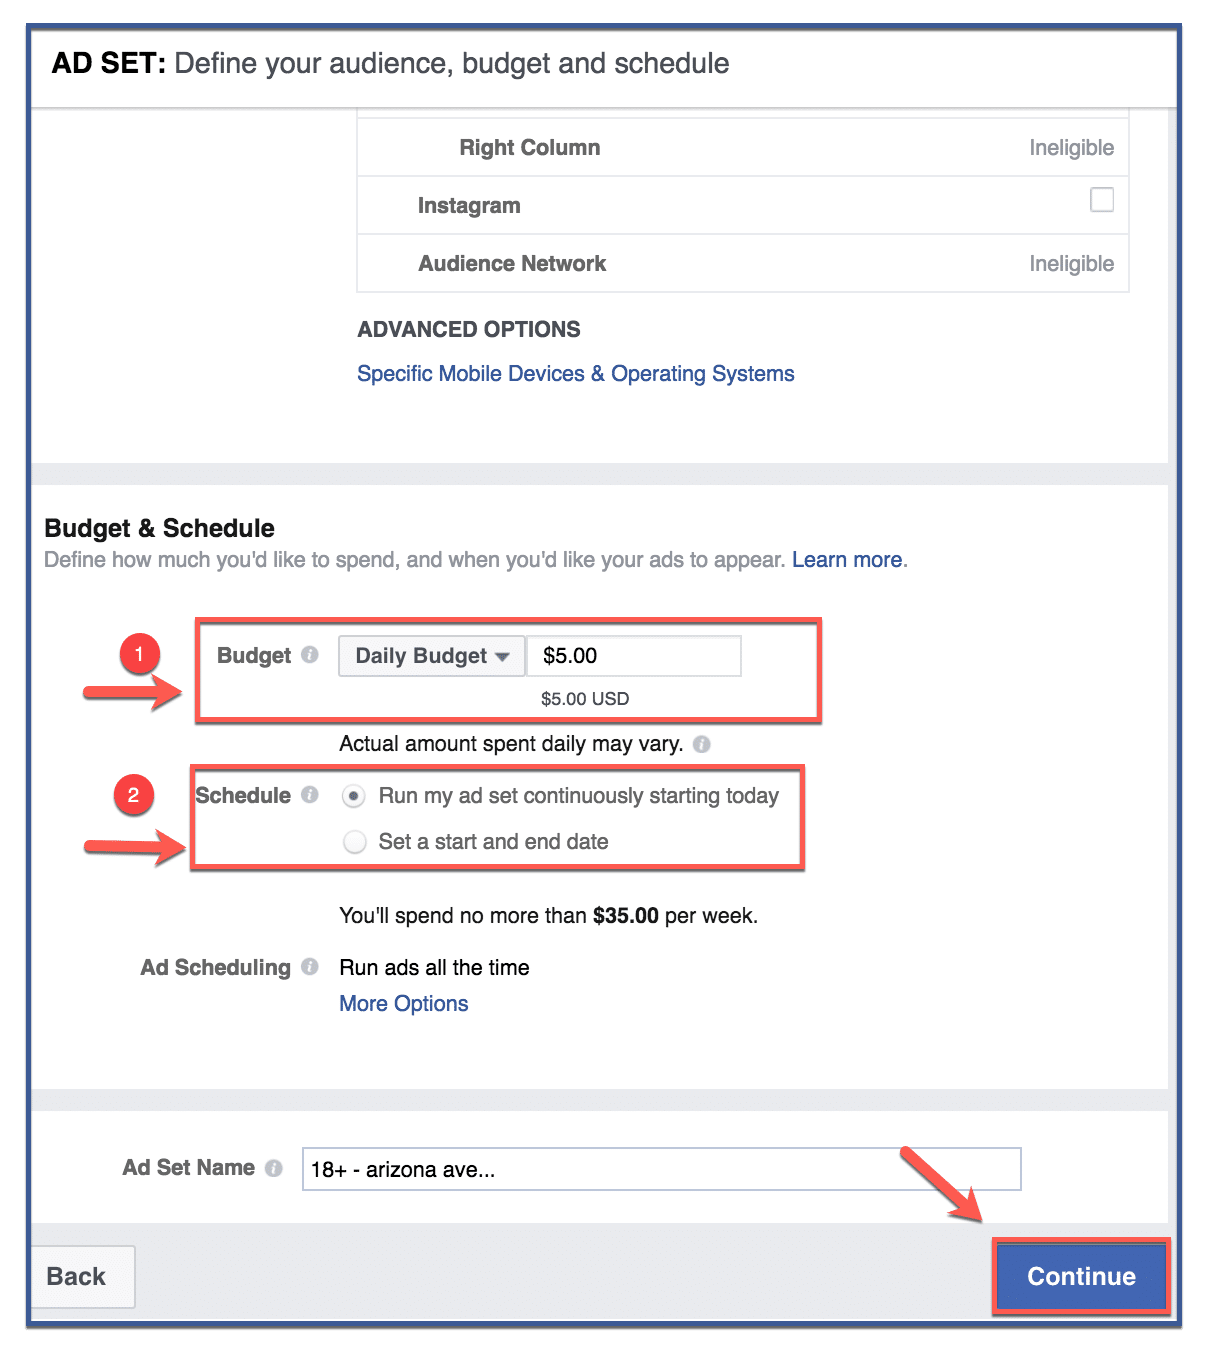
Step 7: Choose a budget
Although you can choose how much you want to spend, keep in mind that Facebook advertising is an auction: the higher your bid, the more likely your ads will appear on Facebook. After you’ve chosen your budget, you must choose your schedule. You can either choose to run your ad continuously or set a start and end date. Keep in mind that if you choose to run your ad continuously, you can turn off your ad at any time.
After you’ve chosen a budget and a schedule, click “Continue.”
Step 8: Choose format and image
Choose your ad format. If you don’t know which to choose, visit Facebook for Business for more information on the different types of Facebook ads. For my example, I’m choosing a single-image ad. After you’re done choosing the type of ad you want, choose an image for your ad by clicking “Browse Library” or “Free Stock Images” below. If you have original creatives that you want to upload, click “Browse Library.” If you want to use the free images from Facebook’s image library, choose “Free Stock Images.” I recommend obtaining your own original creatives if possible.

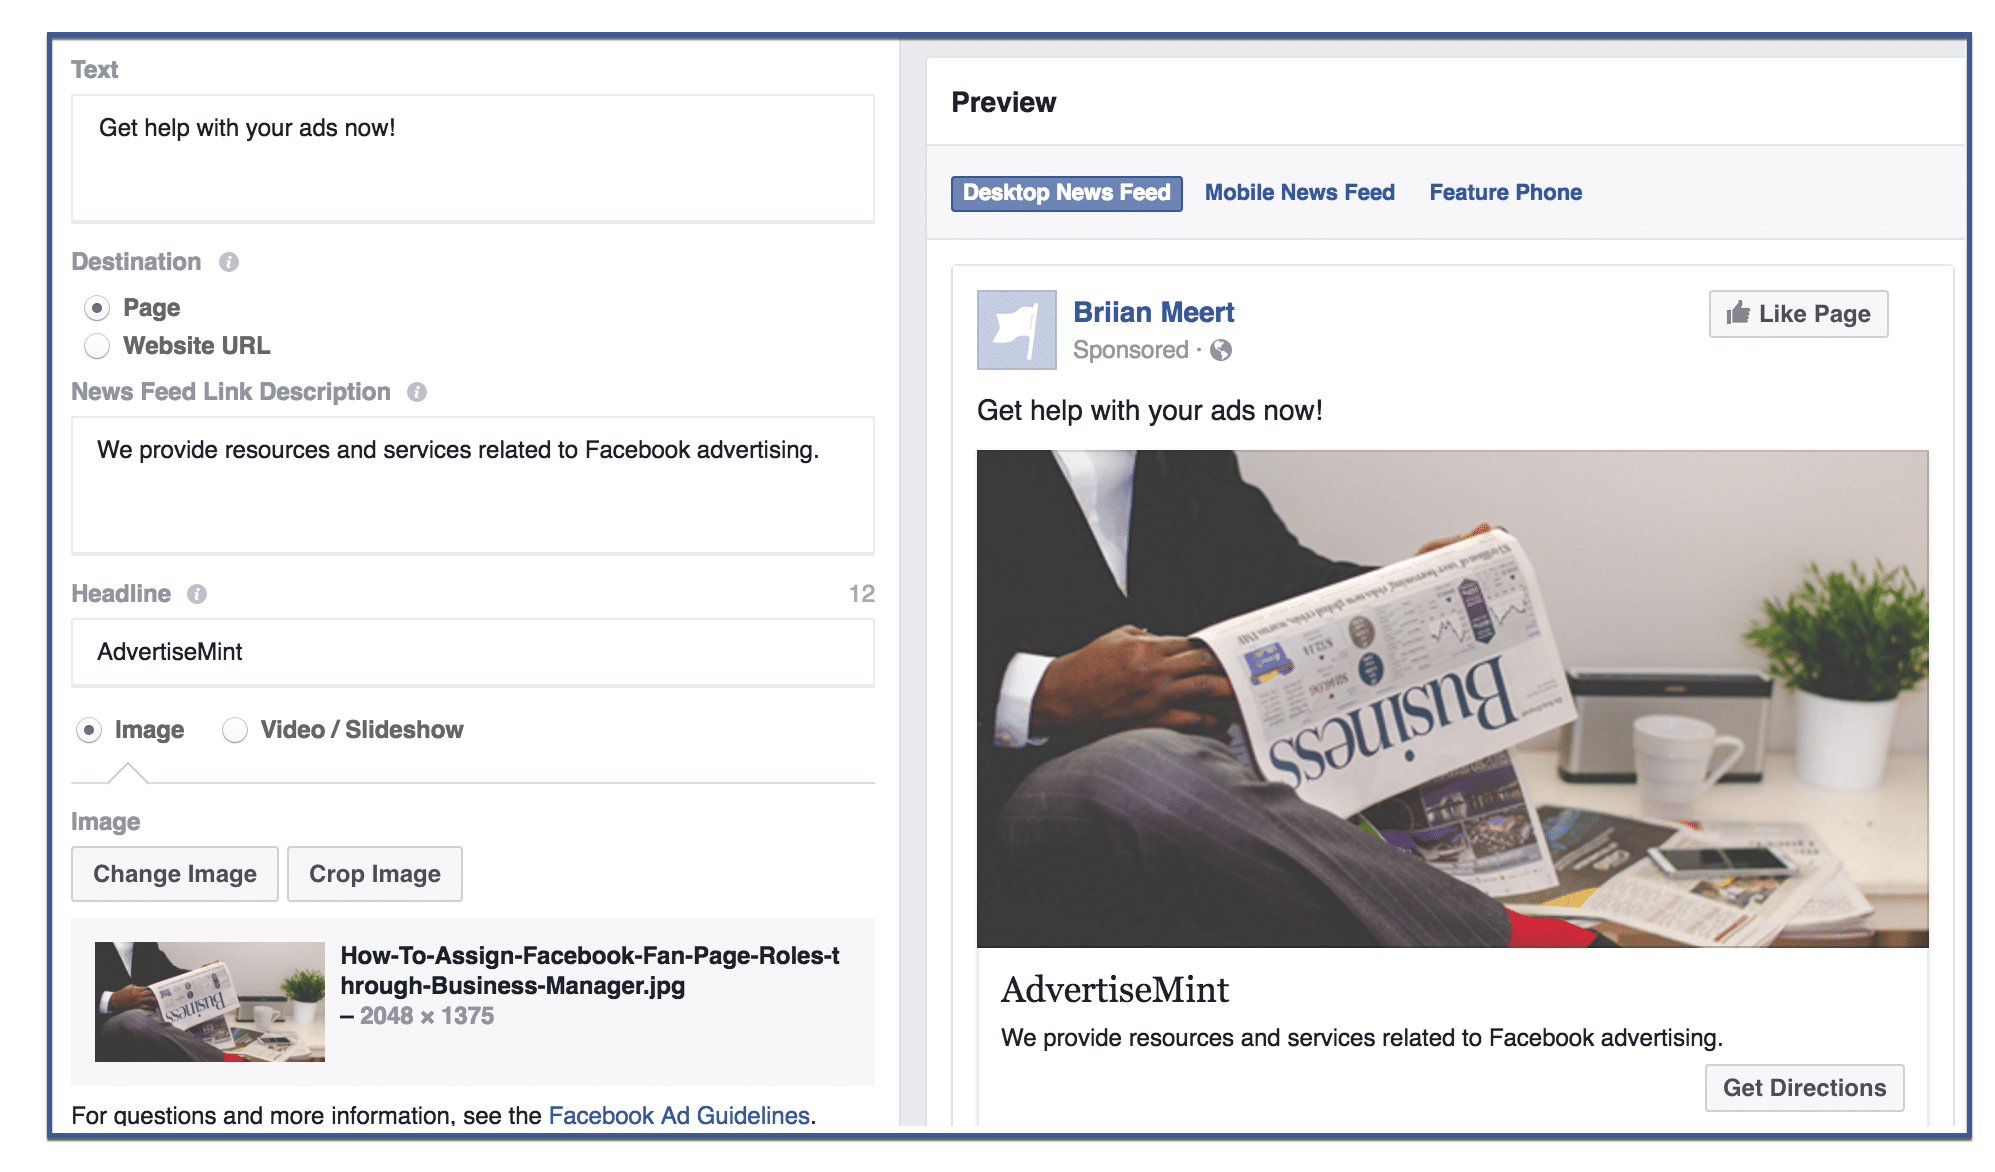
Step 9: Add text
Add text (the words that appear on top of your image), a page destination, a description (describing what your customers should expect from your service/product/business), and a headline. Afterward, scroll down to the next section.
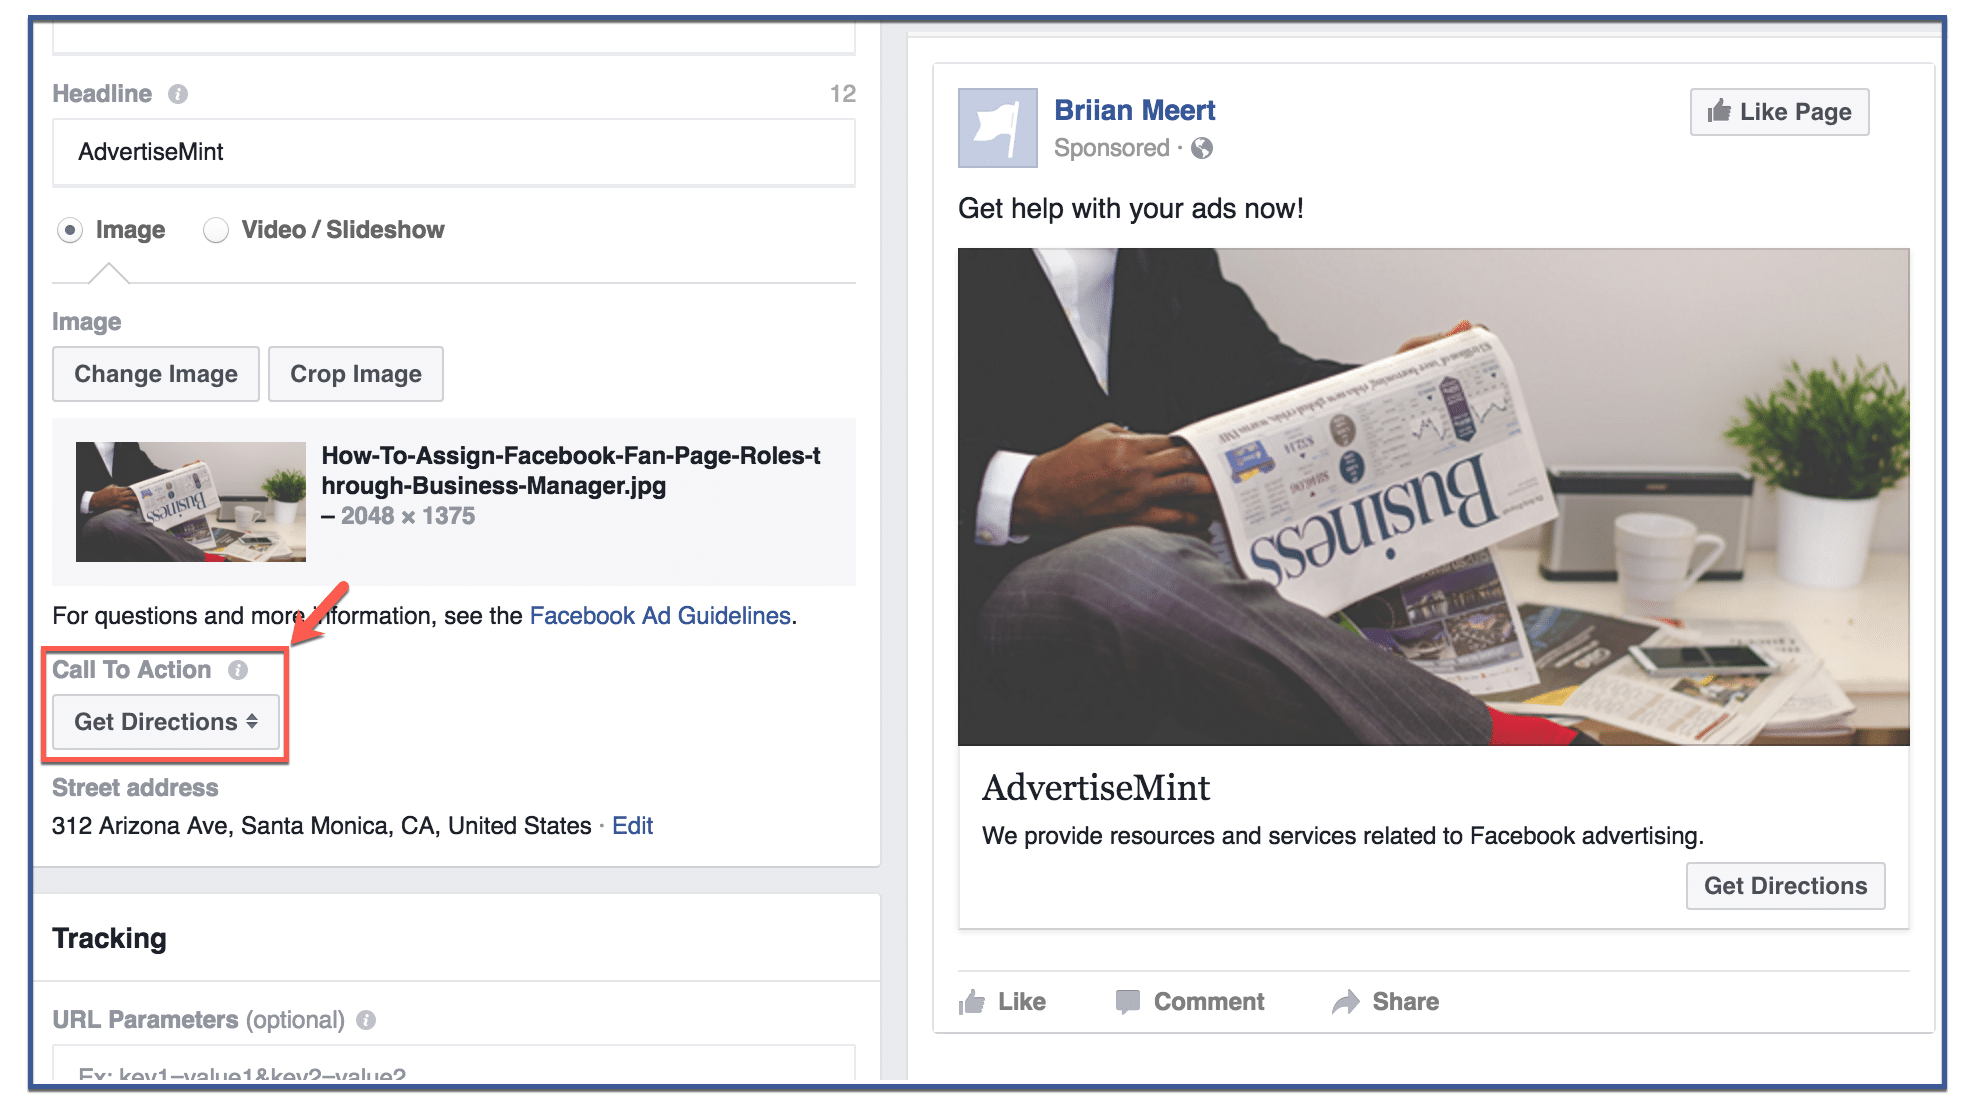
Step 10: Add your business address (if applicable) and CTA.
For my ad and my objective of sending customers to my store, I’m choosing the CTA, or call to action, called “Get Directions.” You may choose whichever CTA you want depending on your marketing goals. If you want your customers to learn more about you business, for example, you should choose the “Learn More” CTA. If you want them to contact you, you can choose “Call Now.”
While all ads require a CTA, my ad requires an address where I want to direct my customers. If your ad does not have this option, scroll down to the next section.
Step 11: Pixel
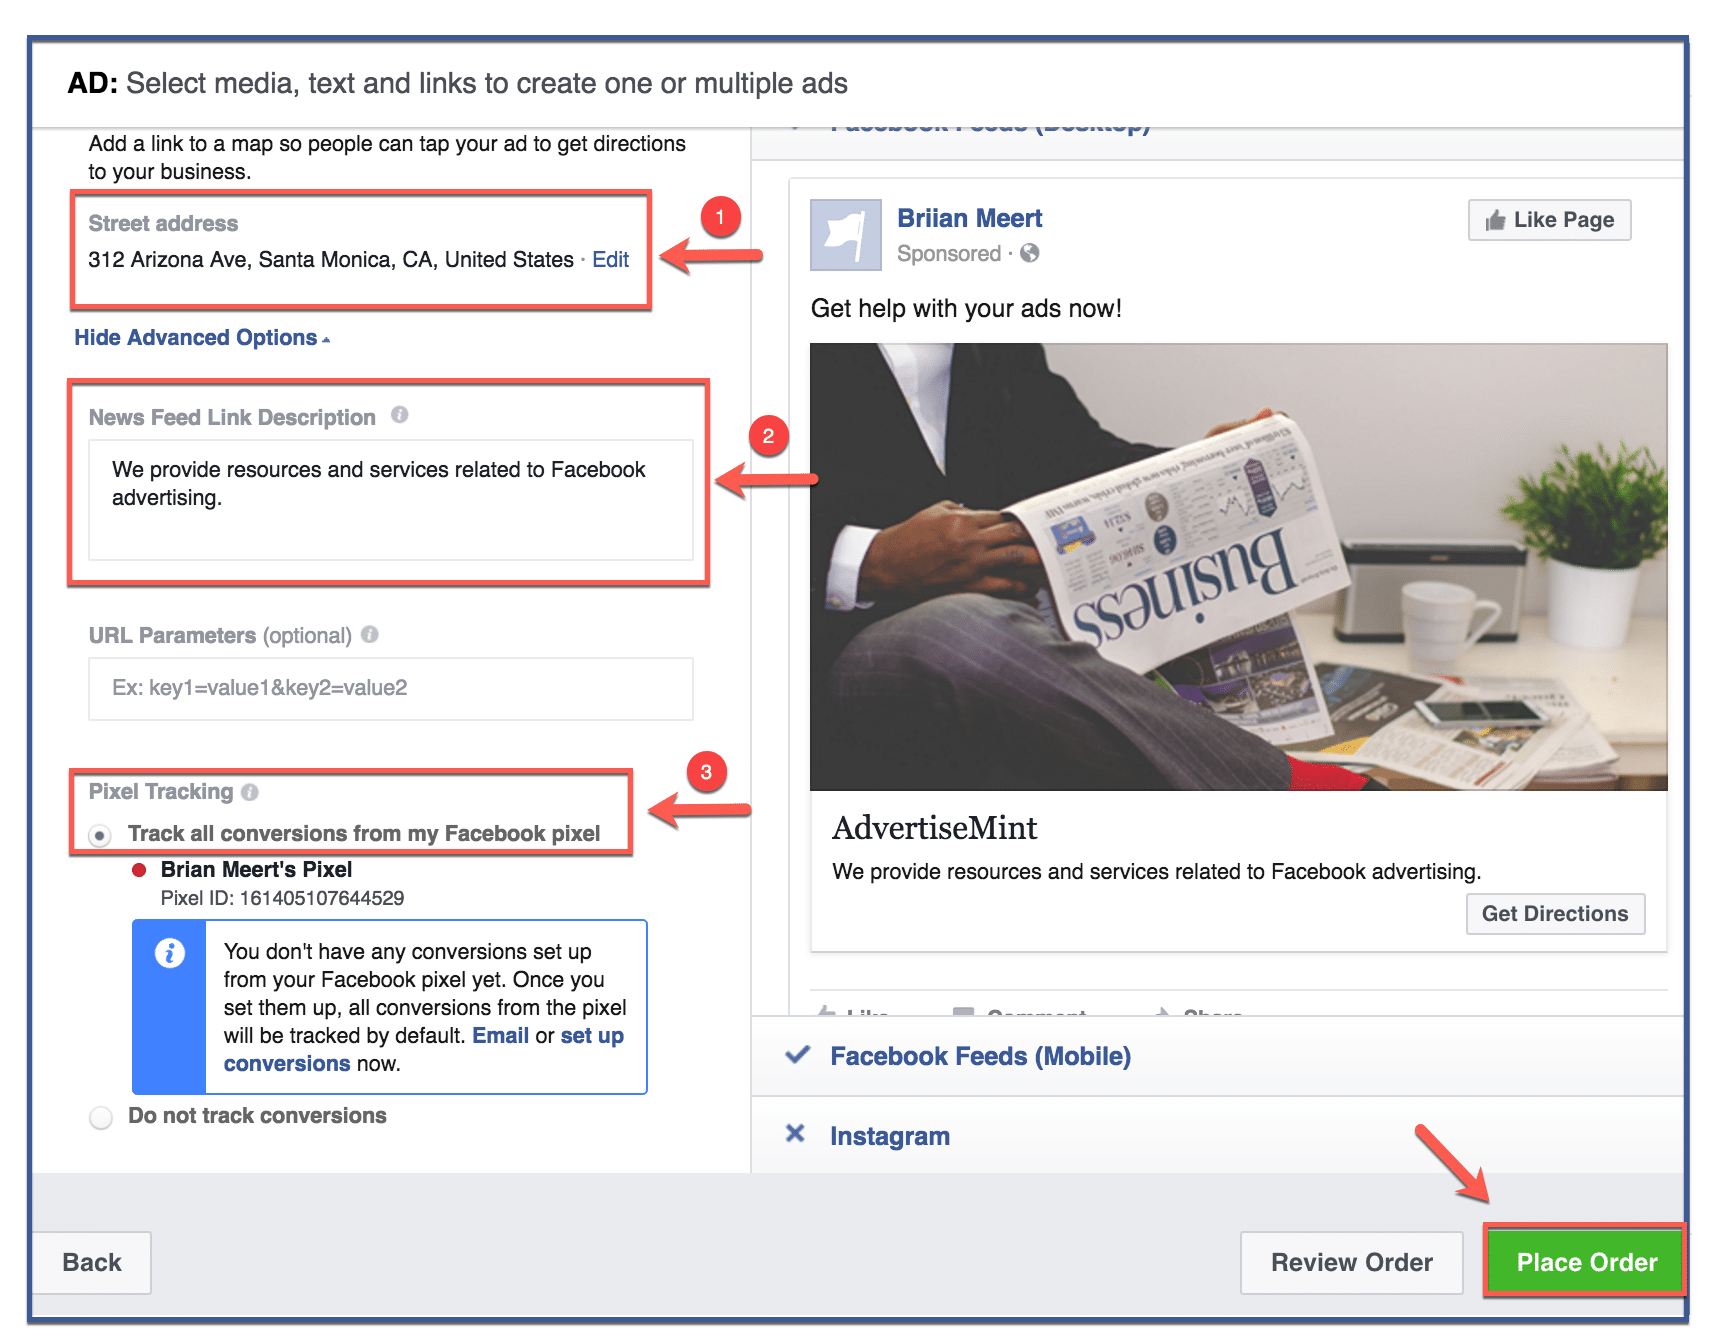
After you’ve entered an address and added a news feed link description, you can then click “Track all conversions from my Facebook pixel” to track your conversions. Although this is optional, tracking conversions is a great advertising tool that lets you retarget to those who have visited your site.
After you’re done creating your ad, click “Place Order.”
Step 12: Click “Continue”
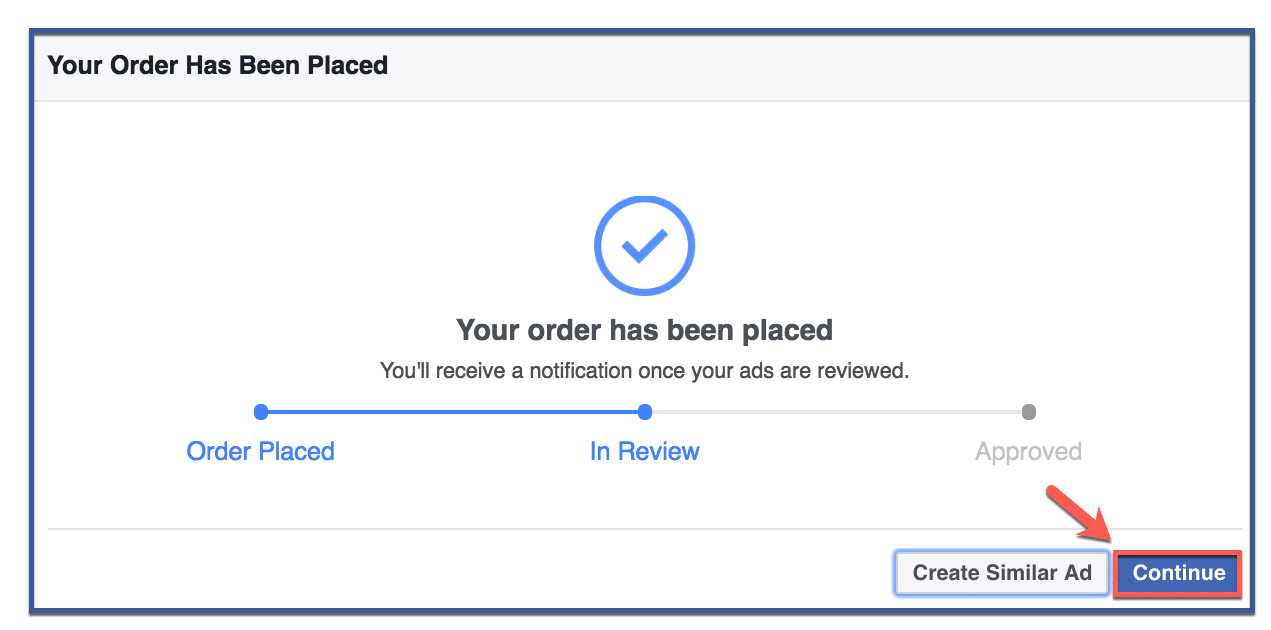
Click “Continue” to finish.
Step 13: You’re done!
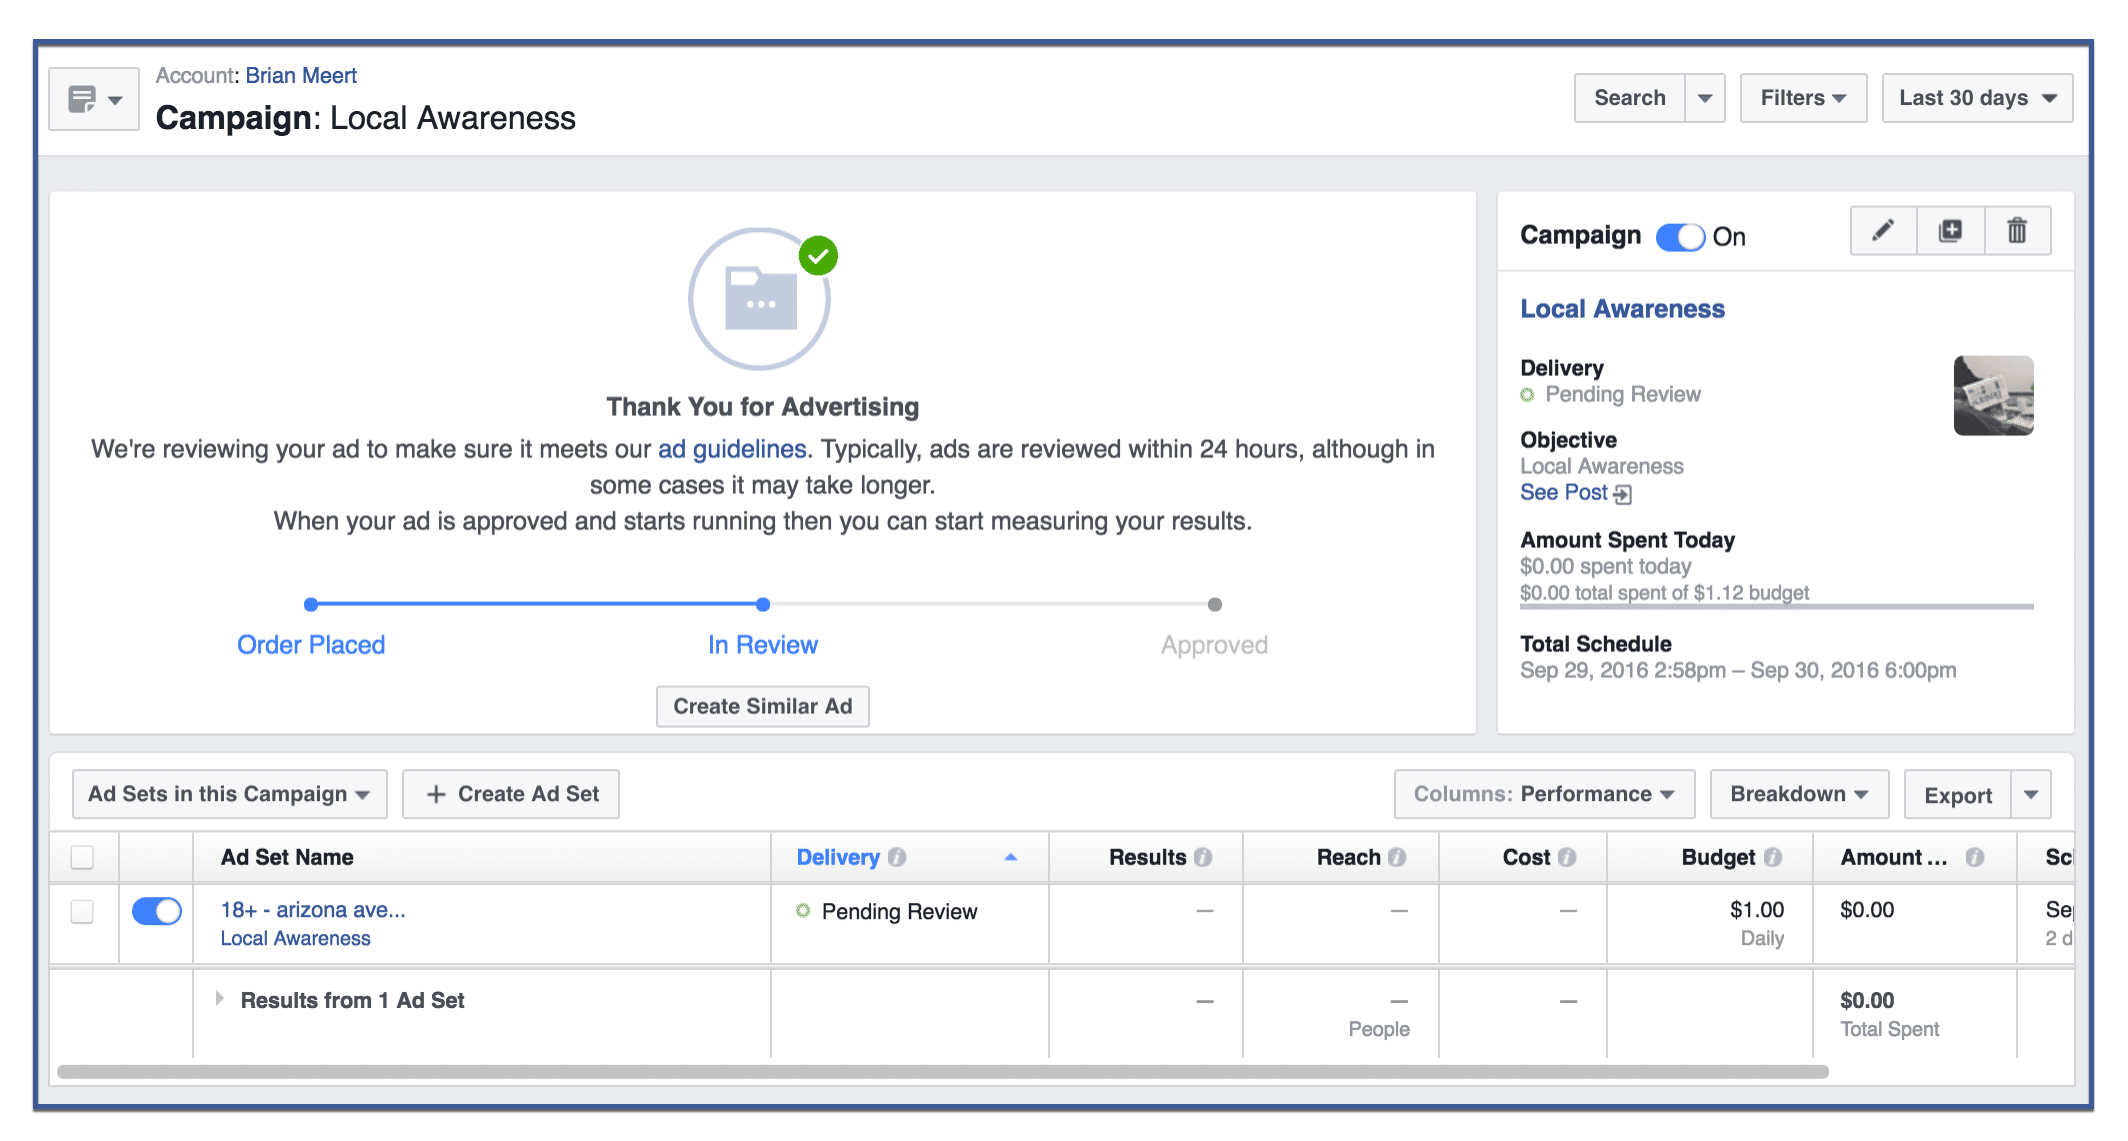
Congratulations, you’ve created an ad! Your ad should appear on this page.