Pixel Perfect is an app on Shopify that allows you to install pixels and product feeds on your Shopify store—no coding required! To be able to install this app, you must fulfill these three requirements:
- You must have a Facebook Pixel ID
- Your store must not have any existing Facebook Pixels installed
- You must not have any existing Facebook tracking code installed in the “additional scripts to run after checkout” section of your store.
If you want to learn how to install Pixel Perfect to Shopify, follow the steps listed below.
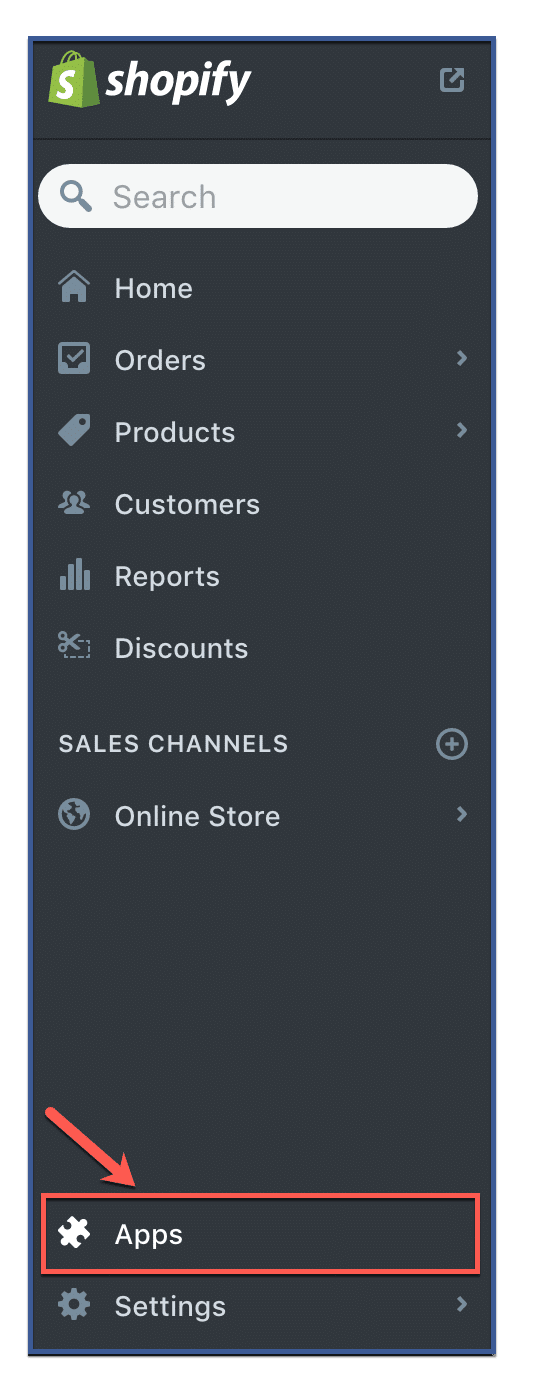
Step 1: Click “Apps”
Once logged in to Shopify, click “Apps,” a tab located on the bottom part of the left hand column.
Step 2: Visit Shopify App Store
Click “Visit Shopify App Store.”

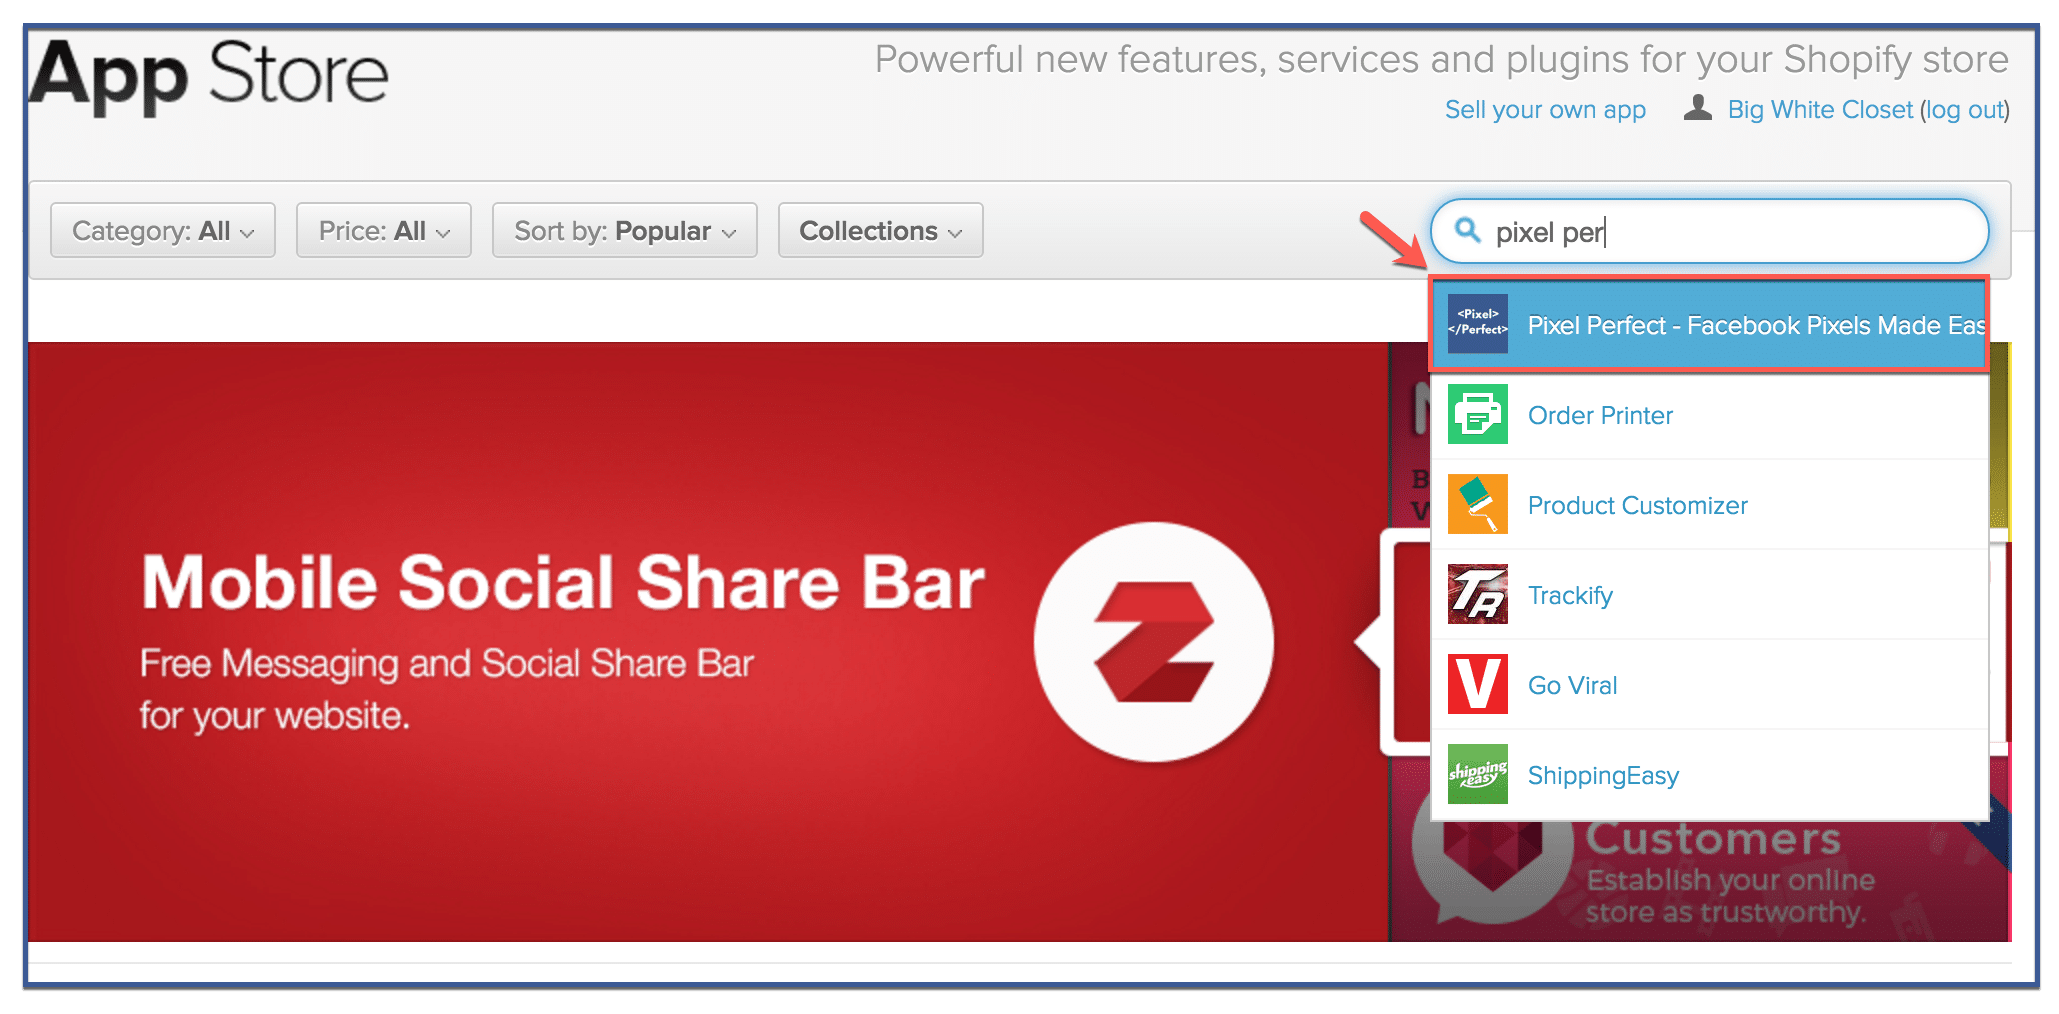
Step 3: Search for Pixel Perfect
Type in Pixel Perfect on the search engine then click “Pixel Perfect.”
Step 4: Click “Get”
Click “Get.” Note that you will get a 7-day free trial. After 7 days, your card will be charged $14 dollars each month.

Step 5: Click “Install App”
Click “Install App.”

Step 6: Click “Approve Charge”
Click “Approve Charge.” Note that this is only a test charge. You will not be billed for your purchase.

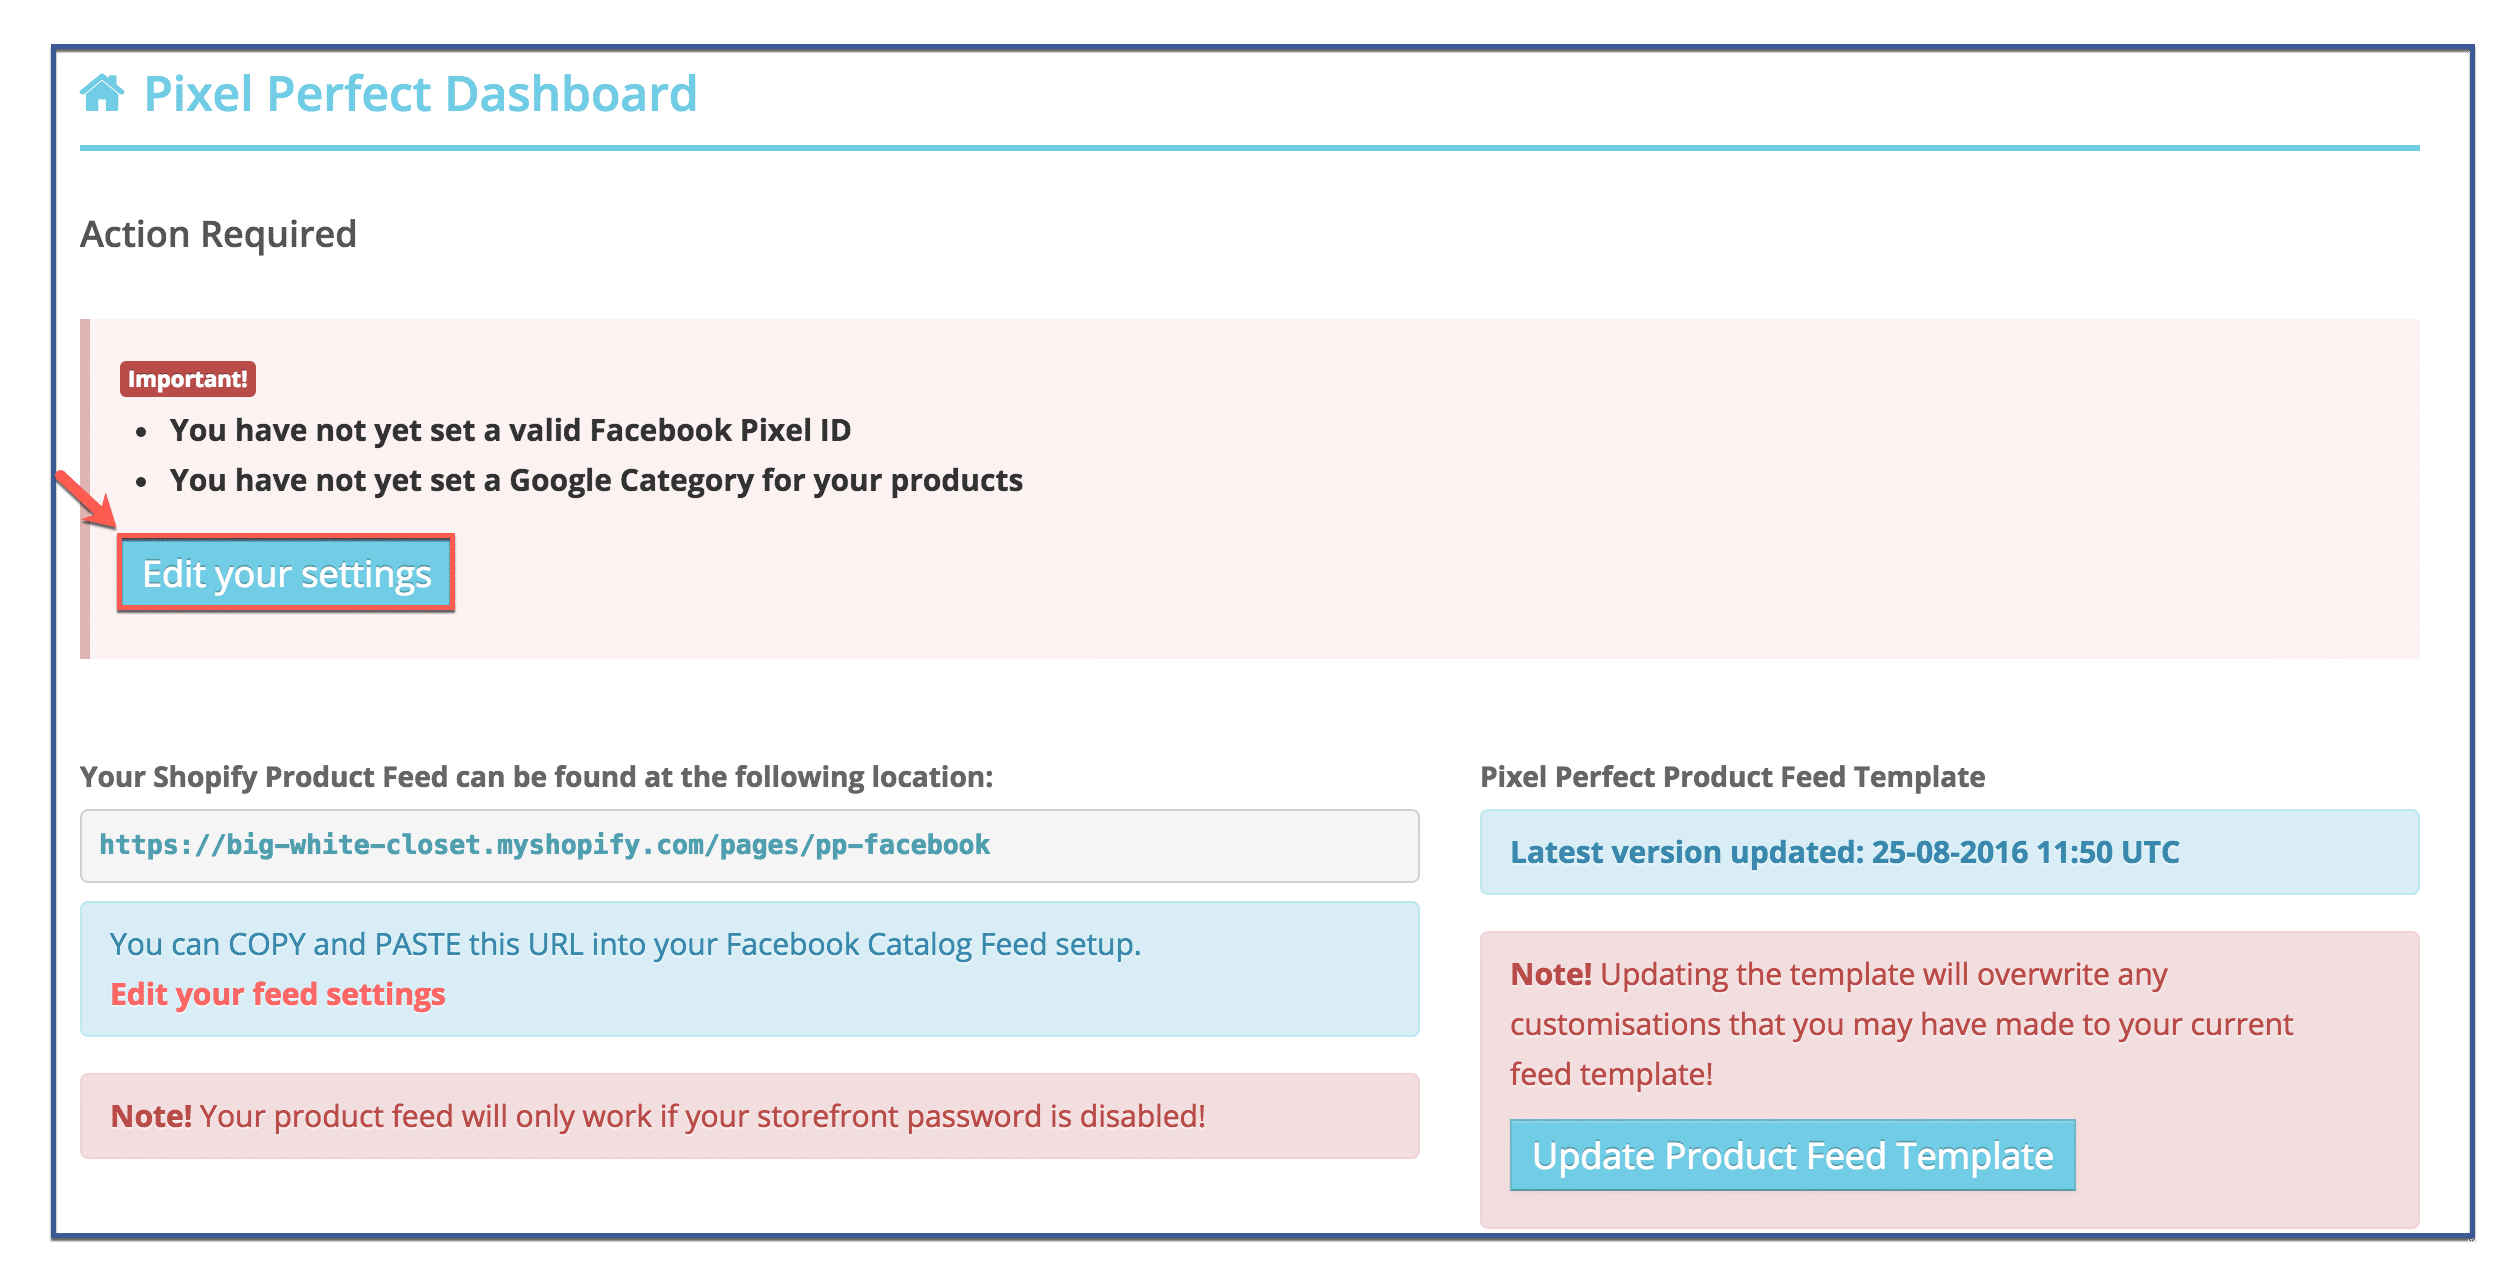
Step 7: Edit your settings
Click “Edit Settings” to add your Facebook Pixel ID to pixel perfect, as well as assign a category for your products. This step is required.
Step 8: Paste your Facebook Pixel ID
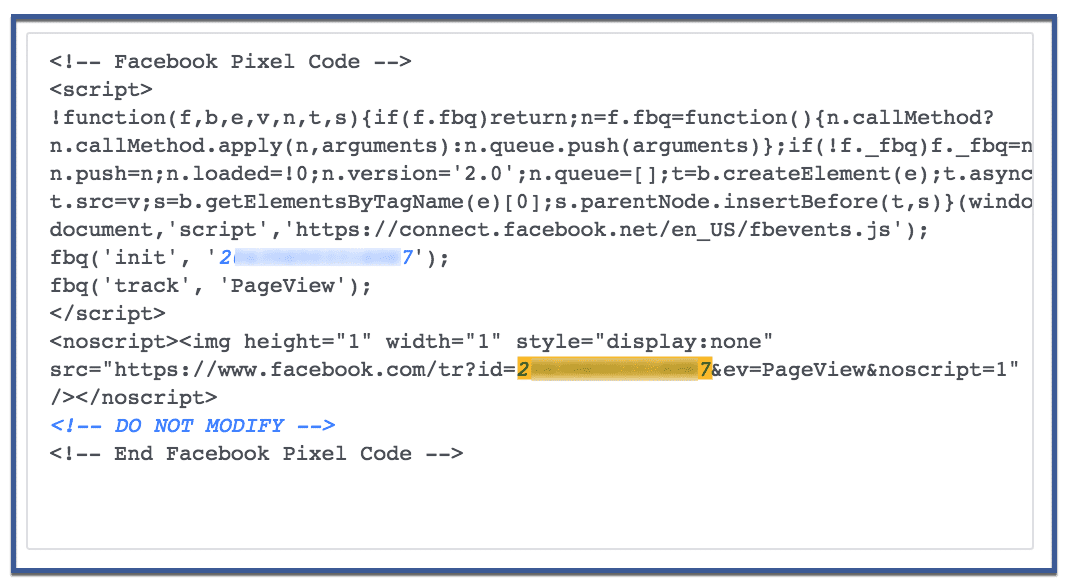
Scroll down the page until you find the section that says “Facebook Pixel ID.” Afterward, paste in your Facebook Pixel ID. If you don’t know how to find your Facebook Pixel or if you want to learn how to create a Facebook Pixel visit How To Create a Facebook Pixel.
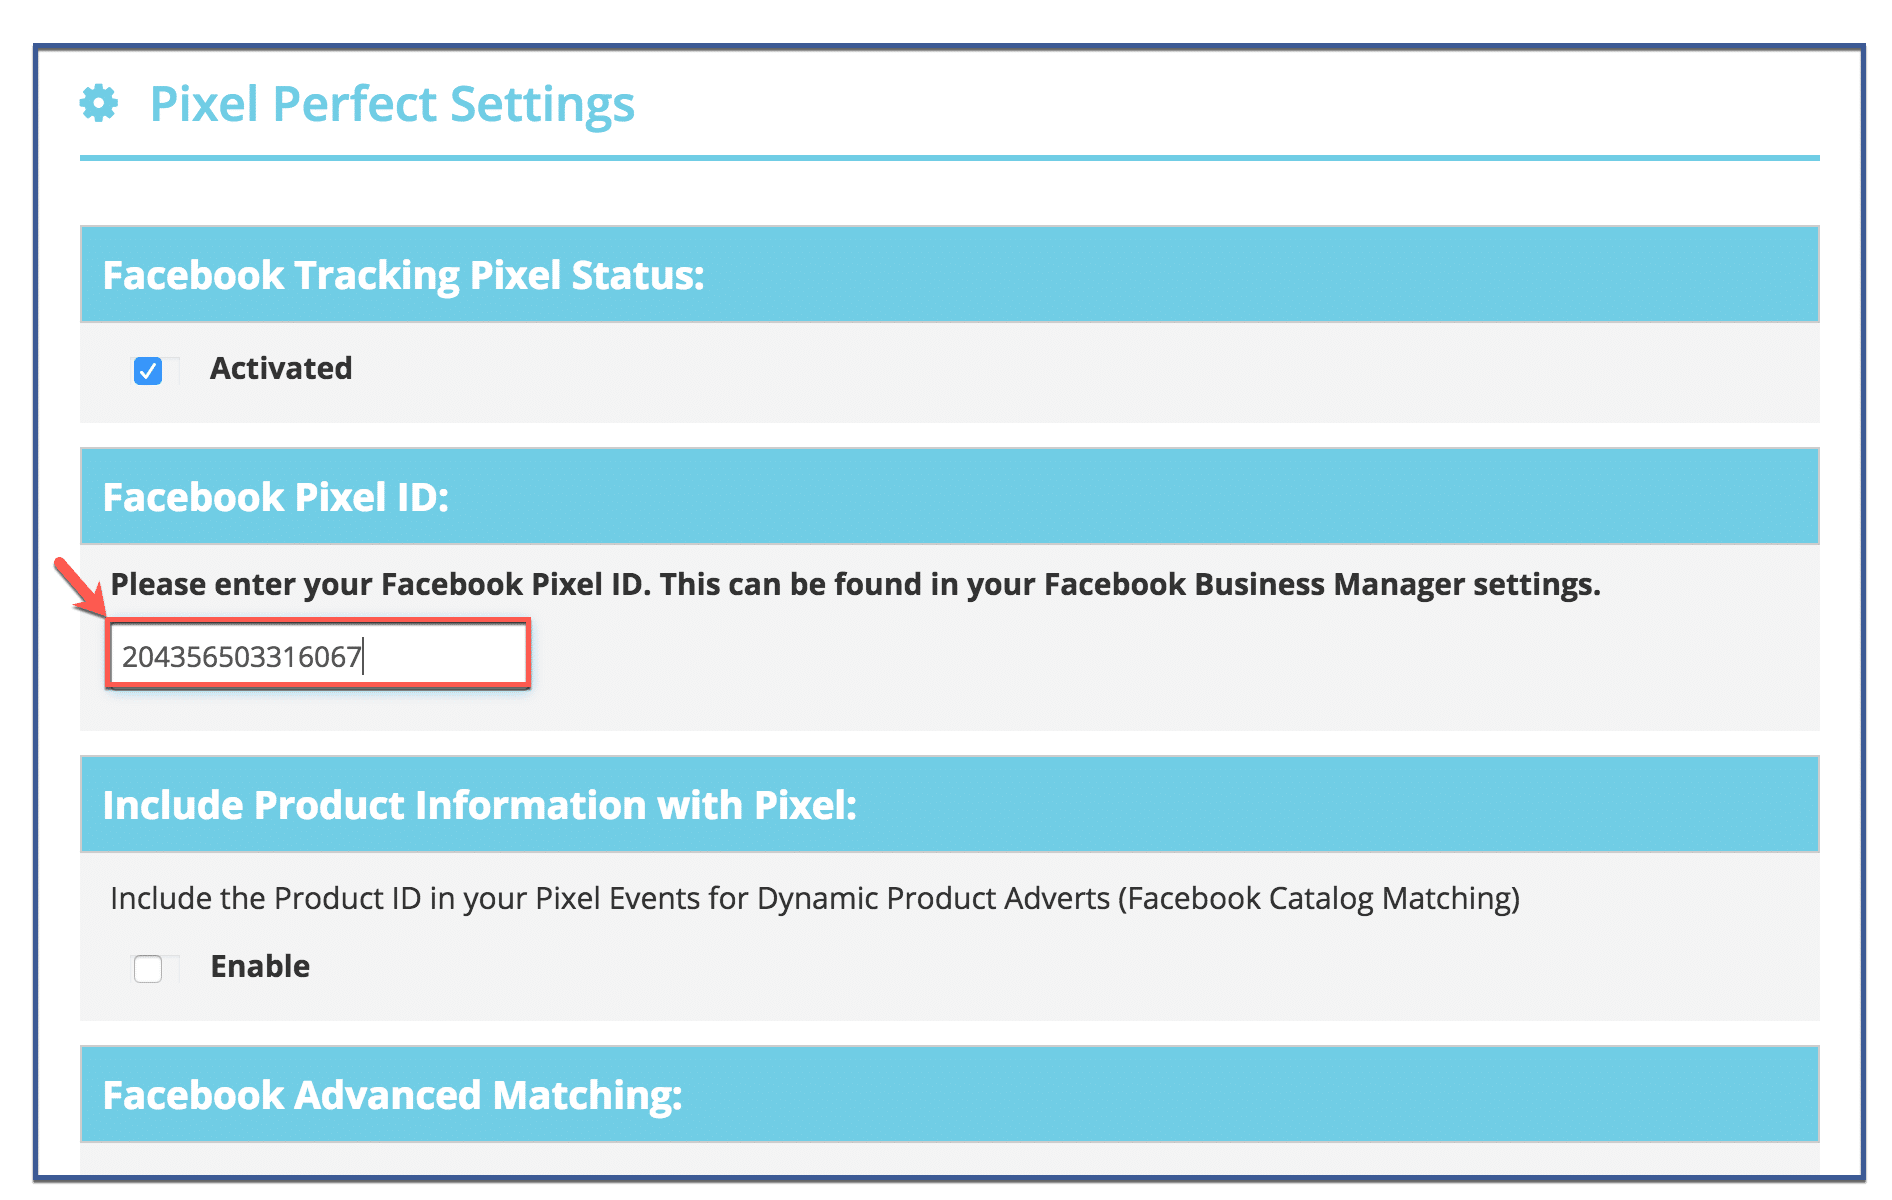
Your Pixel ID is the number highlighted below.
Step 9: Choose Google category
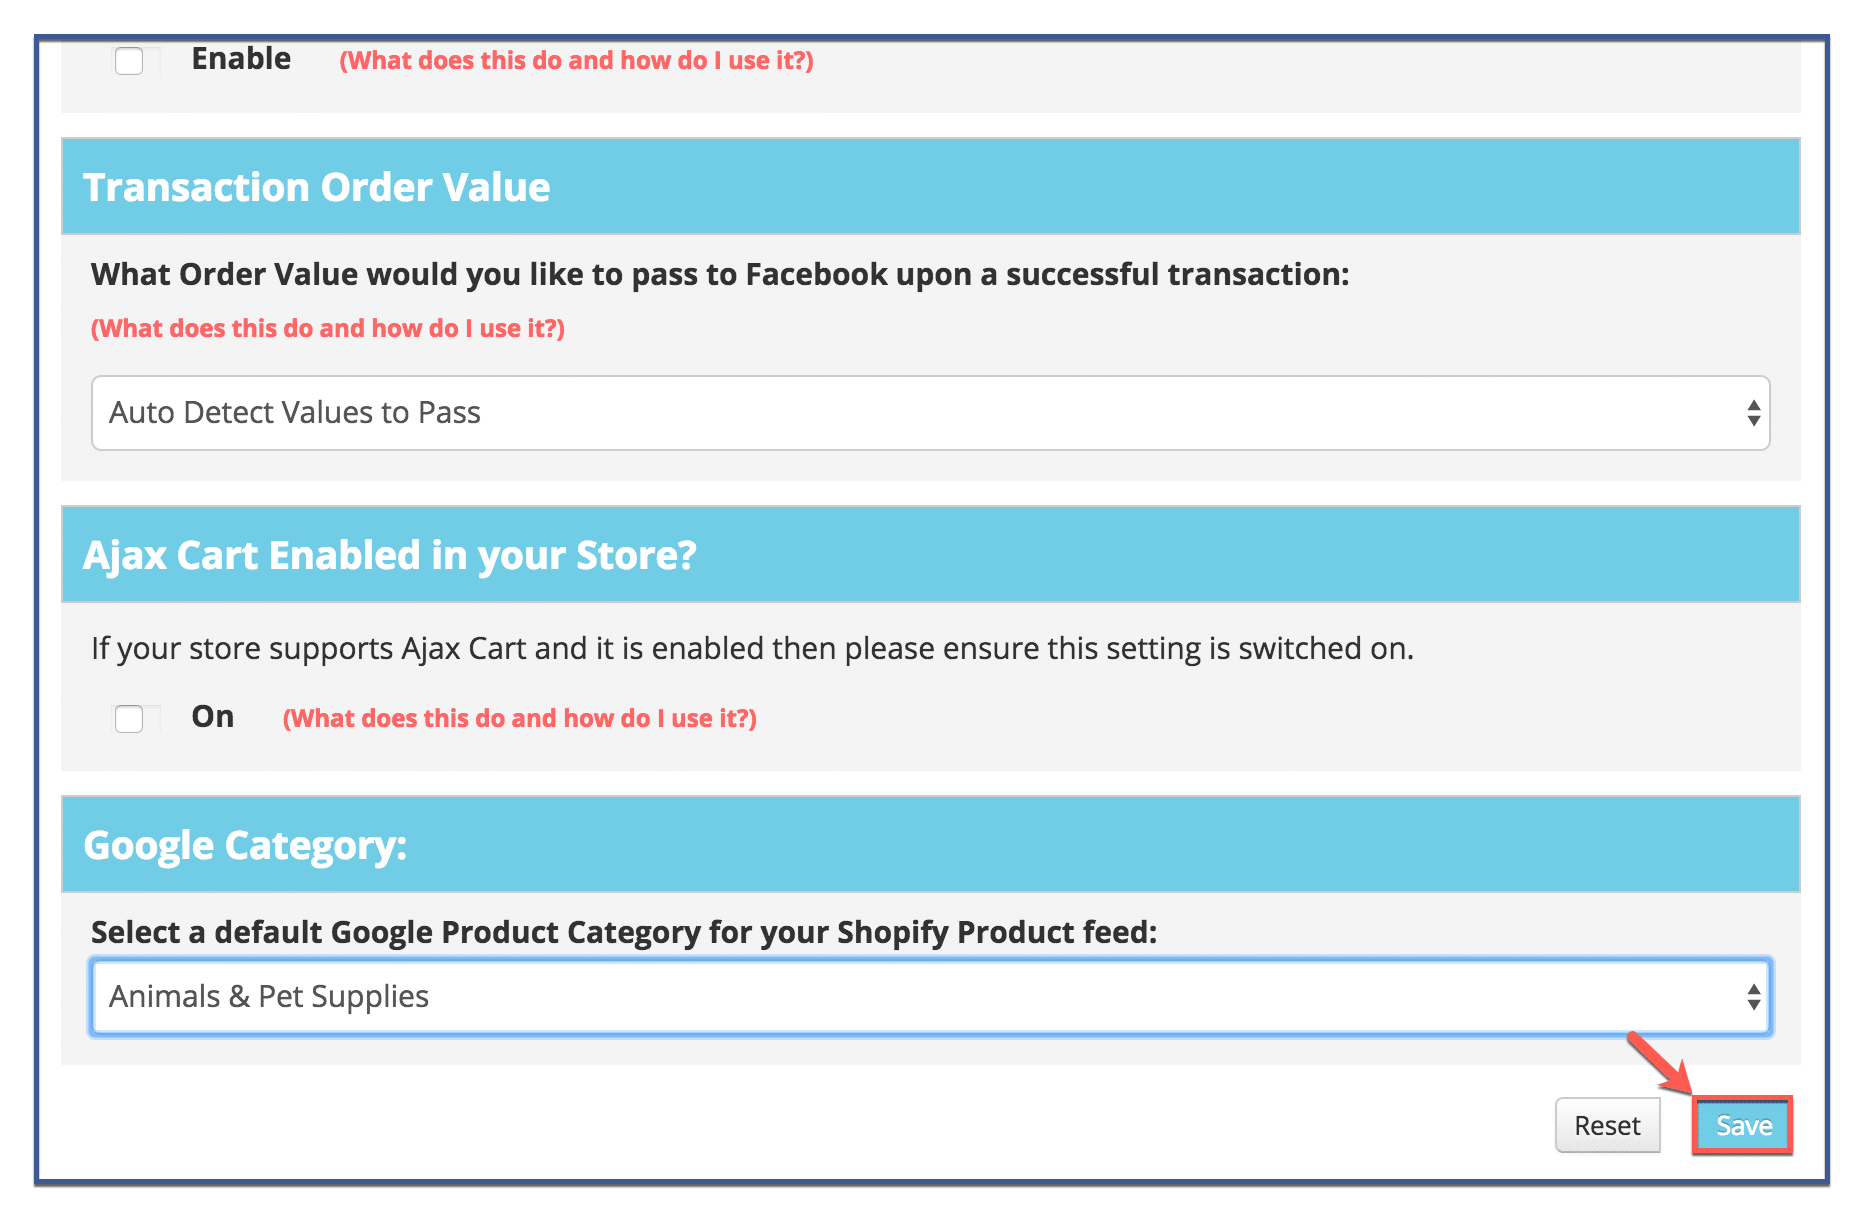
Scroll to the bottom until you hit the section called “Google Category.” Choose a category that describes your product. Afterward, hit “Save.”
Step 10: You’re done!
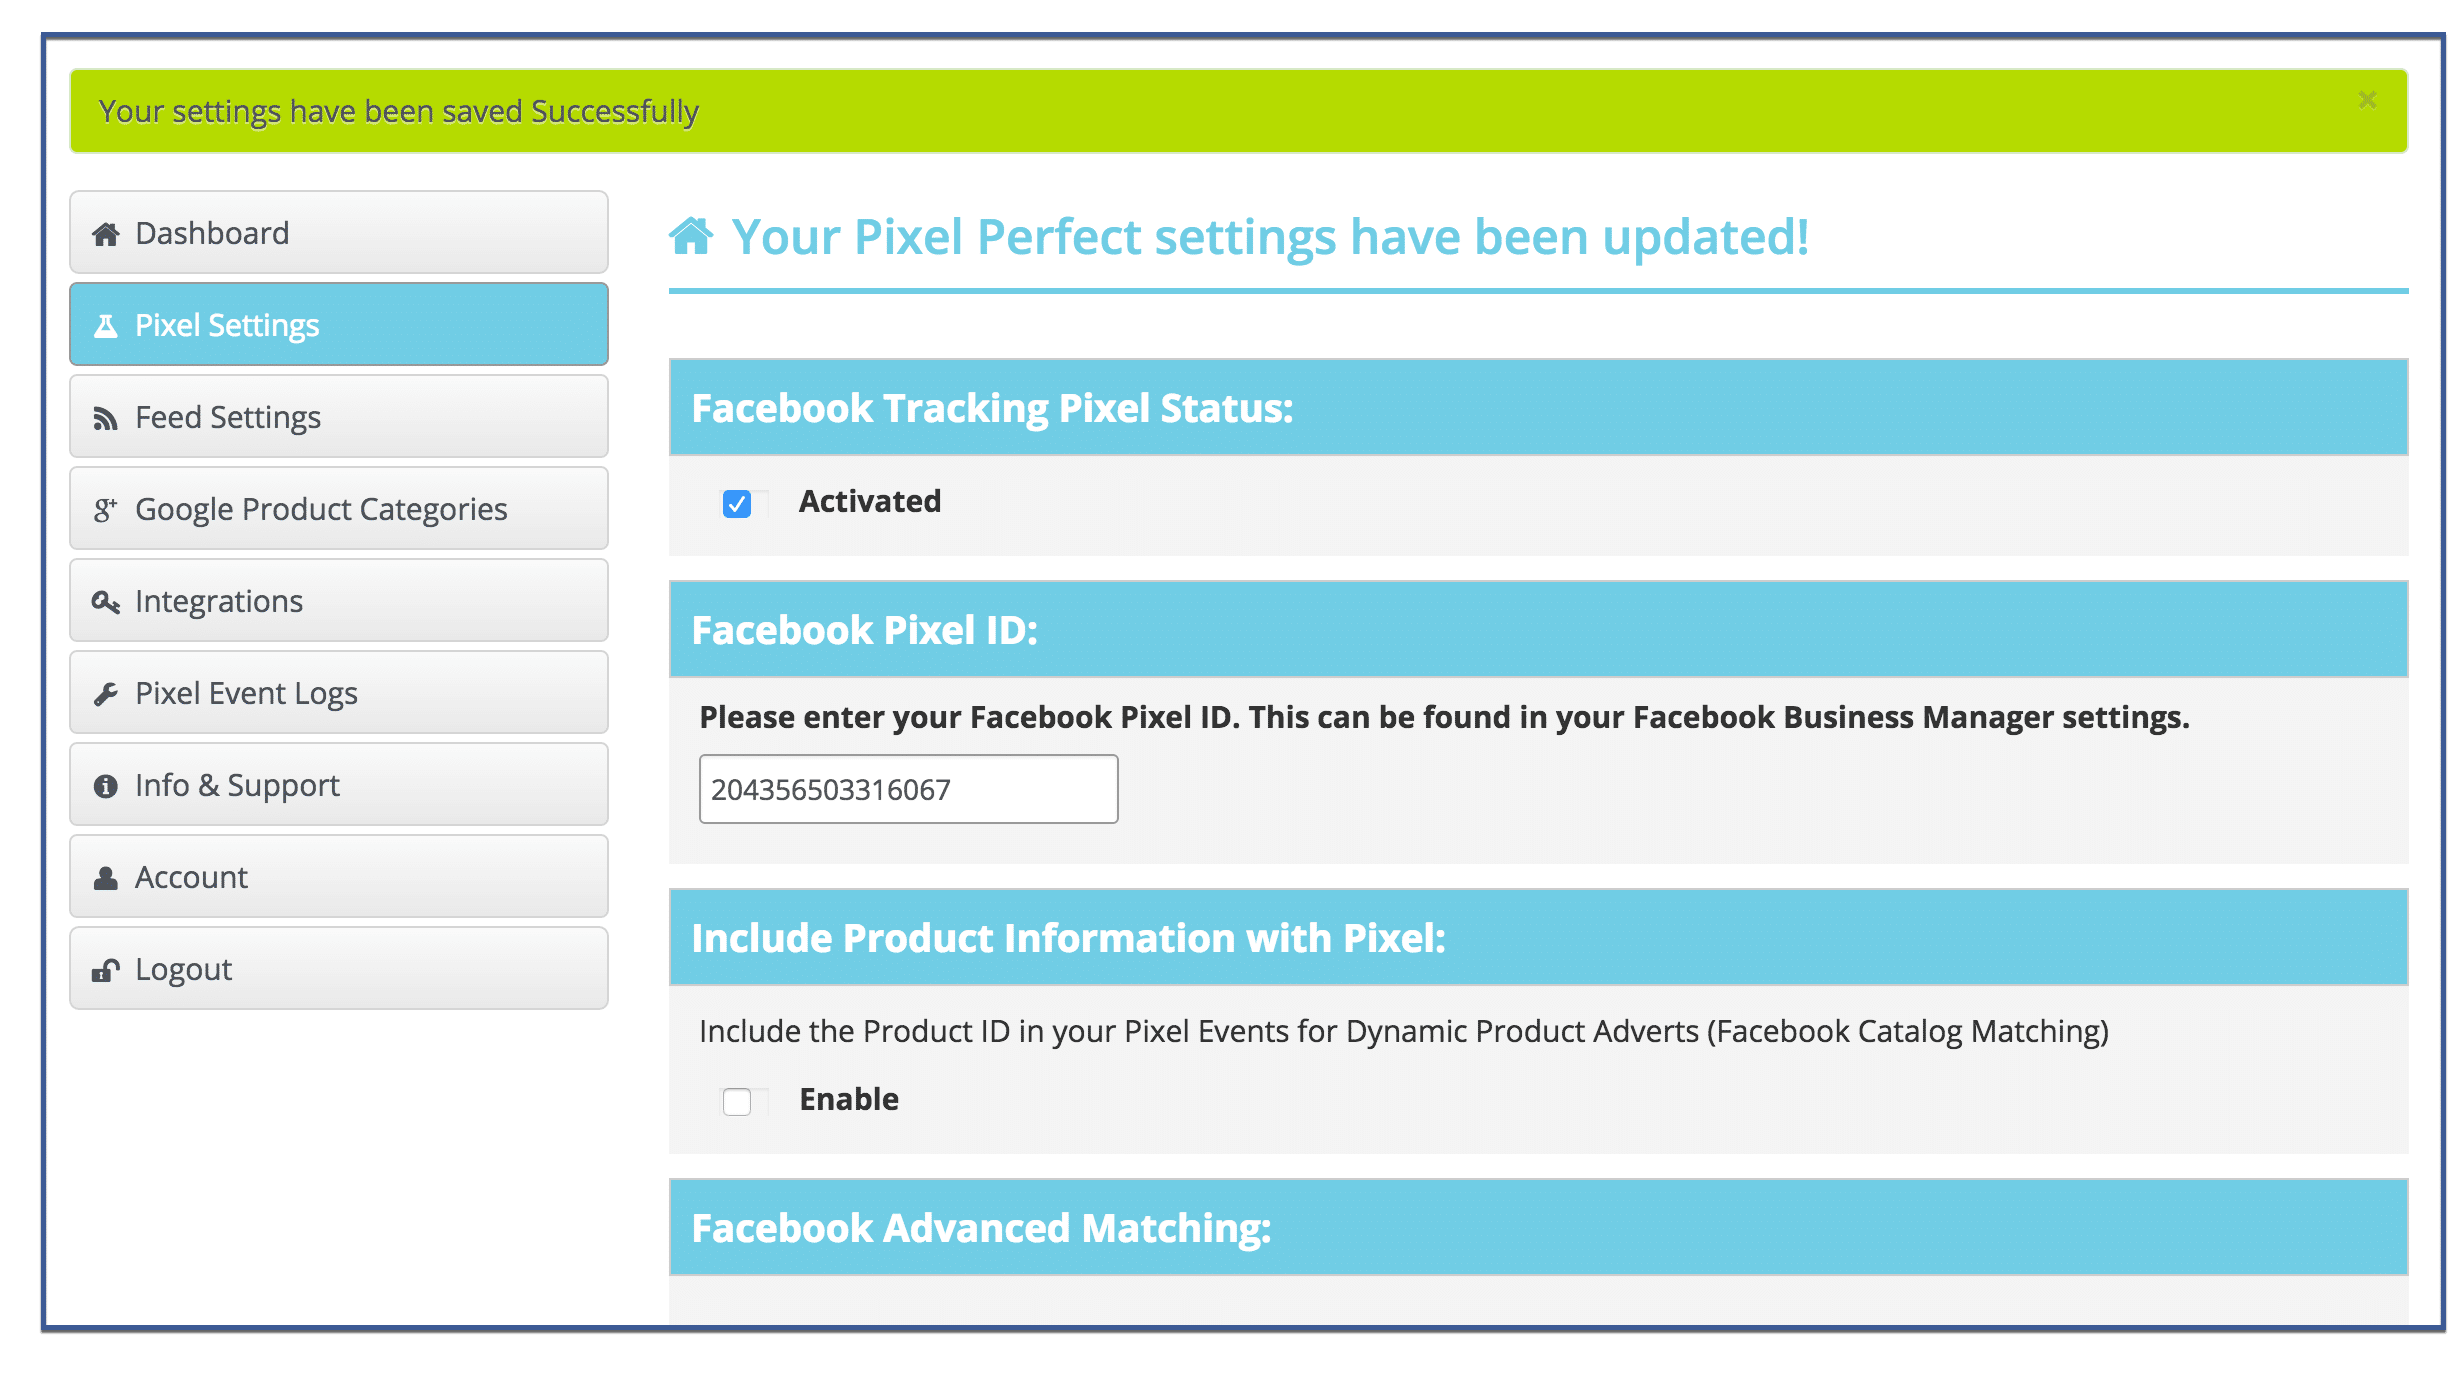
Your Facebook Pixel and category should be saved. There are no further steps required of you.
Did you find this article helpful and informative? If so, comment, like, or share!
