In order to track conversions, set up remarketing and create custom conversions, you’ll need to install the Facebook Pixel on the header of your website. If you do not have a Facebook Pixel, visit How To Create a Facebook Pixel to create a pixel in four easy steps. However, if you already have a pixel that you want to install into WordPress, follow the steps below to install the Facebook pixel in under five minutes.
Option 1: View Pixel
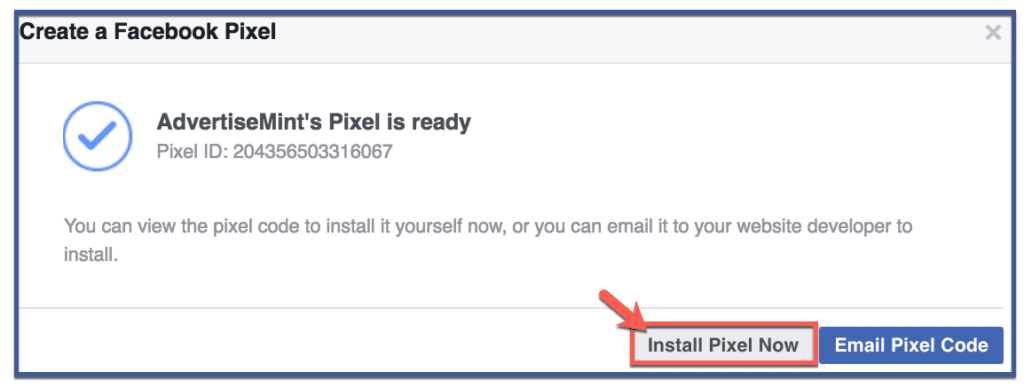
Option 1, Step 1: Click “Install Pixel Now“
Click “Install Pixel Now” to view your pixel code.

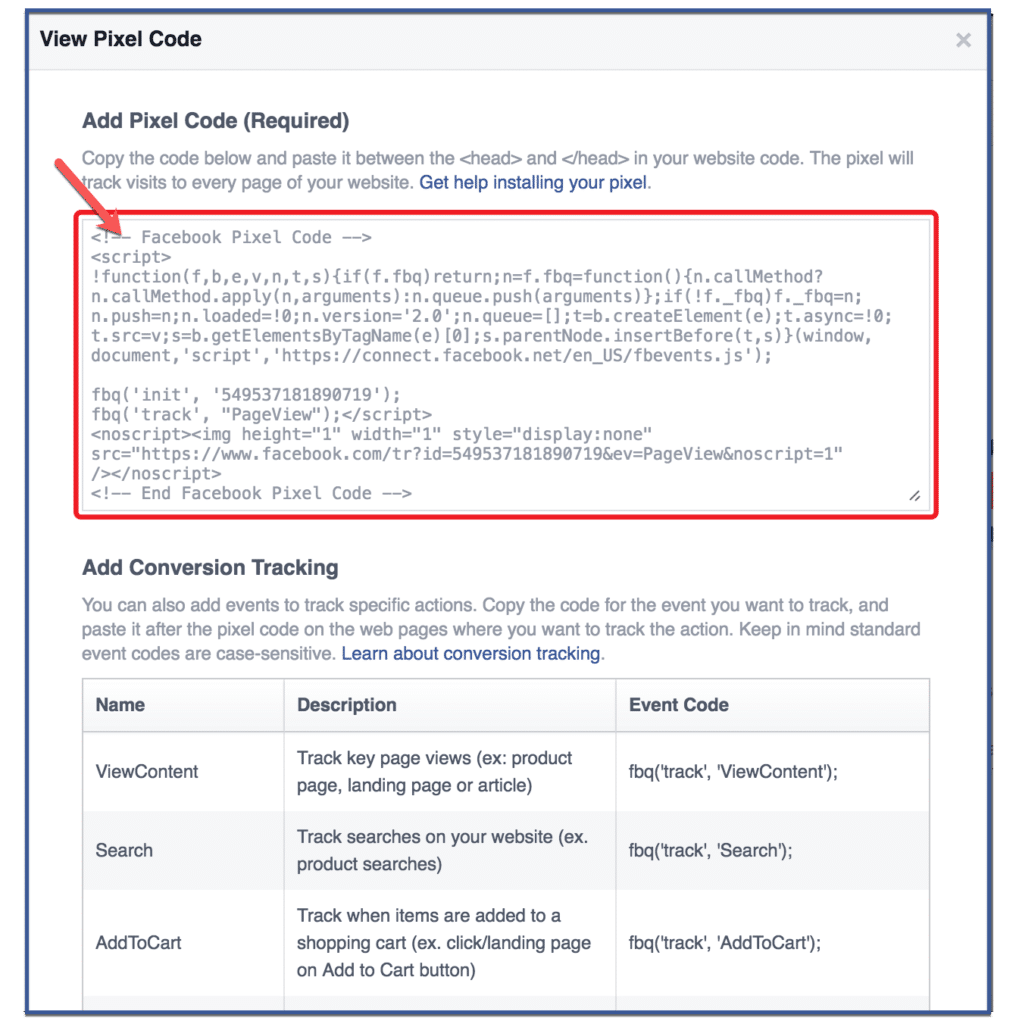
Option 1, Step 2: Copy Code
Copy and paste the code between the <head> and </head> tags within your website code. This code will track visits to every page of your website.

Option 2: Email Pixel
If you want to send your pixel code to your email, follow the steps below.
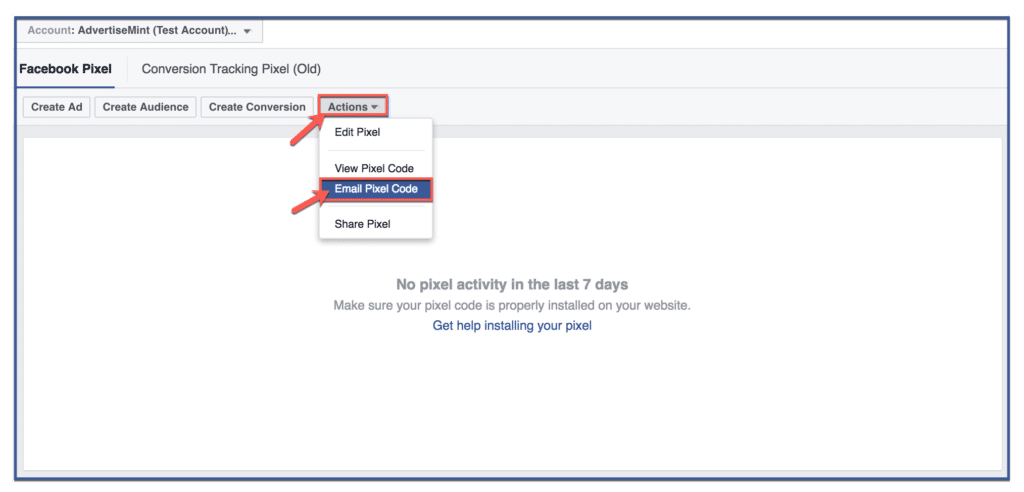
Option 2, Step 1: Click “Actions” & “Email Pixel Code”
Click the “Actions” tab then “Email Pixel Code” on the drop down menu.

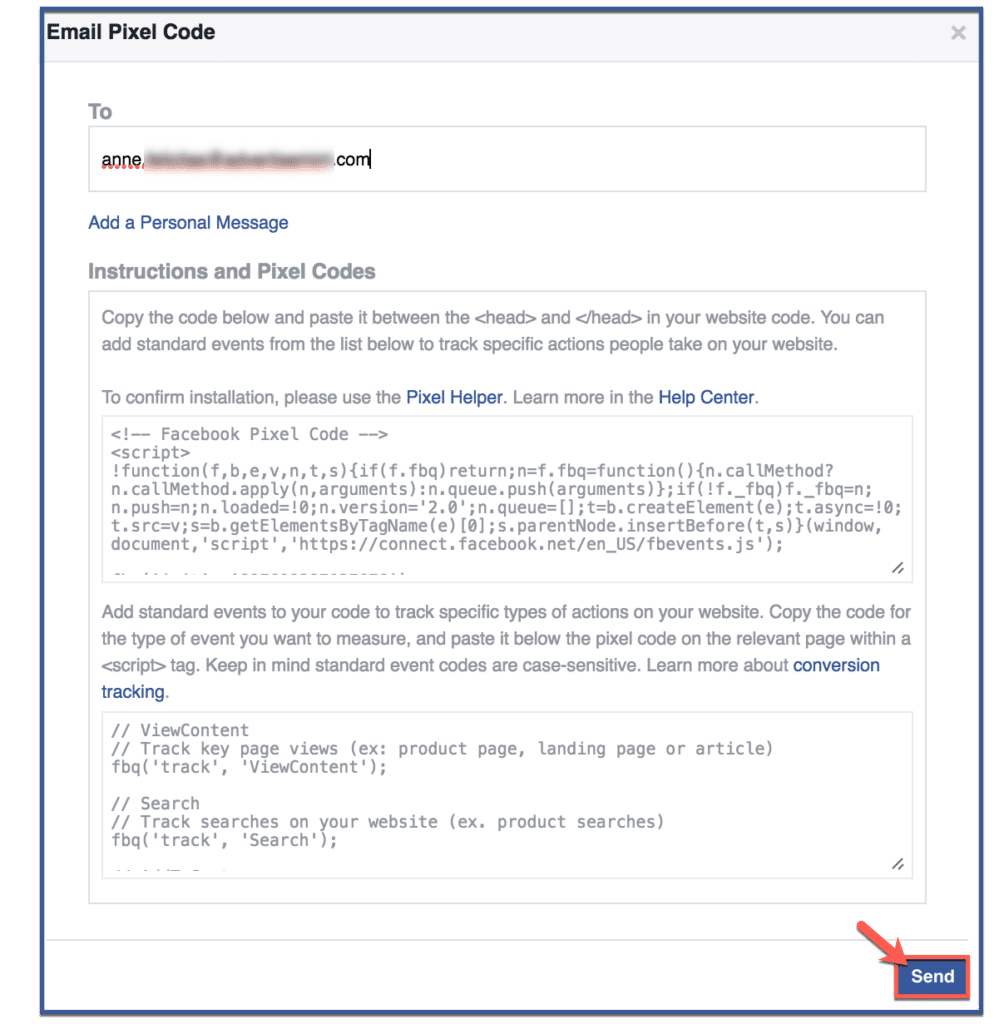
Option 2, Step 2: Click “Send”
Type your email then click “Send“.

Option 2, Step 3: Click “Done”
Afterward, click “Done” to finish.
Step 2: Install the Header & Footer Plugin to your WordPress site.
From your WordPress site, click on “Plugins“, then “Add New” then enter “Header and Footer” into the Plugin search box. Click the “Install” button.
Step 3: Paste the Facebook Pixel into Header & Footer Plugin.
Inside the admin section of WordPress, navigate to “Settings”, then “Header and Footer”. Once inside, make sure the tab “Page Head and Footer” is selected and then find the section titled “Code to be added on HEAD section of every page“. Paste your Facebook pixel into this area and press “Save” at the bottom of the page.
That’s it. You’ve now installed the Facebook pixel onto every page on your WordPress site.
