The Facebook Pixel is a powerful tool that can help you track user activity on your website and create targeted Facebook ads. But how do you install the Facebook Pixel to your website?
In this blog post, we’ll walk you through the steps on how to install the Facebook Pixel to Google Tag Manager. Google Tag Manager is a free tool that allows you to manage your website tags without having to edit your website code. This makes it easy to add the Facebook Pixel to your website without having to hire a developer.
What is a Facebook Pixel?
The Facebook Pixel is a fundamental tool that bridges your website and your Facebook advertising efforts. It’s a piece of code provided by Facebook that you place on your website, acting as a silent observer of user actions.
This unobtrusive code gathers data as users interact with your website, tracking events like page views, purchases, and sign-ups. The collected data is then transmitted back to Facebook, enabling you to understand user behavior comprehensively.
With this valuable information at your disposal, you can fine-tune your advertising strategy, optimize campaigns, and deliver more relevant content to your target audience.
In essence, the Facebook Pixel functions as a digital compass, guiding you toward more informed decisions and effective marketing outcomes.
Steps to Install the Facebook Pixel to Google Tag Manager
If you’ve already created a Facebook pixel code which you want to install to Google Tag Manager, you’ve come to the right place. Before you continue reading, however, create a Google Tag Manager account if you haven’t done so already. Otherwise, here are the steps to installing the Facebook Pixel to Google Tag Manager.
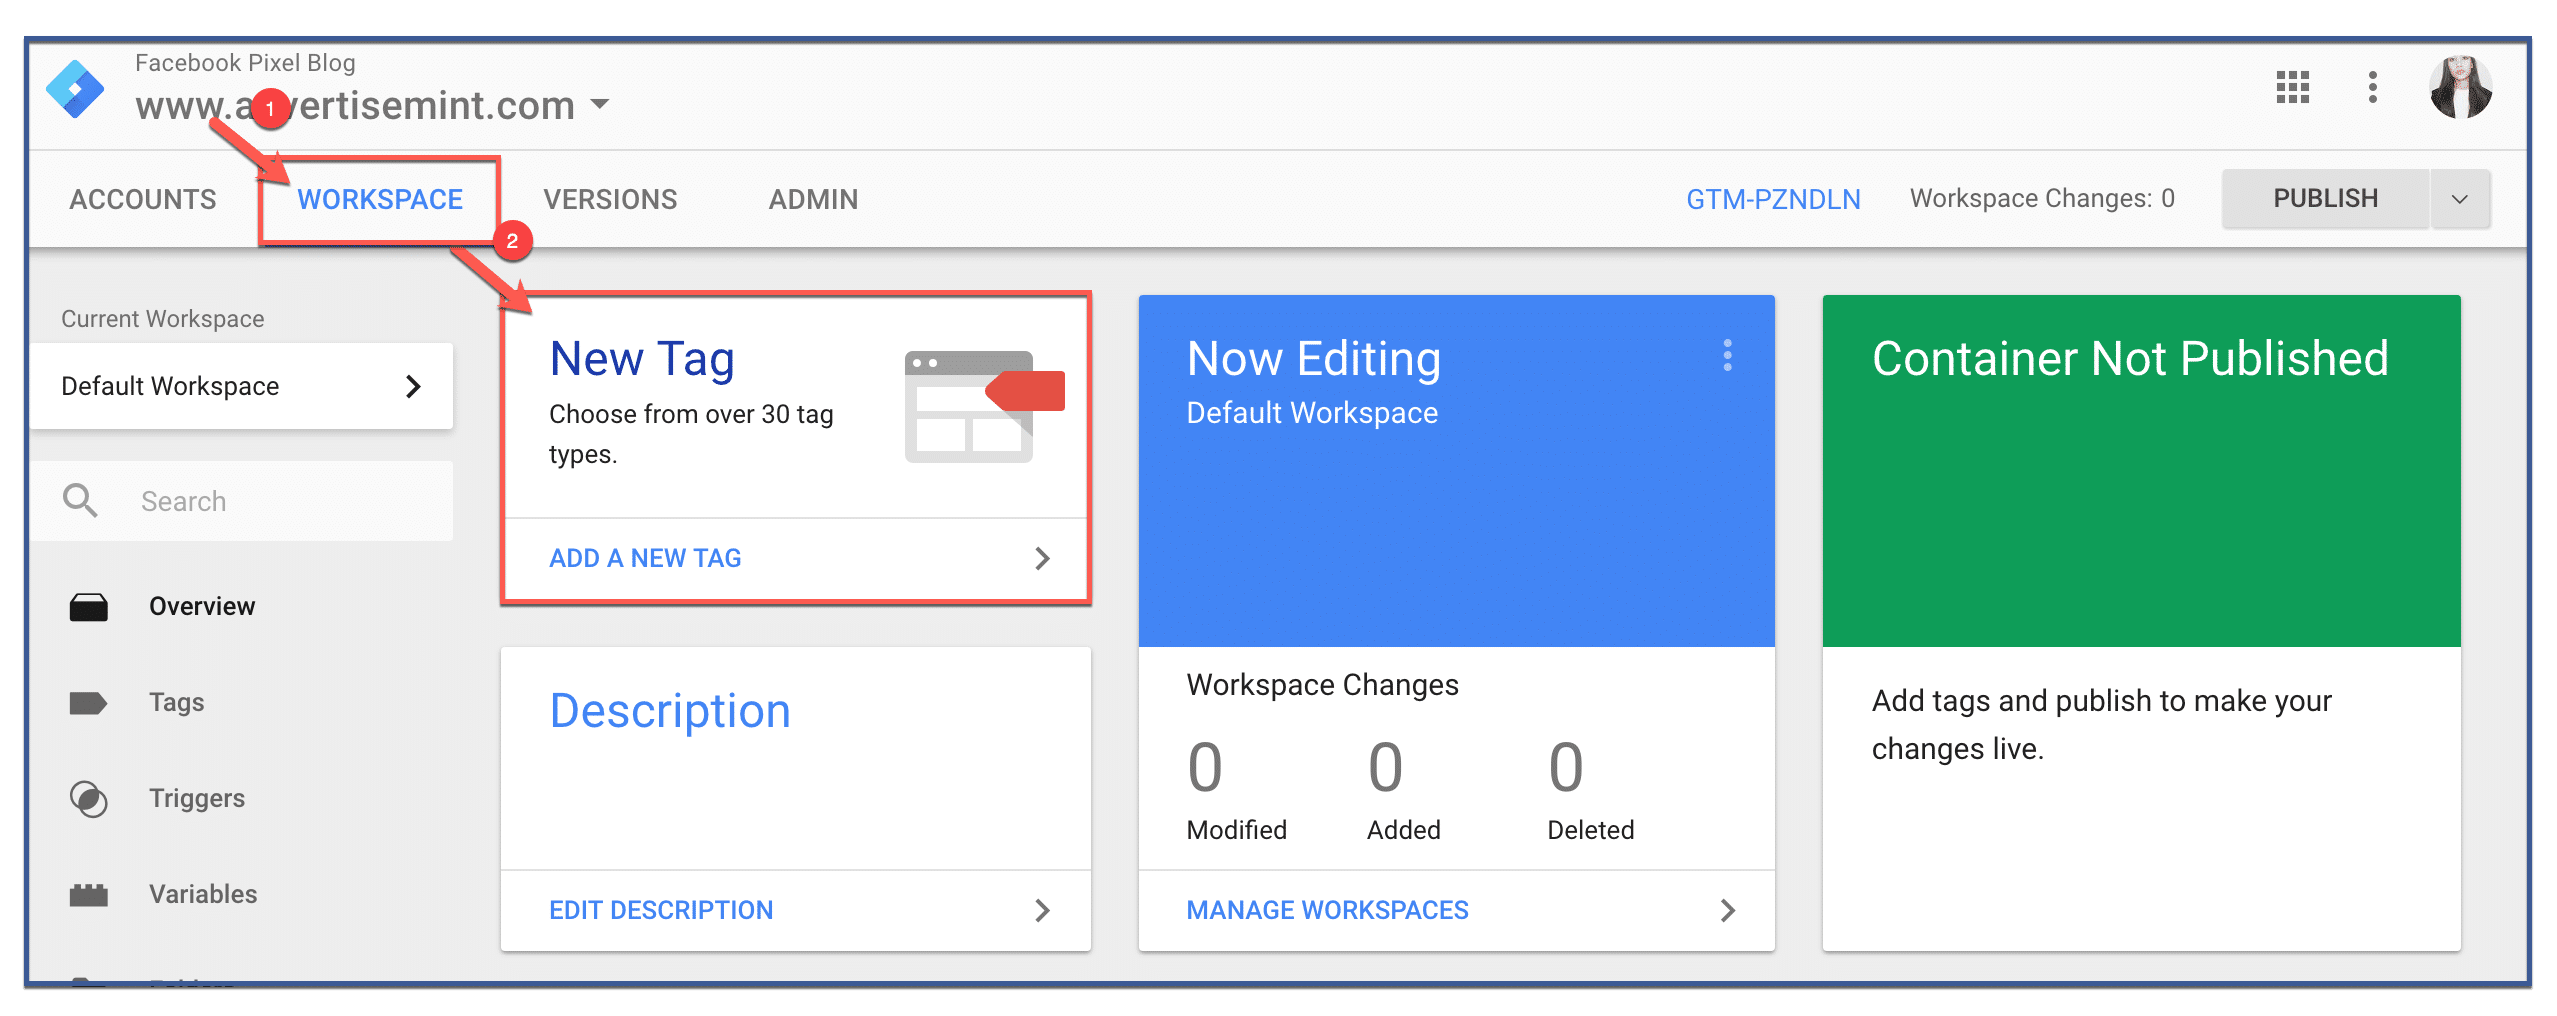
Step 1: Ad a new tag
Go to “Work Space” then click “New Tag” to add a new tag.
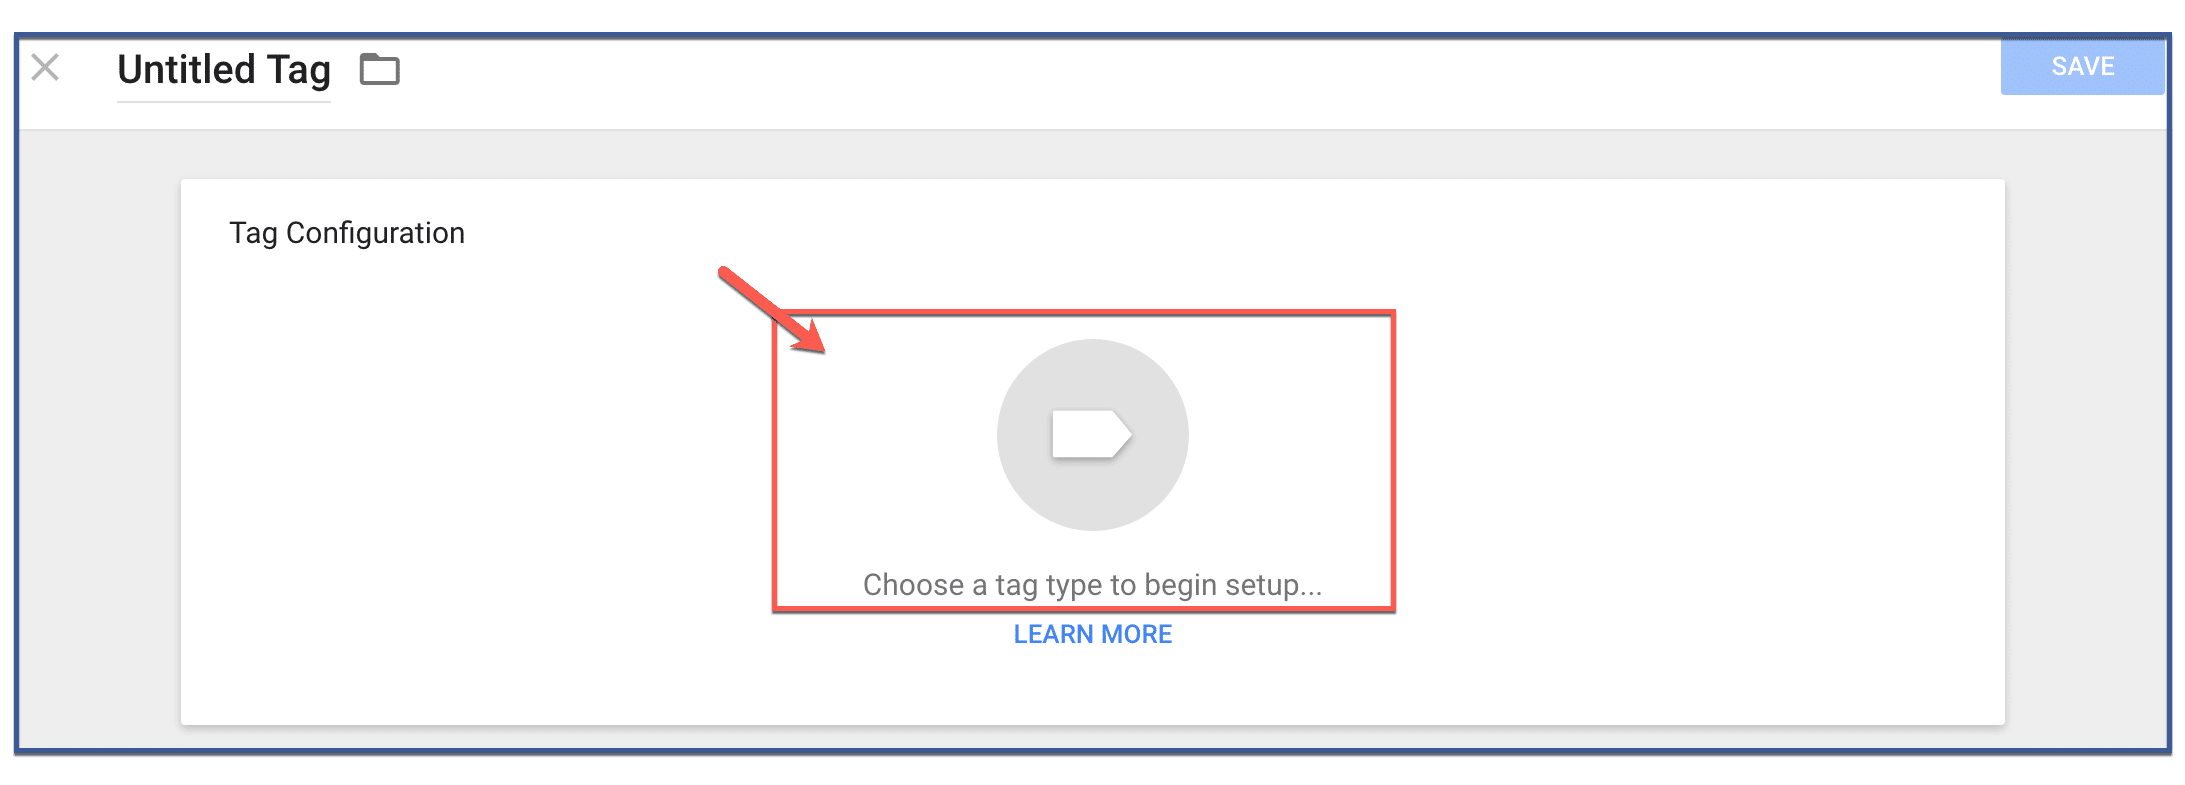
Step 2: Choose a tag type
Under “Tag Configuration,” click “Choose a tag type to begin setup.”
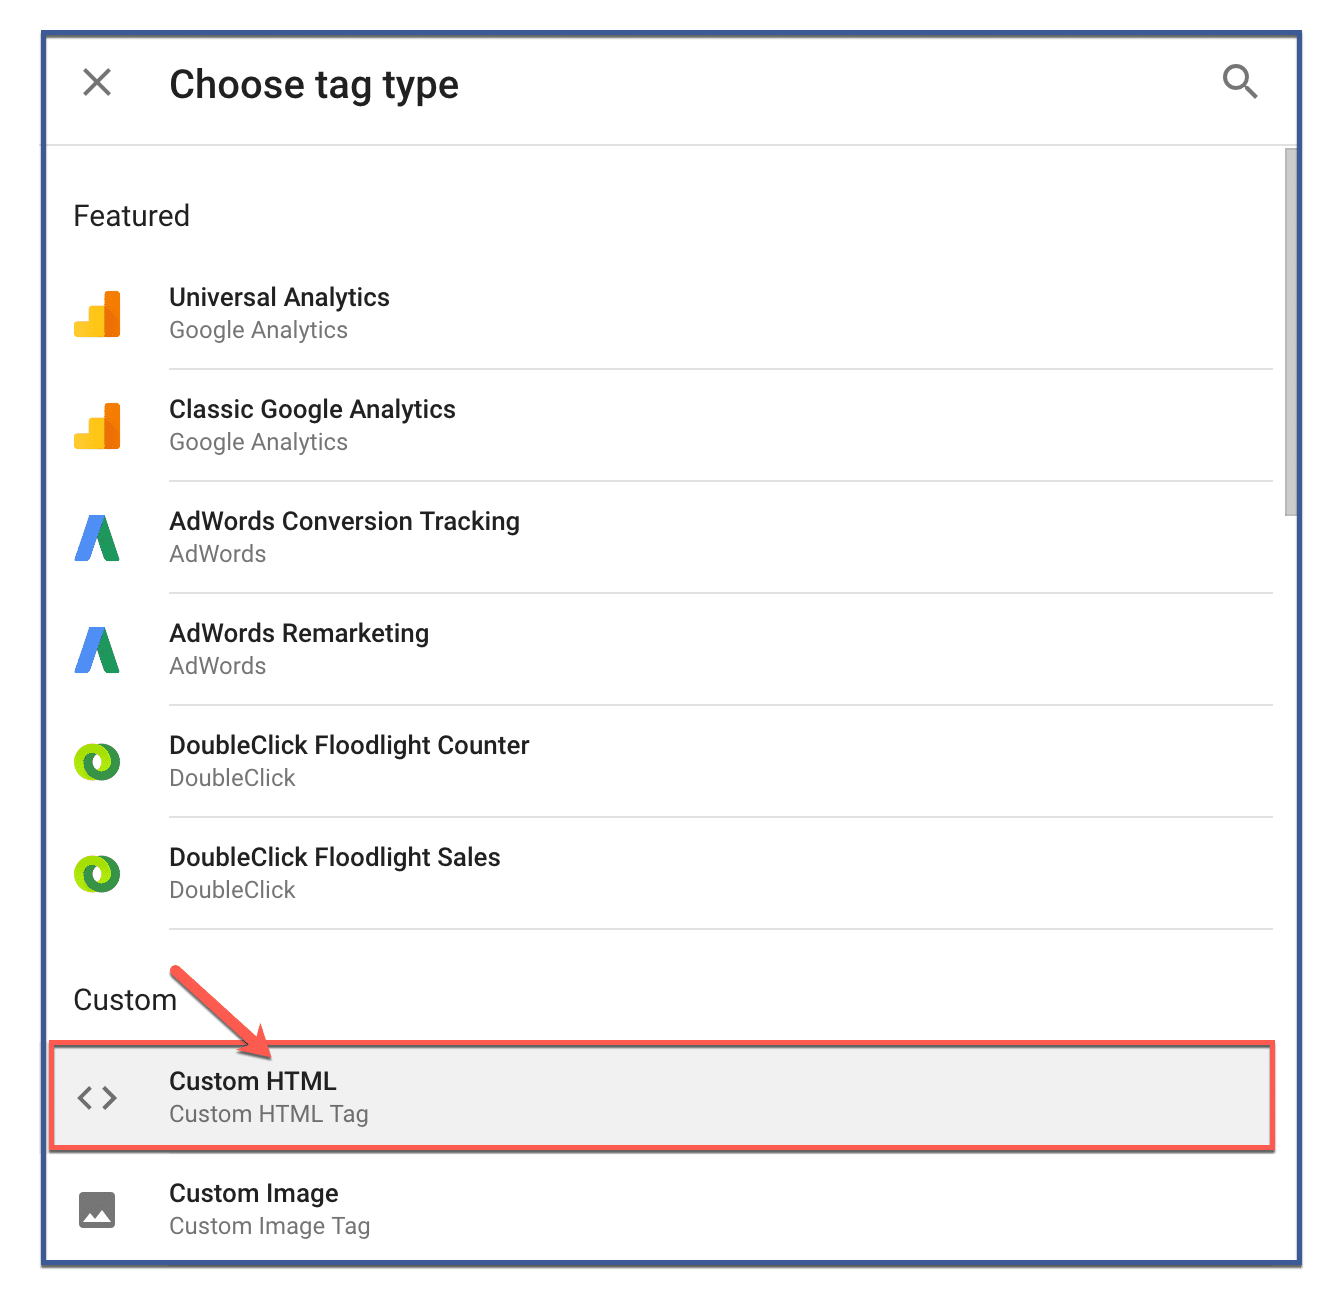
Step 3: Click “Custom HTML”
Scroll down to “Custom” then click “Custom HTML.”
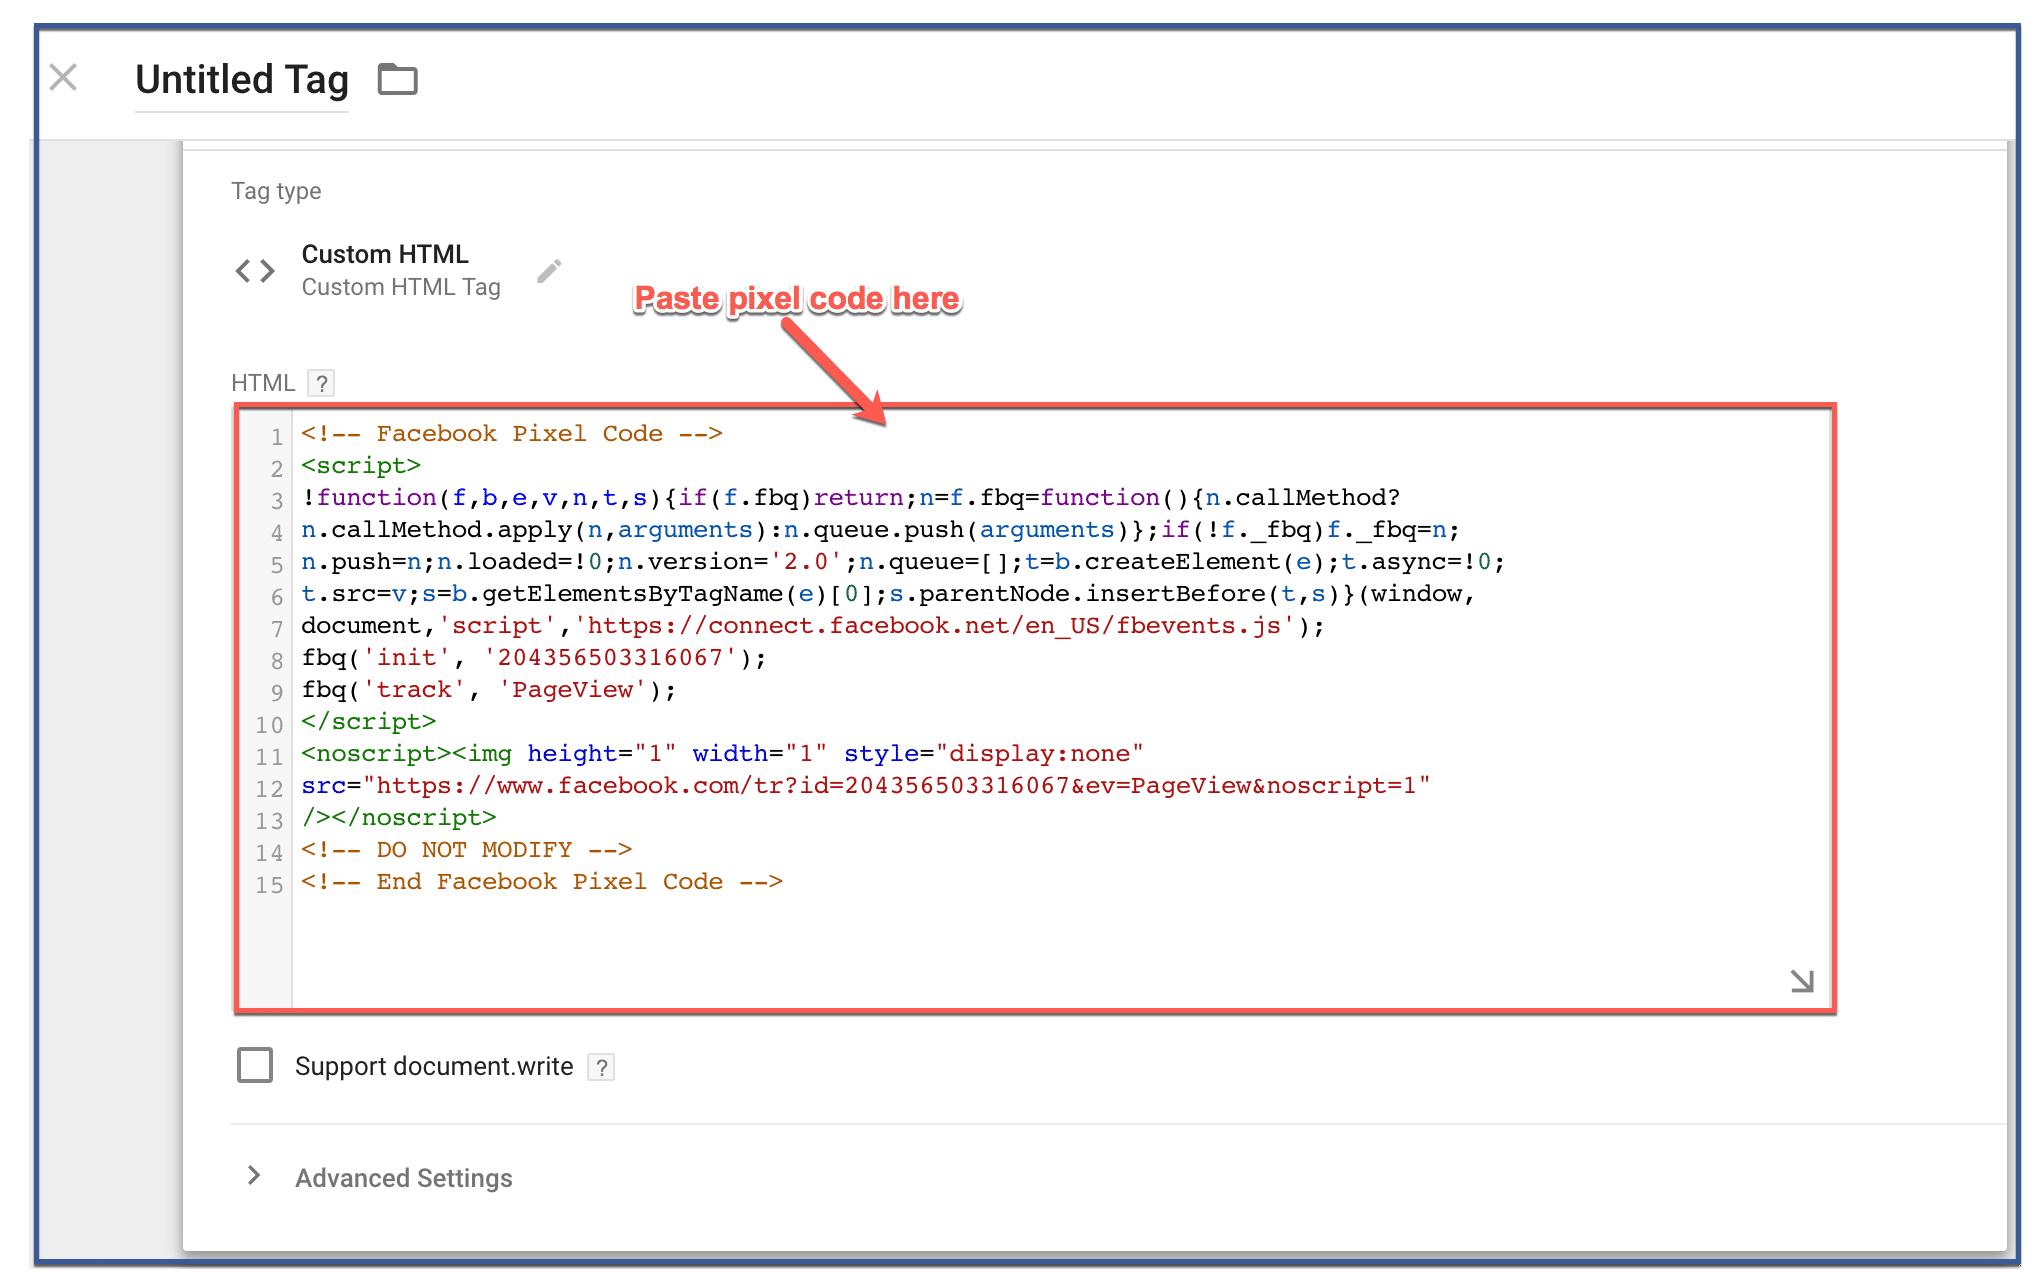
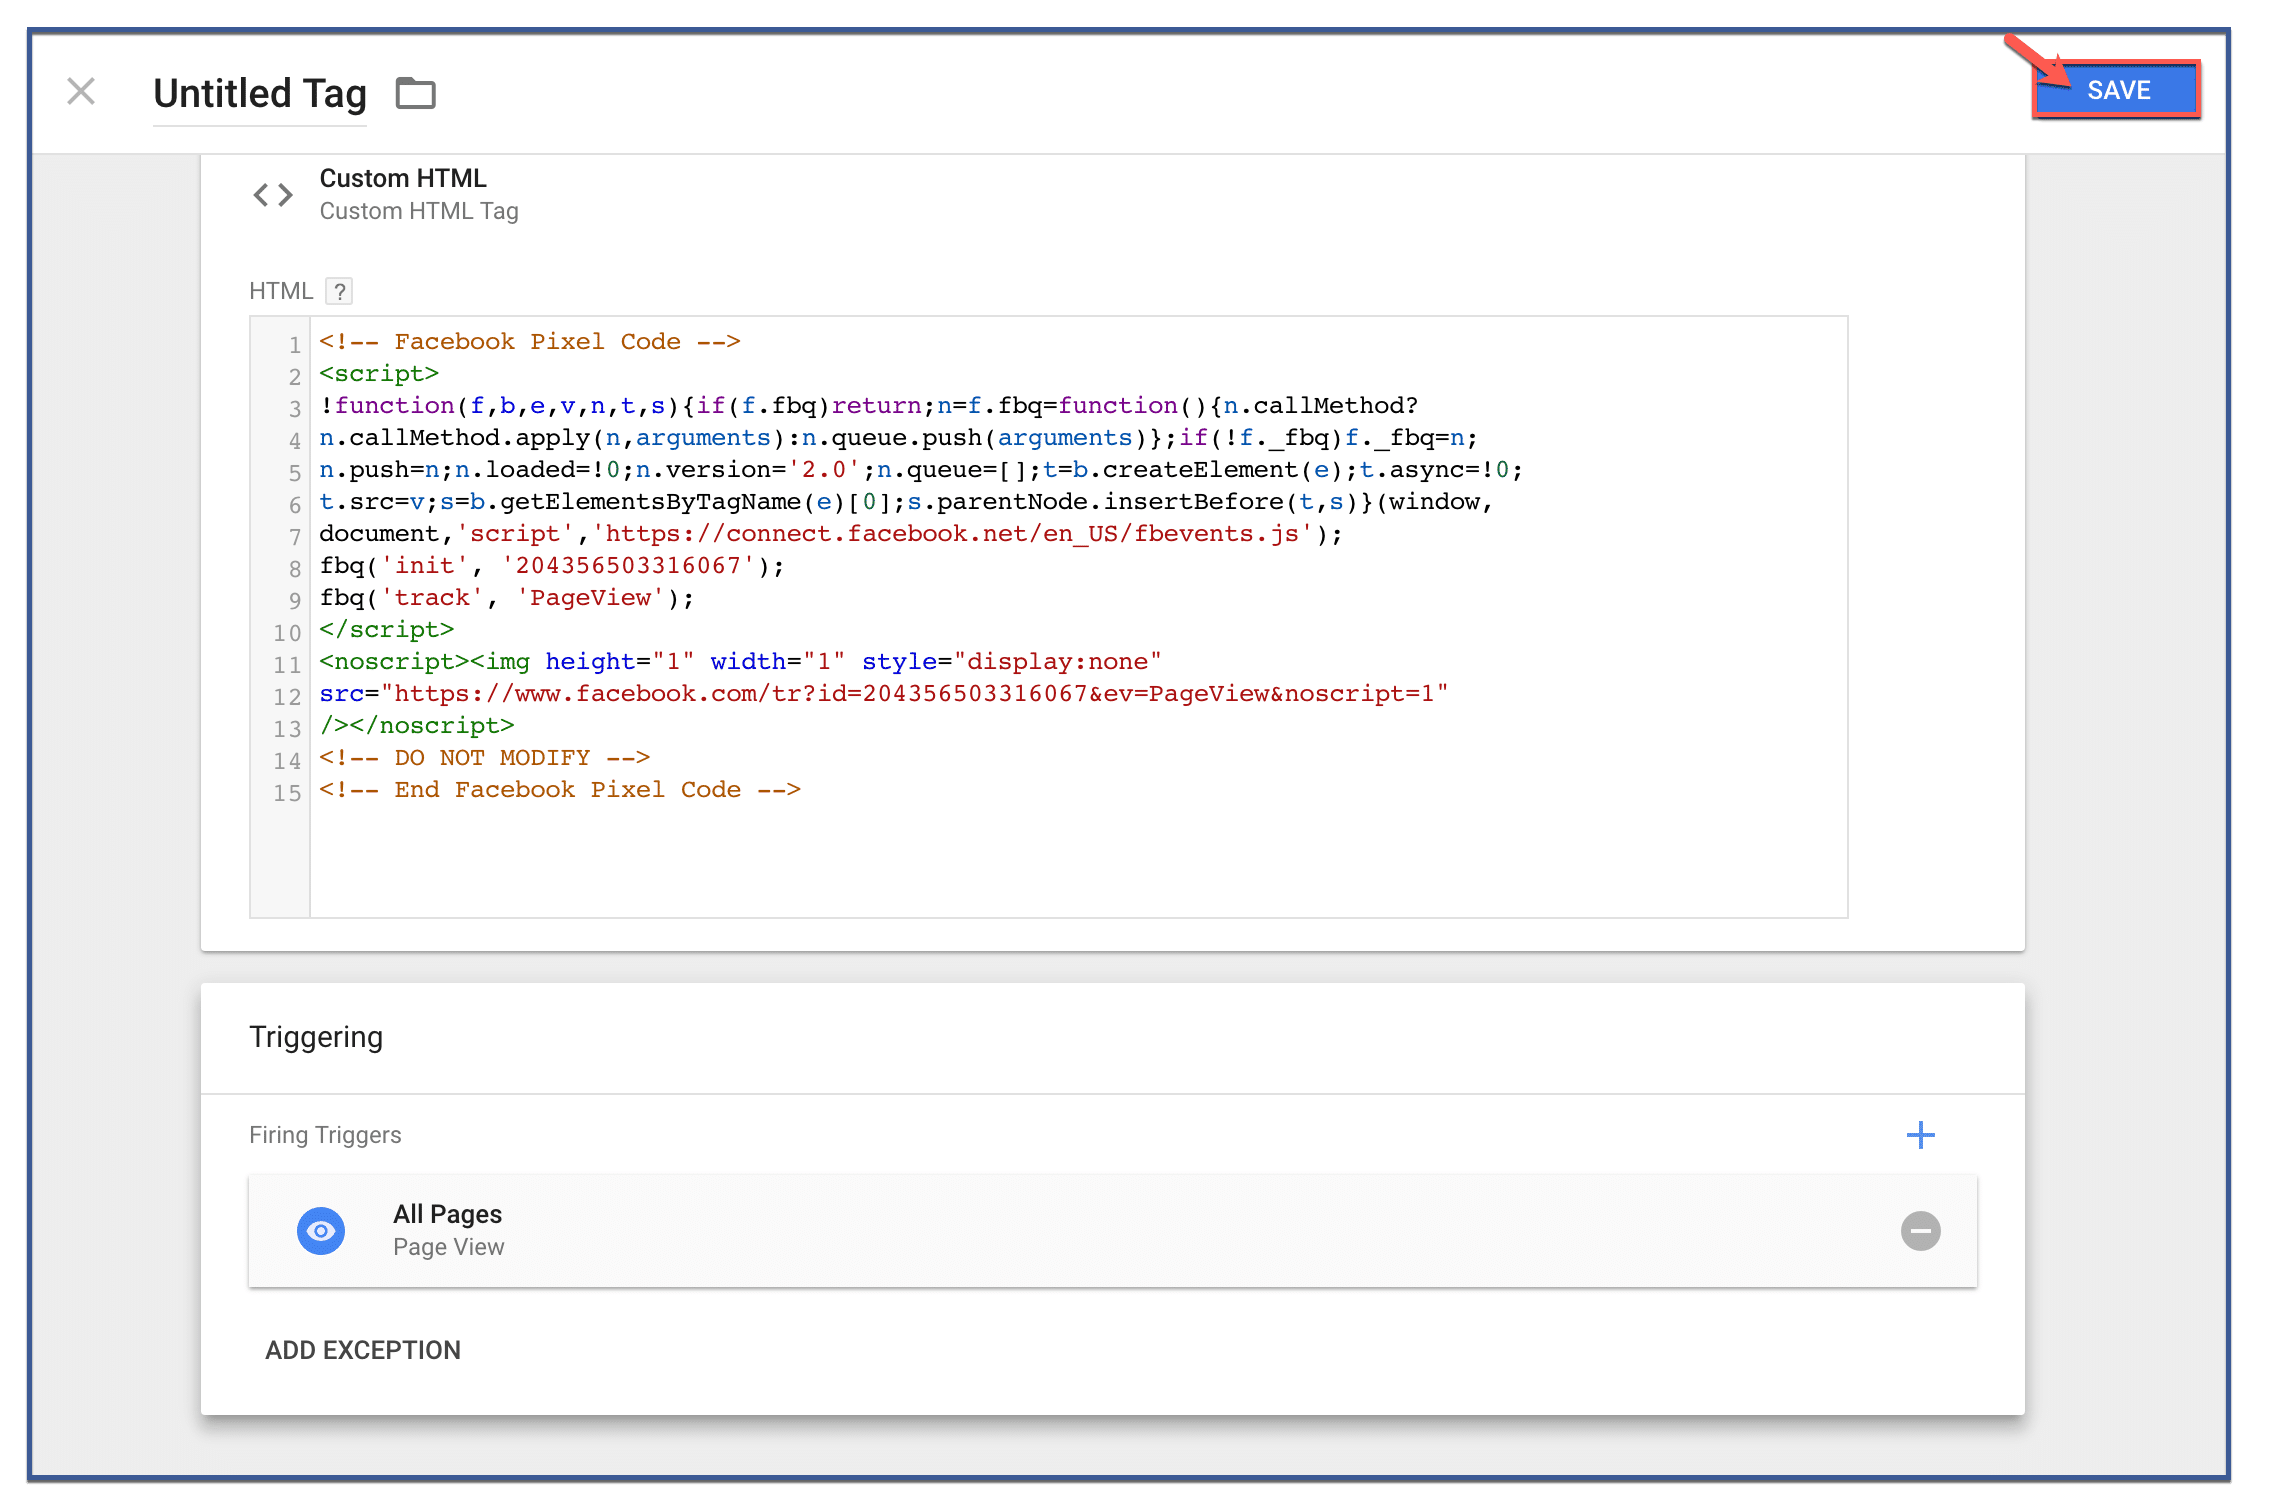
Step 4: Paste your Facebook Pixel code
Paste your pixel code under the box that says “HTML.”
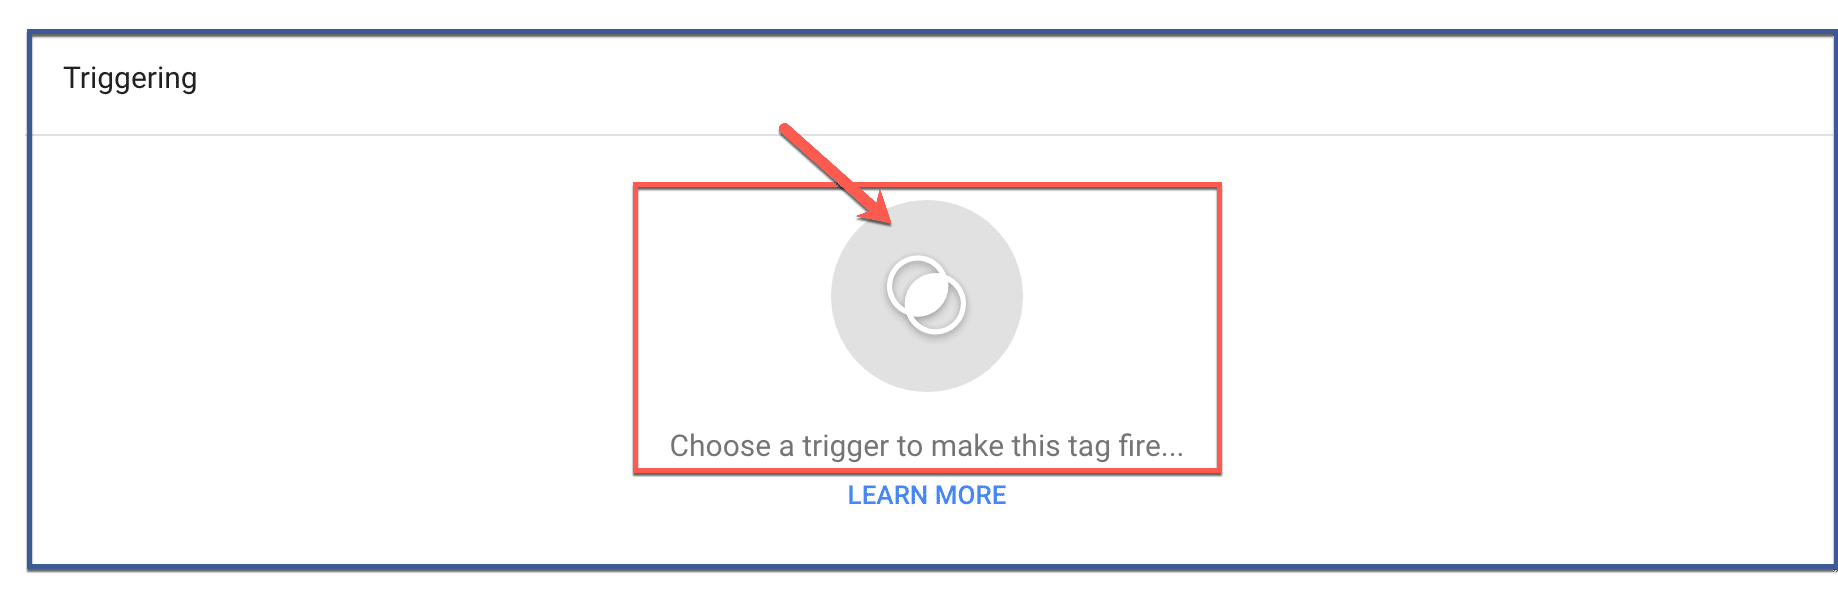
Step 5: Choose a Trigger
Scroll down to “Triggering” then click “Choose a trigger to make this tag fire.”
Step 6: Click “All Pages”
Click “All Pages.” Note that you can check your trigger anytime in the future.

Step 7: Save
Click “Save” on the top right corner of the screen.
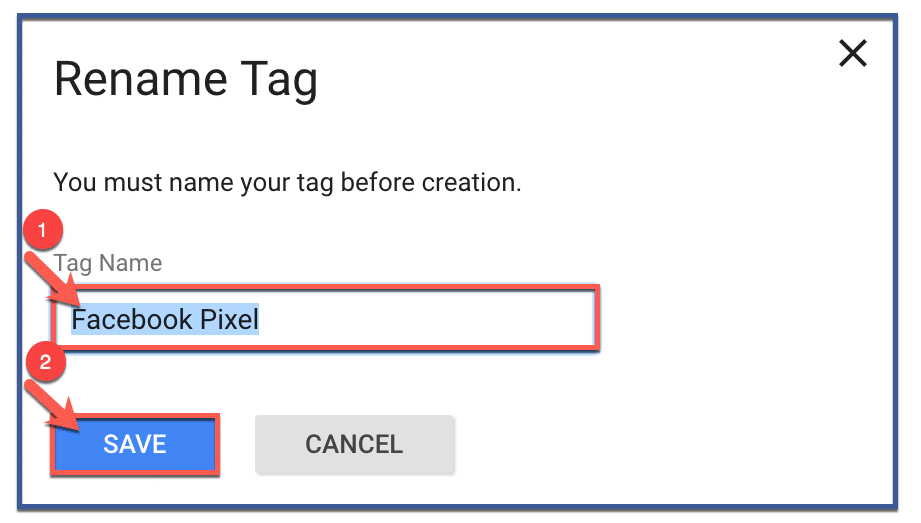
Step 8: Rename tag
Give your tag a name then click “Save.”
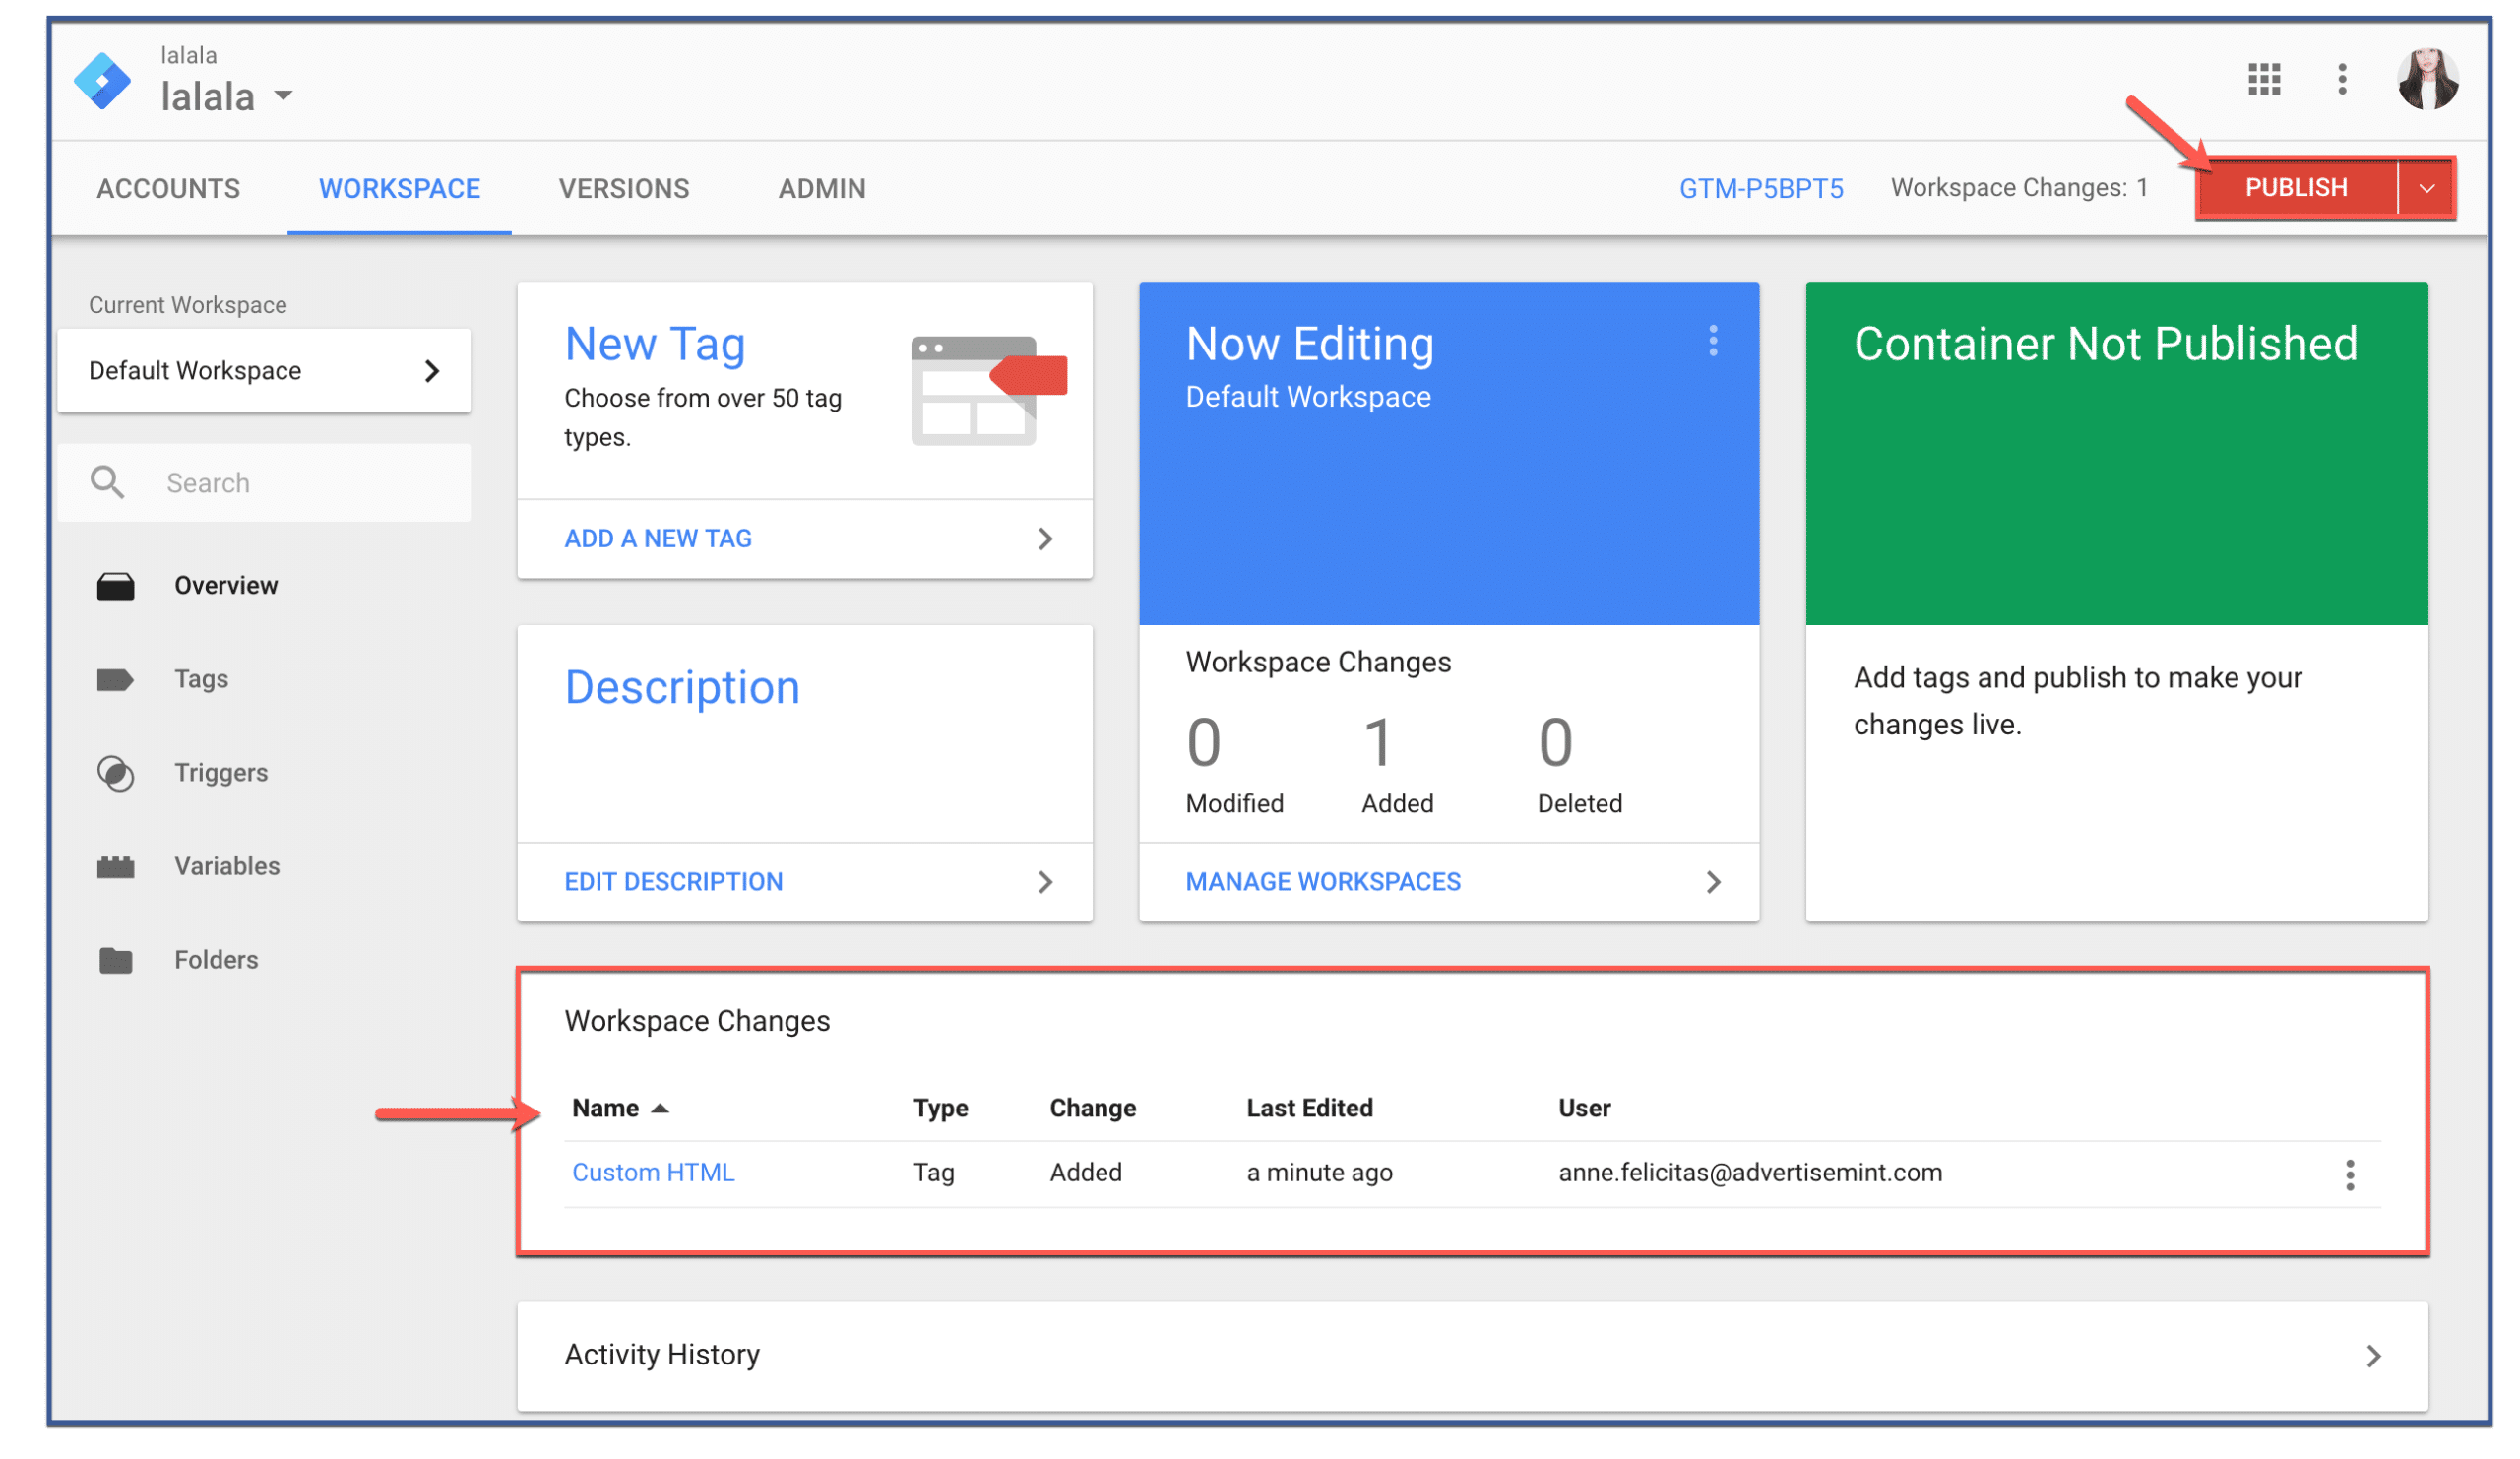
Step 9: You’re done!
All changes you make should appear under “Workspace Changes.” Once you are finished, click “Publish” to publish your changes.
Benefits of Installing the Facebook Pixel to GTM.
The benefits of installing the Facebook Pixel to Google Tag Manager are manifold and can have a transformative impact on your digital marketing strategy.
Streamlined Management
Consolidating the installation of the Facebook Pixel within Google Tag Manager simplifies the process of managing tracking codes. With GTM as a central hub, you can efficiently deploy, modify, and organize various tags, including the Facebook Pixel, all from a single interface.
Flexibility and Customization
Google Tag Manager allows for easy customization of tracking configurations. You can seamlessly adjust tracking parameters, events, and triggers within GTM, giving you the flexibility to adapt to evolving marketing objectives and user behaviors.
Enhanced Testing and Debugging
GTM’s preview and debugging tools provide a controlled environment for testing your Facebook Pixel installation before it goes live. This ensures that your tracking is accurate and functional, reducing the risk of data discrepancies or technical glitches.
Agile Response to Changes
As your marketing landscape shifts, GTM empowers you to swiftly modify tracking elements without the need for extensive coding. This agility enables you to align your pixel with changing campaign goals and seize emerging opportunities.
Data-Driven Decision-Making
The combination of the Facebook Pixel’s data collection prowess and GTM’s streamlined management amplifies your ability to make informed decisions. Accurate and comprehensive data empowers you to optimize campaigns, refine audience targeting, and maximize the impact of your advertising efforts.
Unified Tracking Strategy
Installing the Facebook Pixel to GTM ensures a cohesive tracking strategy across your digital presence. This unity minimizes tracking discrepancies, enhances data accuracy, and provides a holistic view of user interactions.
Improved User Experience
With streamlined tracking mechanisms, you can better understand user behavior and preferences, leading to more personalized and engaging user experiences across your digital platforms.
Time and Resource Efficiency
The efficiency of managing multiple tags within GTM translates to saved time and resources. You can allocate your efforts toward strategic planning and creative execution, rather than wrestling with complex code implementations.
Tracking events using the Facebook Pixel and GTM
Tracking events using the Facebook Pixel and Google Tag Manager (GTM) is a seamless process that empowers businesses to gain valuable insights into user interactions and optimize their digital marketing efforts.
First, within Facebook Ads Manager, define the specific events you want to track, such as purchases, sign-ups, or page views. Then, in GTM, create a new tag and choose the “Facebook Pixel” option. Input your Pixel ID and select the appropriate event to track. Next, set up triggers that determine when the event should fire, such as clicking a button or viewing a specific page.
Once configured, the Facebook Pixel will automatically collect data from user interactions, and GTM ensures that the Pixel fires accurately at the designated triggers.
This collaborative approach simplifies event tracking, offering a robust foundation for refining ad campaigns, understanding user behavior, and making data-driven decisions that elevate your digital marketing strategy.
Conclusion
In conclusion, installing the Facebook Pixel to Google Tag Manager is a smart move for anyone aiming to enhance their digital marketing efforts.
By bringing together these two powerful tools, you can efficiently track user actions, gain valuable insights, and make informed decisions.
The process may seem technical, but it’s worth the effort as it opens up a world of possibilities for optimizing your campaigns and connecting with your target audience in a more meaningful way.
FAQs
What is the Facebook Pixel?
The Facebook Pixel is a code snippet that is added to website to track user activity. This data can be used to create targeted Facebook ads, measure the effectiveness of your ads, and understand your website visitors.
What is Google Tag Manager?
GTM manages your website tags without having to edit your website code. This makes it easy to add the Facebook Pixel to your website without having to hire a developer.
Why should I install the Facebook Pixel to Google Tag Manager?
There are several reasons why you should install the Facebook Pixel to Google Tag Manager:
- It’s easy to do.
- It’s reliable.
- It’s flexible.
What are some of the events that I can track with the Facebook Pixel?
You can track a variety of events with the Facebook Pixel, such as:
- Page view
- Add to cart
- Purchase
- Lead
- Contact
