You likely know that you can use several different objectives for your Facebook ad campaigns. By selecting a campaign objective, you’re telling Facebook what you want from that campaign. This is very important because Facebook will optimize your ad campaign for that objective. For example, if you choose the traffic objective, Facebook will try to generate as many link clicks as possible for you by automatically finding people within your audience who are most likely to click on your ad.
Facebook’s targeting feature mentioned above is a fantastic feature. It makes all of your ad campaigns a lot more effective, and it significantly reduces the cost of Facebook advertising. But it does create one big problem: you will eventually target customers who already converted. This post will show you how the exclusion marketing method solves that problem.
Table of Contents
The Exclusion Marketing Method
To explain how the exclusion marketing method works, I’ll use a Facebook campaign with the traffic objective as an example.
When you create a traffic campaign, Facebook will serve your ad to people who are most likely to click on it. Facebook determines whether or not someone is likely to click on your ad by seeing if they previously clicked on it. People who already clicked on your ad are obviously interested in what you’re advertising, and they are highly likely to click on your ad again. Facebook’s targeting algorithms factor this in, and it will show your ad to people who clicked on it in the last few days.
Overall, Facebook’s method of serving ads to those who are likely to convert is effective because not everyone will convert into a lead or sale the first time they click on your ad and visit your website. After that first click, a lot of people will take some time to think about what you’re offering, or they may not convert for a whole host of other reasons. You don’t want to miss out on easy leads and sales so continuing to advertise to these people is important.
Hopefully some of the people who clicked on your Facebook ads converted into a lead or sale. However, continuing to advertise to those people is a waste of money. You need to distinguish between those who clicked and converted and those who clicked and did not convert. Once you do that, you can exclude people who already converted from your Facebook ad campaigns. I use the exclusion marketing method to do this, and it’s a simple three-step process.
Step 1: Install the Facebook Pixel
If you already installed the Facebook Pixel on your website, then you can go ahead and skip to step two. Otherwise, install the Facebook Pixel on your website to identify the people who already converted. To install the Facebook Pixel, you need to go to the Pixels tab in your Facebook ad account.

Then you need to click the “set up” button that will open a window that looks like this:
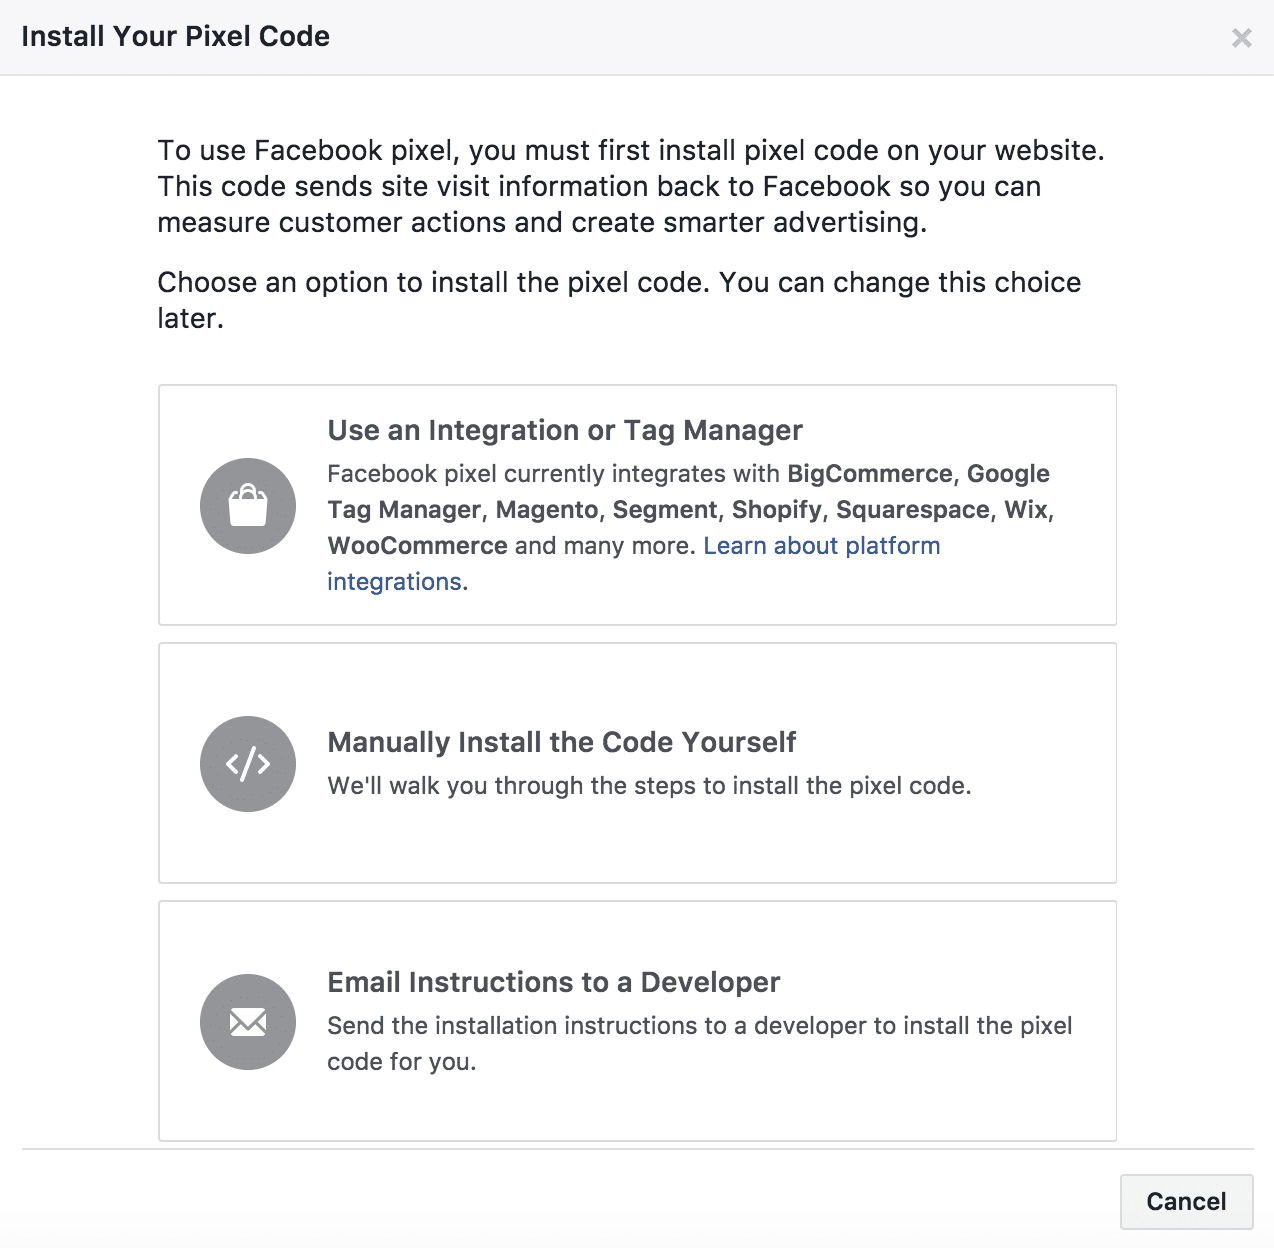
Here you have three options:
- Use an integration or Tag Manager
- Manually Install the Code Yourself
- Email instructions to a Developer
If you are using one of the platforms (BigCommerce, Google Tag Manager, Magento, etc.) listed in the first option, then you can simply select that option and follow the installation instructions. Otherwise, you will either need to install the Facebook Pixel yourself (option two) or hire a developer to install it for you (option three).
If you have a WordPress website, you’ll have to install the pixel yourself. Remember, you can always hire a developer to install the pixel for you. You can find a developer on Upwork or Fiverr.
How to Install the Facebook Pixel on WordPress?
To install the Facebook Pixel on a WordPress website, you don’t need to select the second option from the screenshot above. Instead, you need your Facebook Pixel ID, which you can find by selecting option three. That option will open a dialogue box that looks like this:

Copy your pixel ID and then head over to your WordPress website. The easiest way to install the Facebook Pixel on WordPress is to use a plugin. There are several plugin options, but my favourite is Pixel Cat.
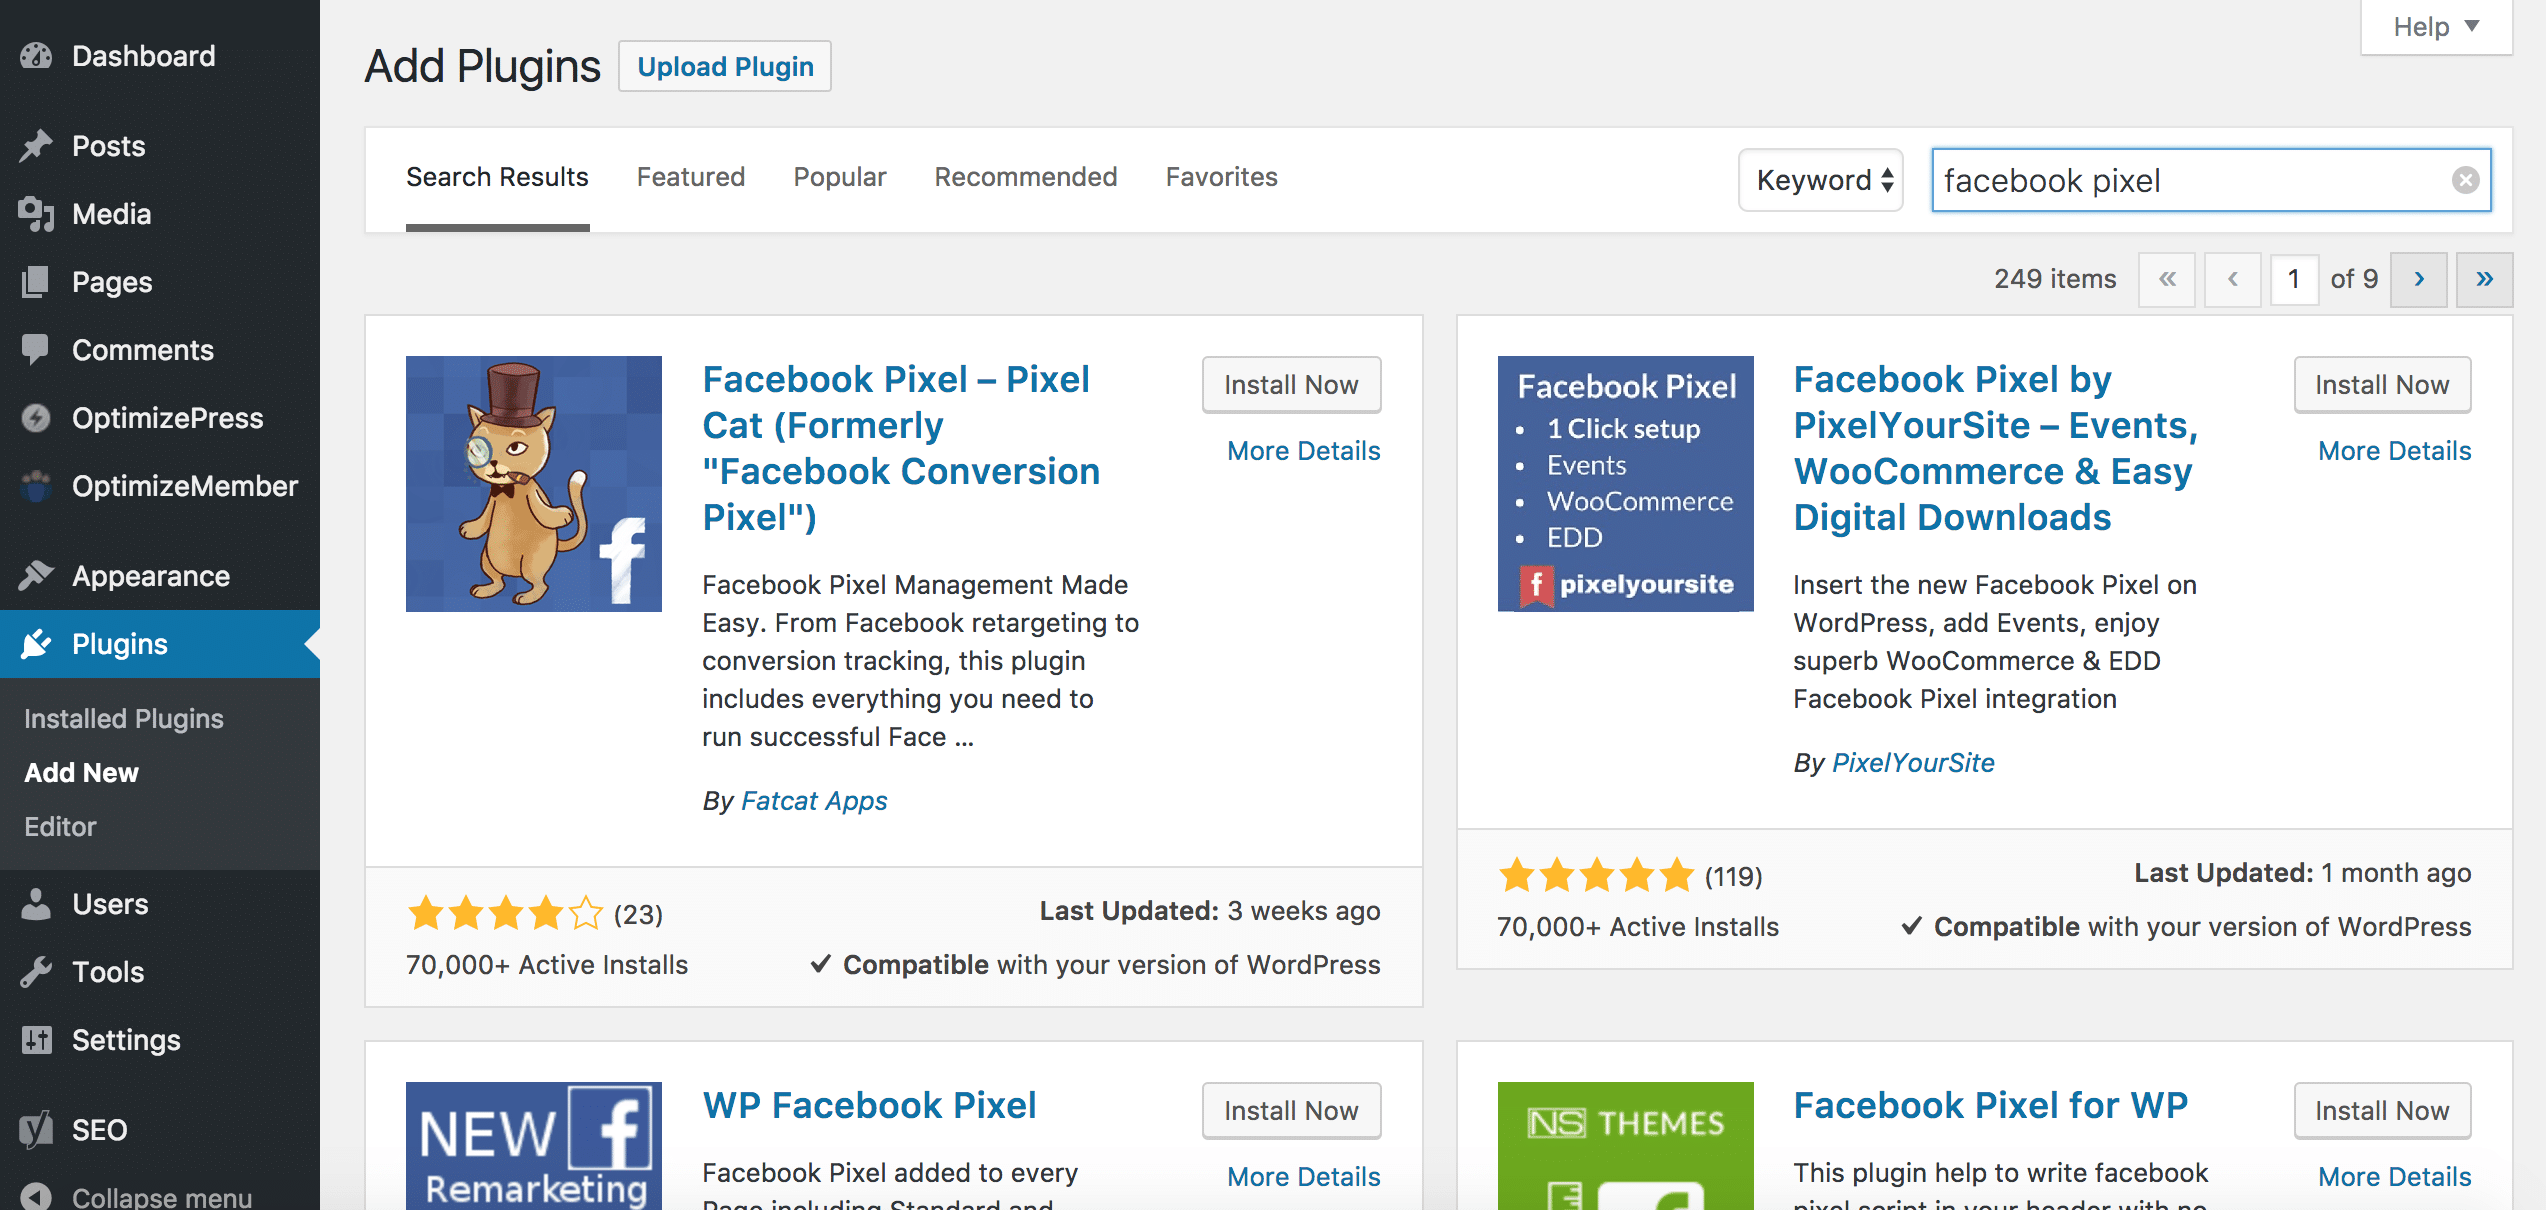
Install Pixel Cat and then activate it. That will open a page that looks like this:
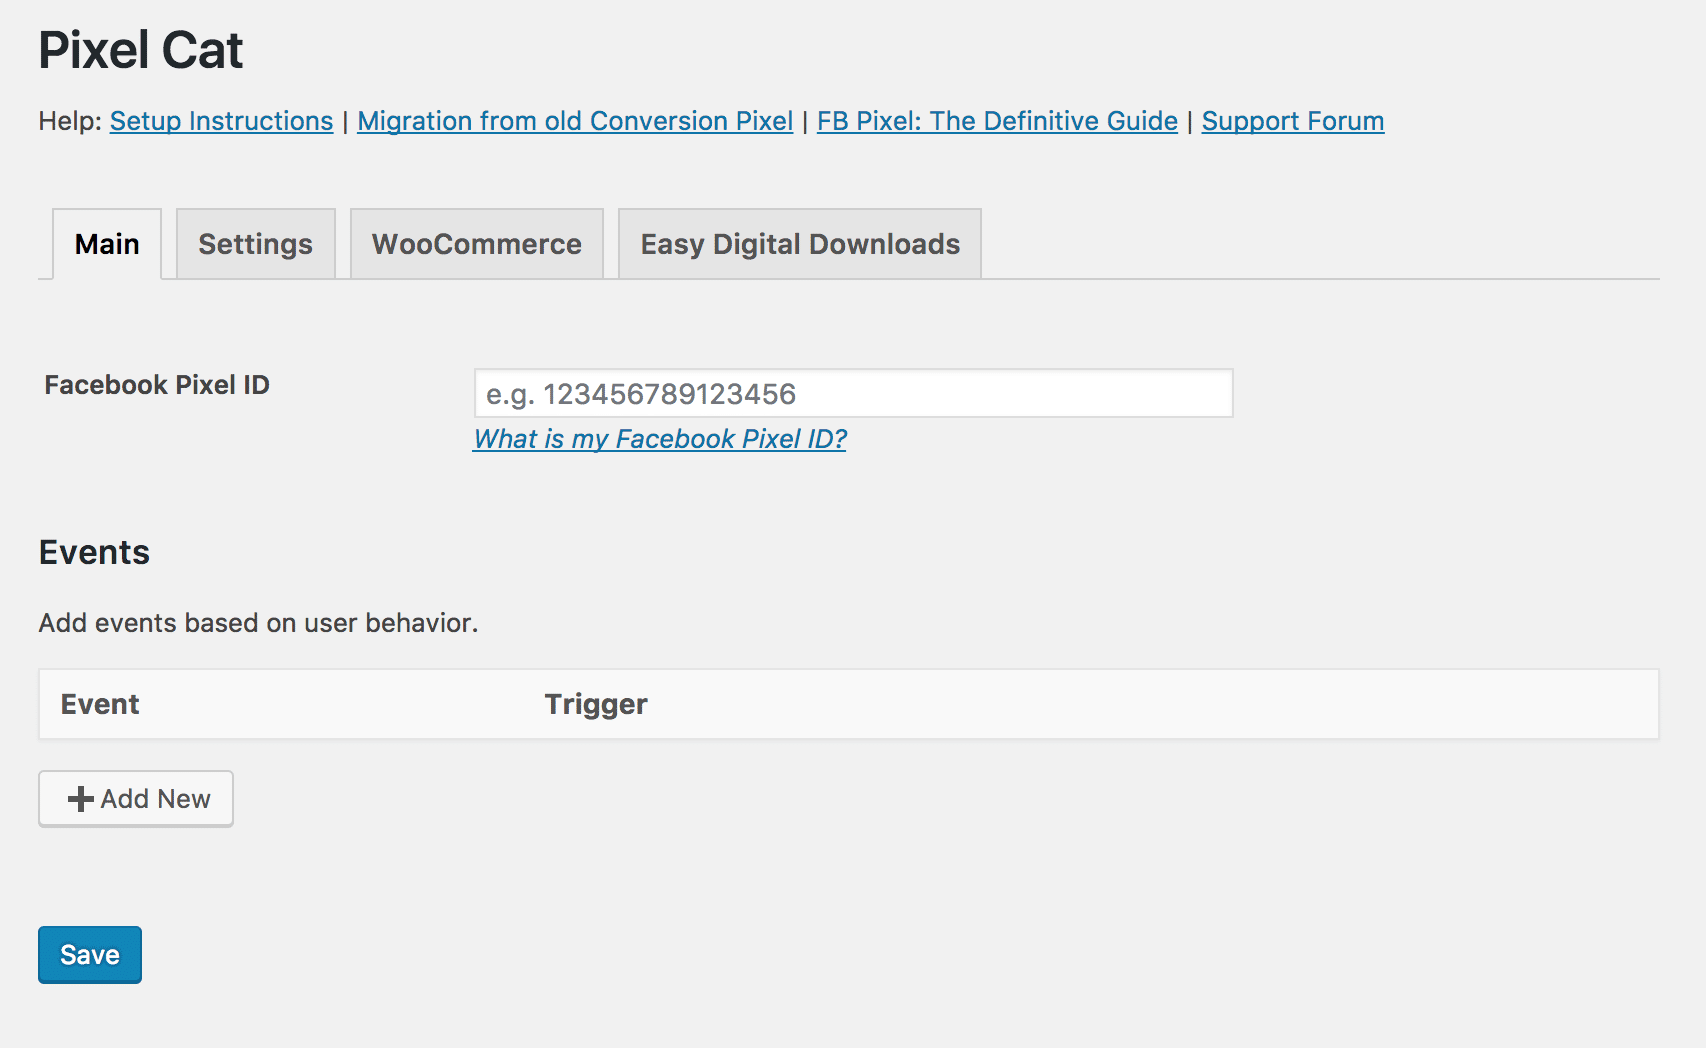
Paste your Facebook Pixel ID into the text field, click save, and that’s it. The Facebook Pixel is now installed in your website.
Step 2: Create a Custom Audience
Let’s move to step two, creating a Custom Audience. Now that you installed the Facebook Pixel, you can track the people who visit your website. But for the exclusion marketing method to work, you need to identify the people who became a lead or who made a purchase. That way, you can exclude them from your target audience. To identify these people, you need to create a website Custom Audience.
Within your Facebook ad account, go to the Audiences tab.
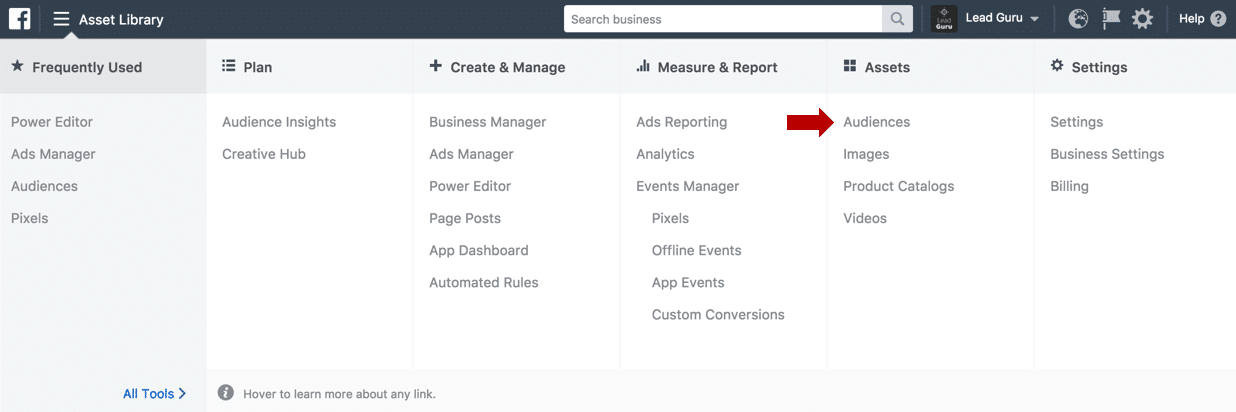
Select “Create Audience” and “Custom Audience.”
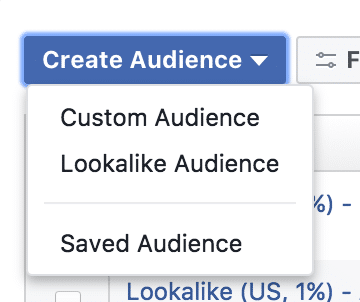
That will open a dialogue box that looks like this:
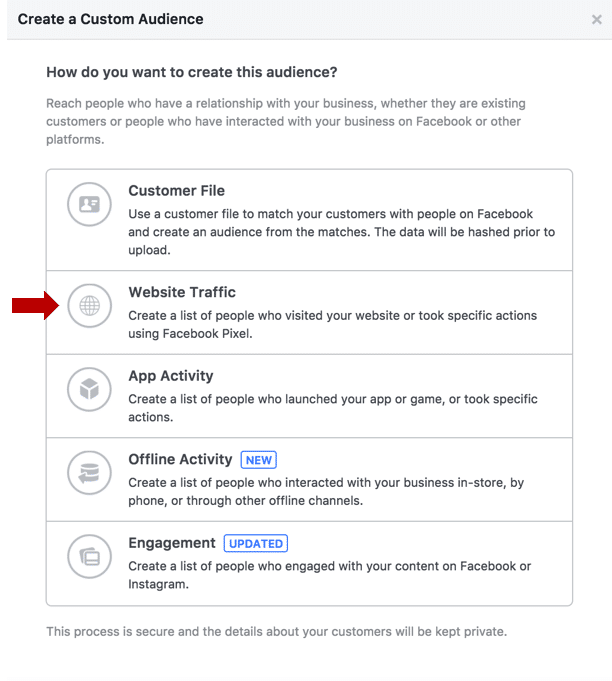
There are lots of Custom Audiences options, but for the purpose of this post, you should select “Website Traffic” from the options above. That will open a dialogue box that looks like this:
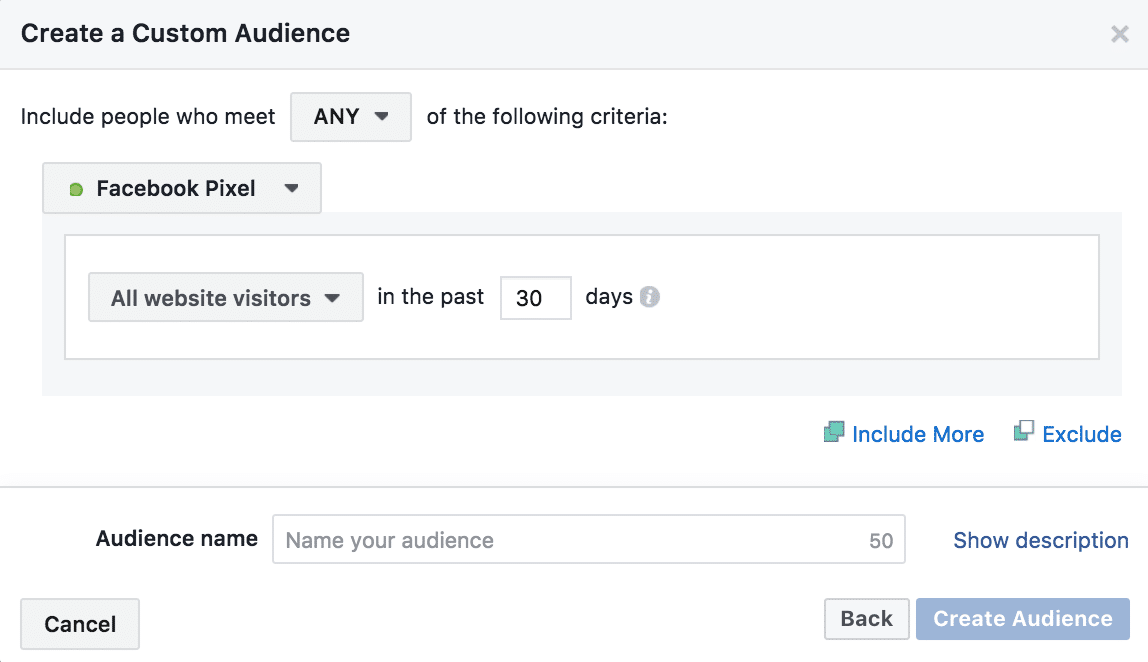
Here, you’ll need to change a few options. First, change “All website visitors” to “People who visited specific web pages.” Then change “URL contains” to “URL equals” and adjust the time period from 30 days to 180 days.
Now you need to copy the URL of the thank-you page that people are taken to after they convert and paste that into the text field.
If you have a Facebook campaign that’s designed to generate inquiries for your services, for example, exclude the people who already inquired and visited your page. Copy the URL of your page and paste it into the text field. Your Custom Audience window should now look something like this:
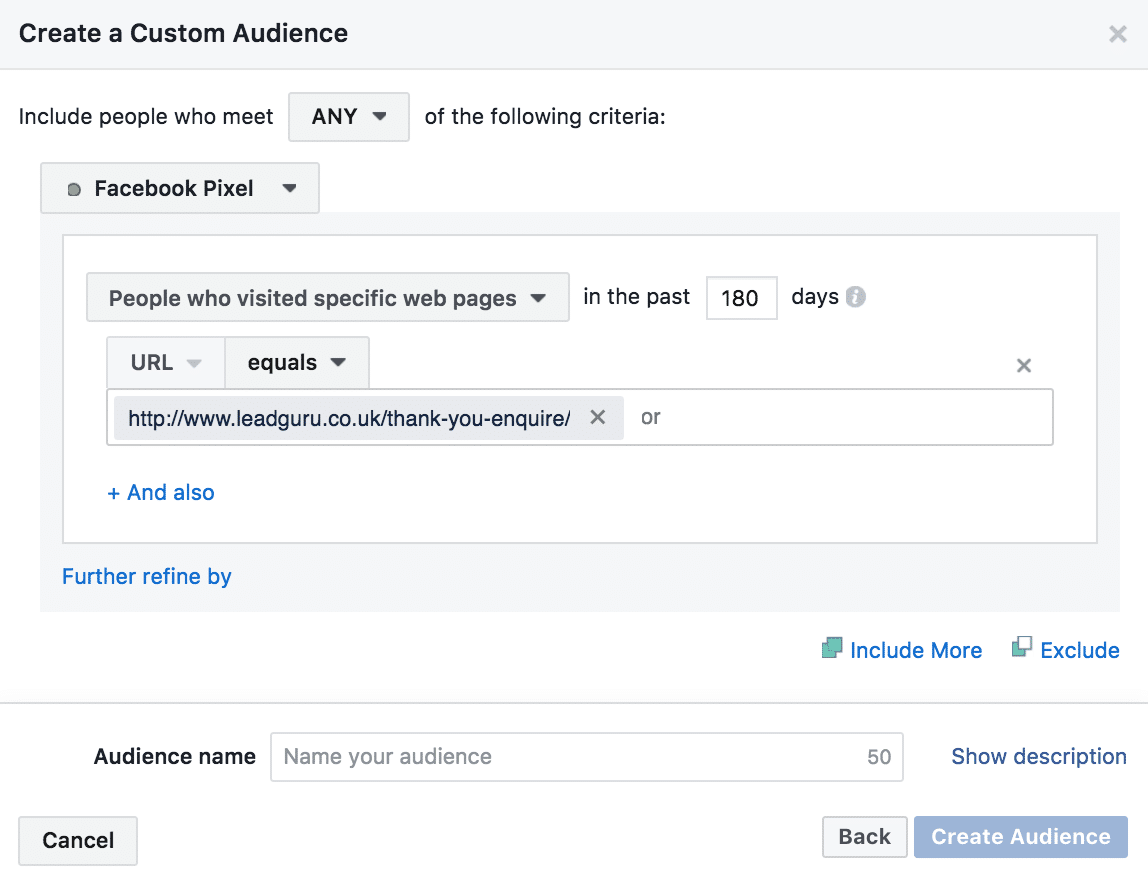
Next, name your Custom Audience and select “Create Audience.” Your Custom Audience may take a bit of time to populate.
Step 3: Exclude the Custom Audience from Your Facebook Ad Campaign
Let’s move to the third and final step of the exclusion marketing method, excluding the Custom Audience you created from your Facebook ad campaign. This step is very quick and easy to do once you know how to do it.
Go to your Facebook ad account again and go to Ads Manager. Then select the ad campaign that you would like to exclude your Custom Audience from and navigate to the ad set level. In the audience section, you will see a Custom Audiences text field. Beneath that there is a little exclude button that you should click on:
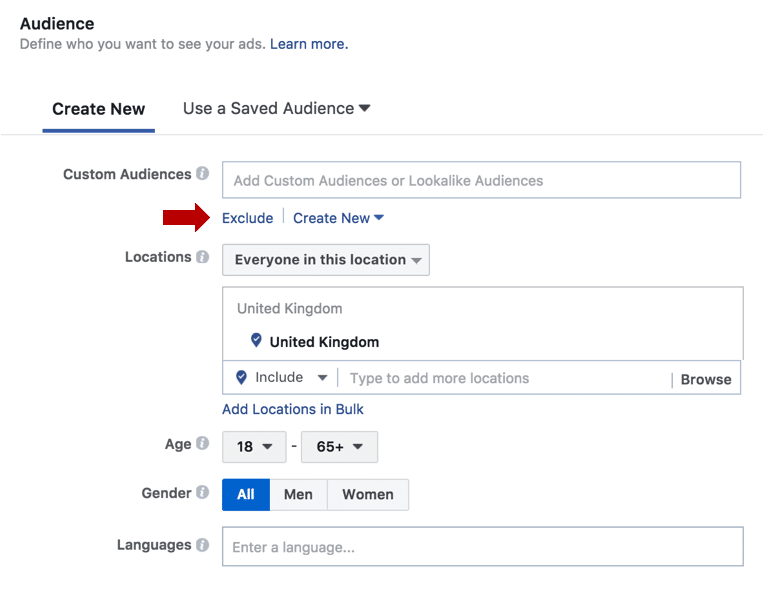
When you do, another text field will appear. Go ahead and type the name of your new Custom Audience into that second text field. Don’t forget to save the changes you made!
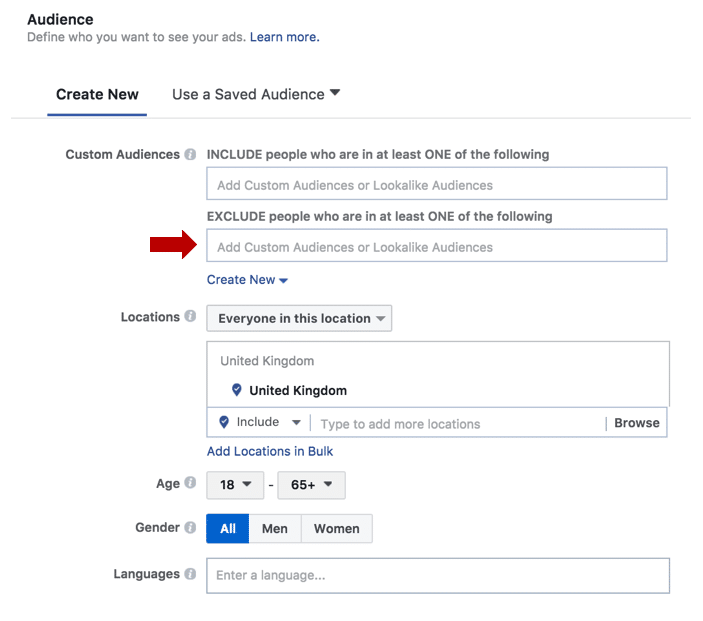
Now the people within that Custom Audience will not see any ads from that ad set. Depending on how many conversions you already generated, that could have a significant impact on your cost per lead and sale. It also guarantees that you won’t waste part of your ad budget on people who have already converted.
Why Not Use the Conversions Campaign Objective?
You might think, “Why don’t I just use the conversions campaign objective? That way, Facebook will optimize my ad campaign for conversions, and I’ll avoid this issue altogether.”
If you don’t generate a lot of conversions, you shouldn’t use the conversions objective. To properly optimize for conversions, Facebook says you need to generate at least 50 conversions per week in each ad set. That’s a lot of conversions, and depending on the product or service you offer, that might not be possible for you. In that case, it’s often better to use the traffic campaign objective.
Let’s Review What You Learned Today
Facebook’s intelligent targeting algorithms make all your Facebook ad campaign more effective. But with some campaign objectives, one big problem arises: people who have already converted won’t automatically be excluded from your campaign—you’ll waste money advertising to those people. The exclusion marketing method solves that problem.
The three steps of the exclusion marketing method are
- Install the Facebook Pixel on your website
- Create a website Custom Audience
- Exclude the Custom Audience from your Facebook ad campaign
That’s right. Getting better results from your Facebook ad campaigns is as easy as one, two, three.

