
Because last year’s Black Friday was successful, reaching $3.34 billion in online sales alone, it’s likely that this year’s Black Friday will be just as successful, if not more. Consumers plan to spend more this holiday season, a study found, foreshadowing an increase in Black Friday sales. Deloitte, a company that offers audit, consulting, advisory, and tax services, found that 79 percent of the consumers it studied plan to spend the same or more this holiday season. With consumers eager to spend money, it would be foolish not to offer Black Friday deals this year.
Given the rise of e-commerce, Facebook is the best place to advertise. Many entrepreneurs with small businesses, however, don’t know how Facebook advertising works. With Black Friday a few days away, there is not enough time to learn Facebook advertising. There is enough time, however, to create the easiest, beginner-friendly Facebook ad: the Boosted Post.
A Boosted Post is a regular page post that you pay Facebook to advertise. Boosted Posts, like Facebook ads, will appear on the news feeds of your target audience. And, much like a Facebook ad, you have access to Facebook Analytics, which shows your ad’s results. To create a Boosted Post, you don’t need access to Business Manager and you don’t need to know how to use Power Editor or Ads Manager. Creating Boosted Posts is an easy process, requiring only several things, all of which you likely already have: a Facebook business page, an online store, creatives, and a sale, deal, or offer.
Table of Contents
1. Business Page
Because Boosted Posts are only available to Facebook page owners, you must create a business page.
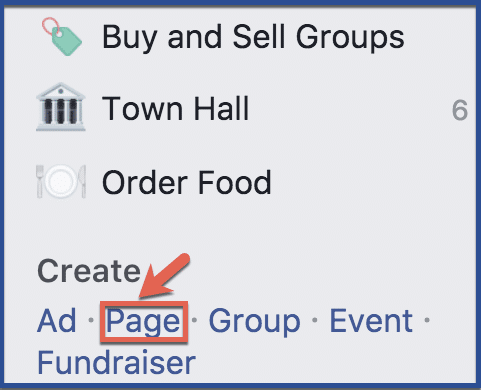
Step 1: Click “Page”
At the end of the left column, located on the left side of your Facebook page, is a section called “Create.” Under that section, click “Page.”
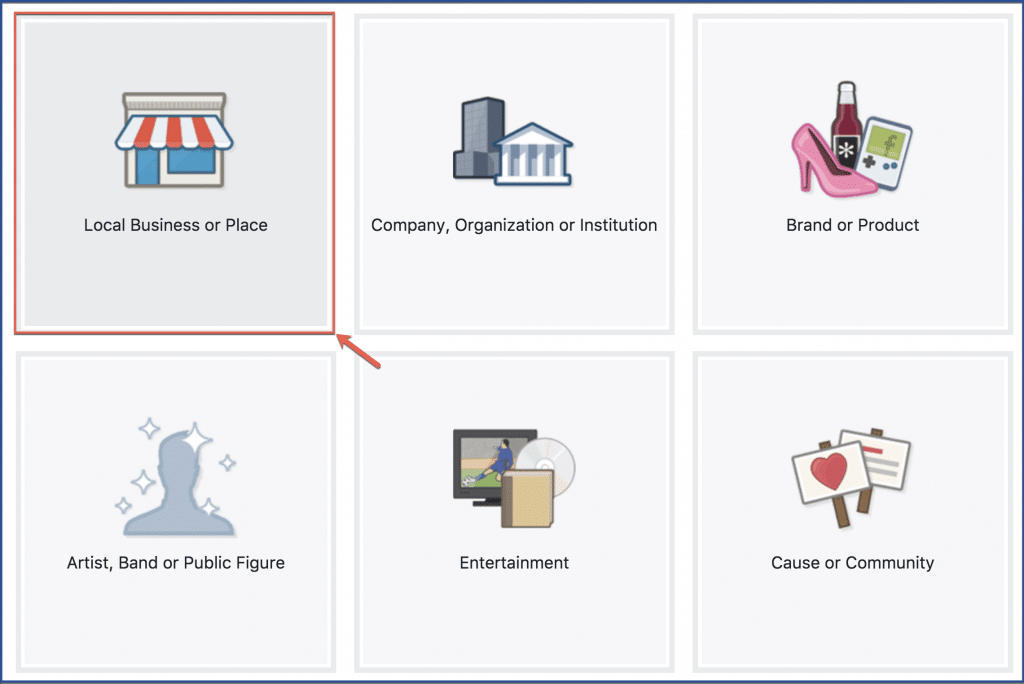
Step 2: Choose “Local Business or Place” as your page type
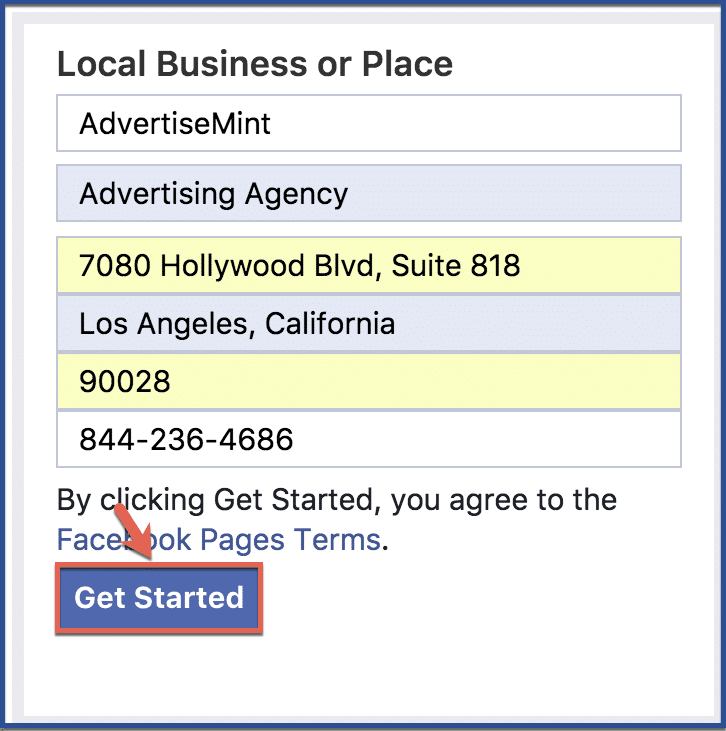
Step 3: Fill in required information >> click “Get Started”
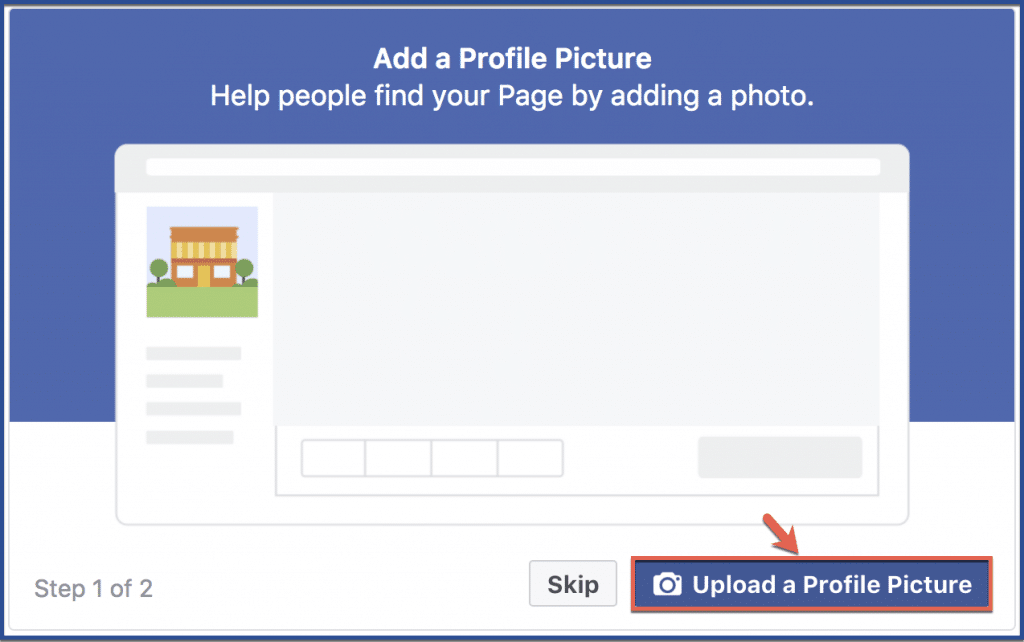
Step 4: Add a profile picture
Do not skip this step. To be credible, your page must have a profile picture, which ideally is your business logo.
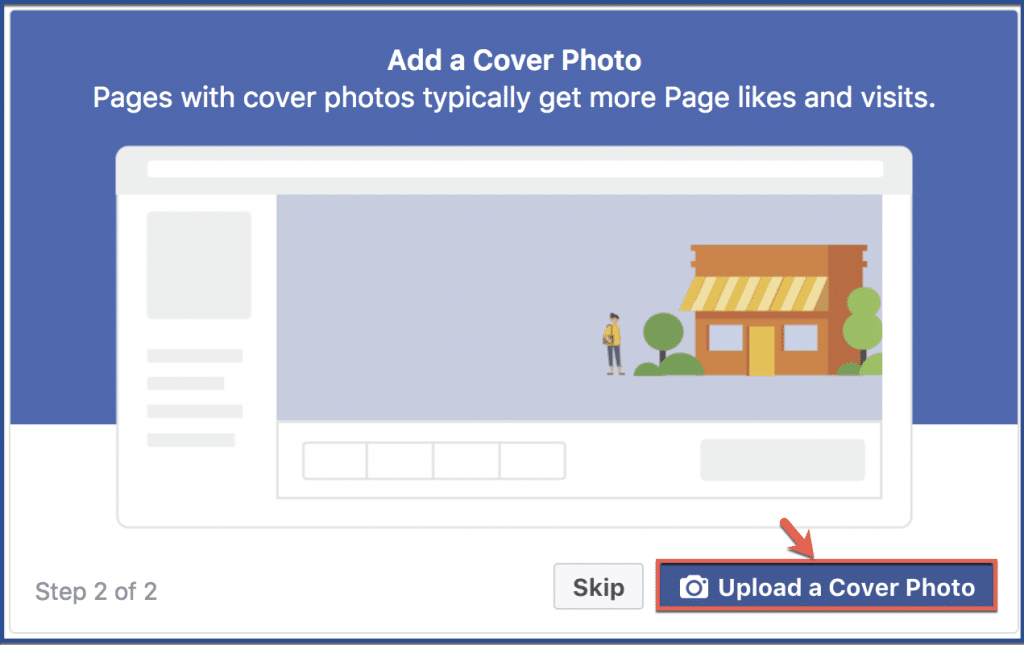
Step 5: Add a cover photo
Again, do not skip this step. Facebook pages that don’t have a cover photo appear awkward, bare, unfinished, and sloppy.
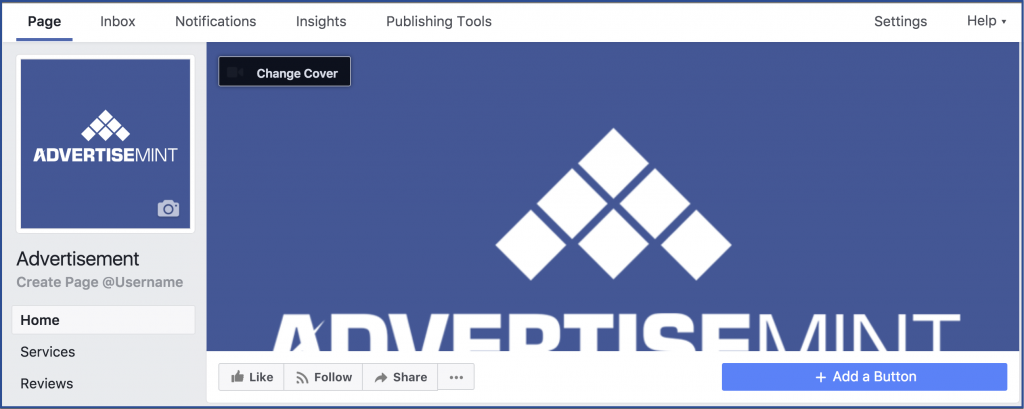
Step 6: Add your business information
After you add your cover photo, you will be directed to your Facebook page. Once there, include your business information, such as services, phone number, and address. Although you can skip this step, don’t. All reputable business pages give visitors more information about the business.
2. Online Store
In order to promote your products or services, you need an online store, whether that’s in Shopify or Magento, to link to your Boosted Post.
3. Creatives
“Creative” is an umbrella term that encompasses all the elements of an ad, such as videos, images, call-to-action buttons, and copy. You can create your own creatives using a photo editing software such as Photoshop, hire a freelance designer from Fiverr, or purchase a template from Envato.
When creating your creatives, it’s important to abide by Facebook’s 20 percent text rule: your images should not consist of more than 20 percent text. If you don’t abide by this rule, your ad will be rejected. Also, make sure your creatives fit Facebook ad dimensions properly so they don’t become distorted and your ad doesn’t get rejected.
4. A Sale, Deal, or Offer
A Black Friday ad campaign won’t be a Black Friday ad campaign without a sale, deal, or offer. Before you create your Boosted Post, reduce the prices of your products or offer free shipping.
How to Create a Boosted Post?
Once you have all four requirements, you can then create a Boosted Post.
Step 1: Create a post
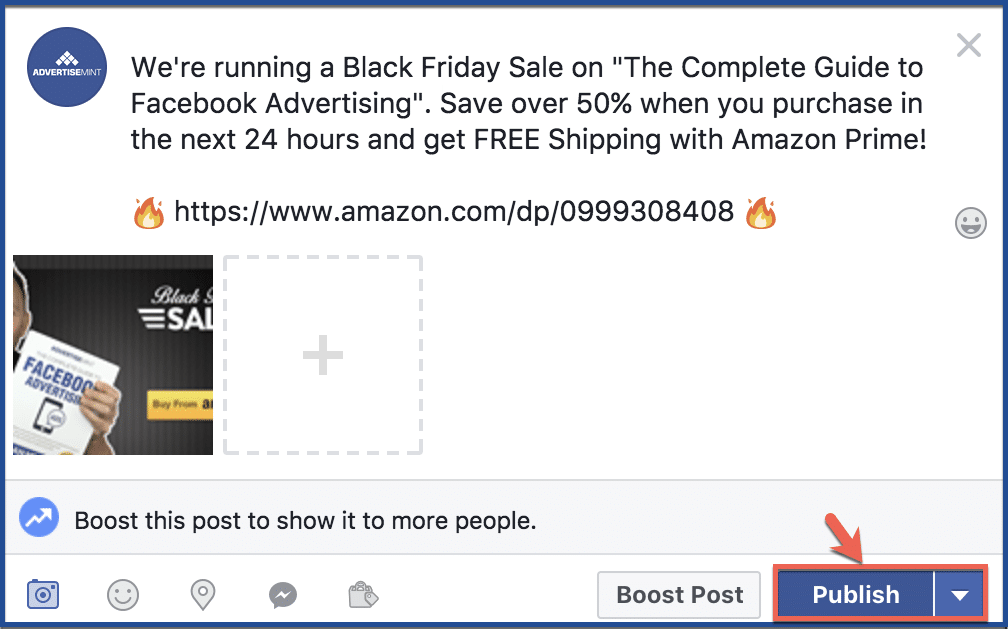
Create a regular Facebook post, the way you normally would when writing a post on your personal Facebook account or business page. Write copy that clearly explains your offer, upload your creative, then include the link to your store. After you’re done, click “Publish.”
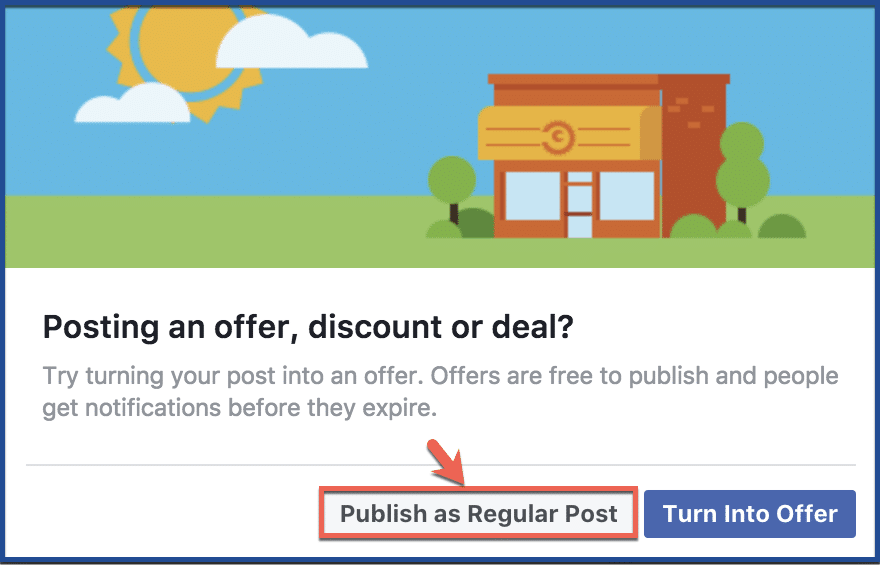
Step 2: Click “Publish as a Regular Post”
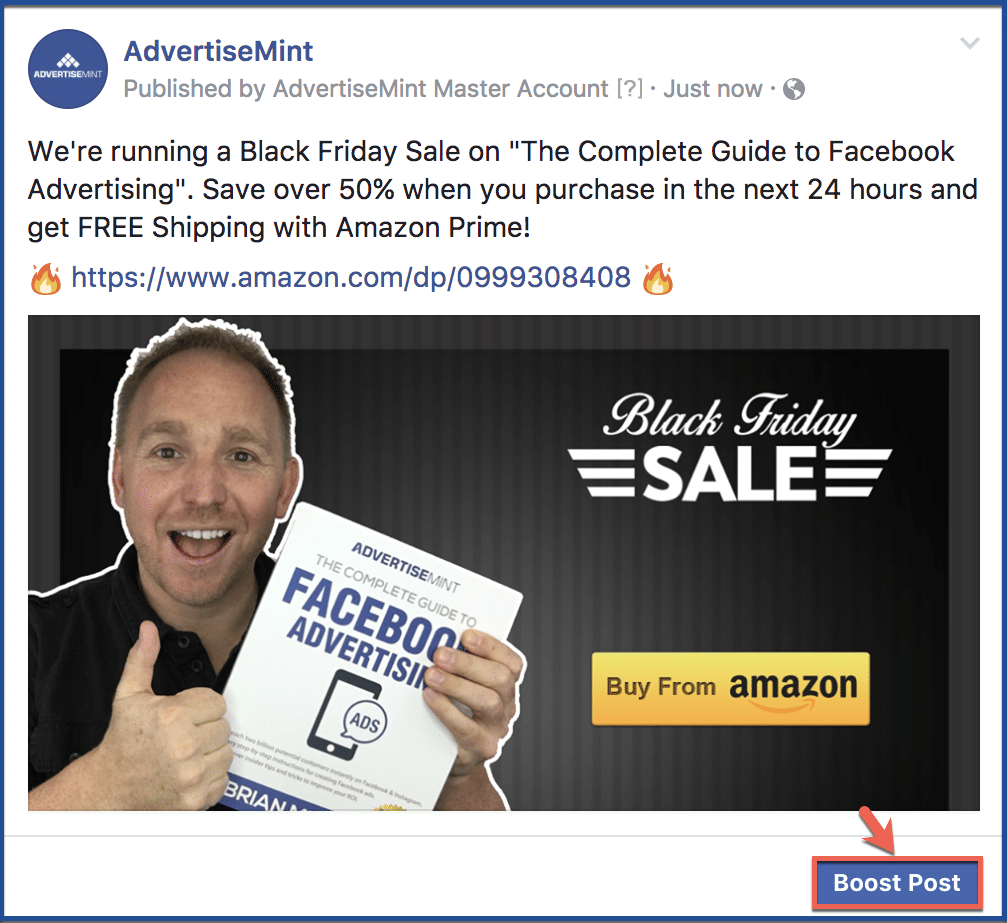
Step 3: Click “Boost Post”
Once your post appears on your page’s timeline, a “Boost Post” button will appear under the post. Click it.
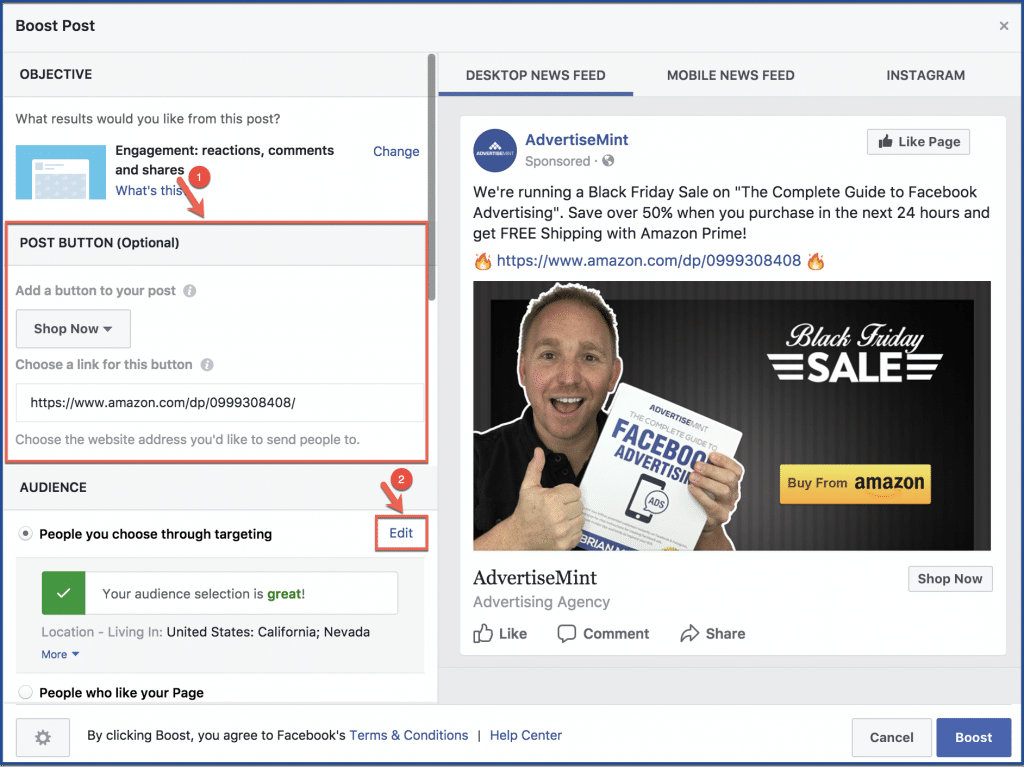
Step 4: Add CTA (call-to-action) button and link to your store >> create target audience
Add the appropriate CTA button. CTA buttons appear on the bottom right corner of your ad. Next, add the link to your e-commerce store or to the specific product you’re promoting. Facebook will connect the link to the CTA button. Then, click the “Edit” button to create the target audience that will see your ad.
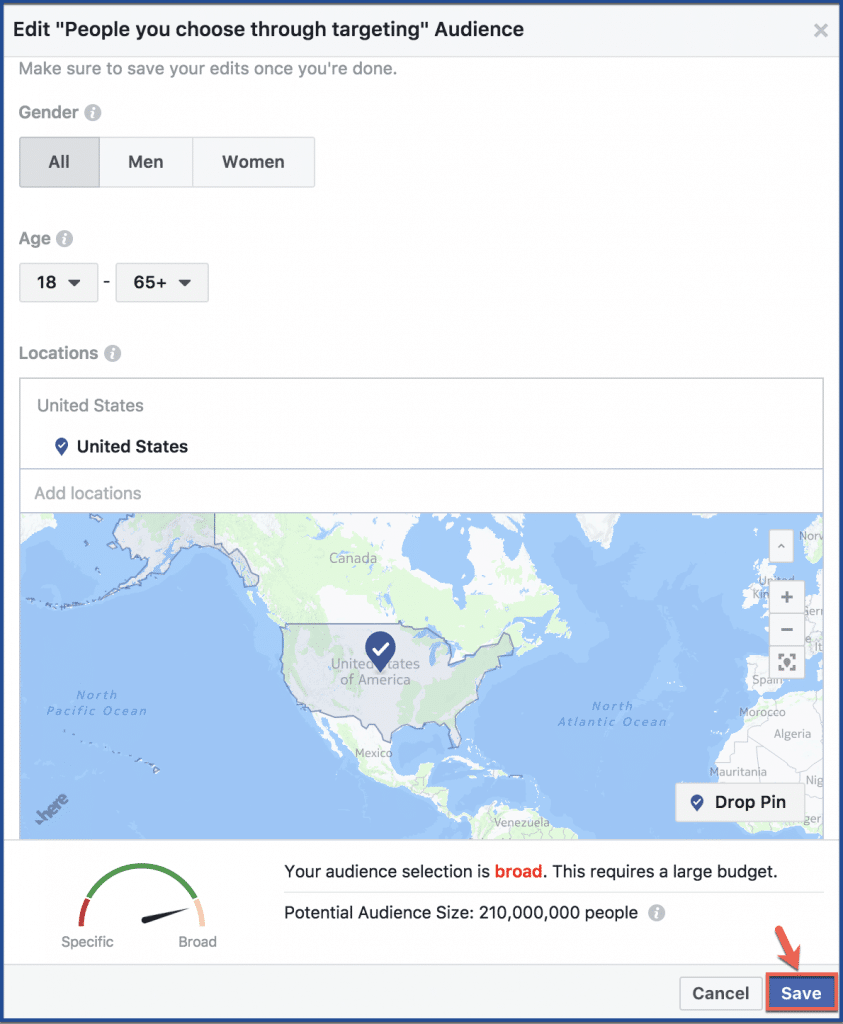
Choose the gender, age, and location of your target audience. Once you’re done, click “Save.”
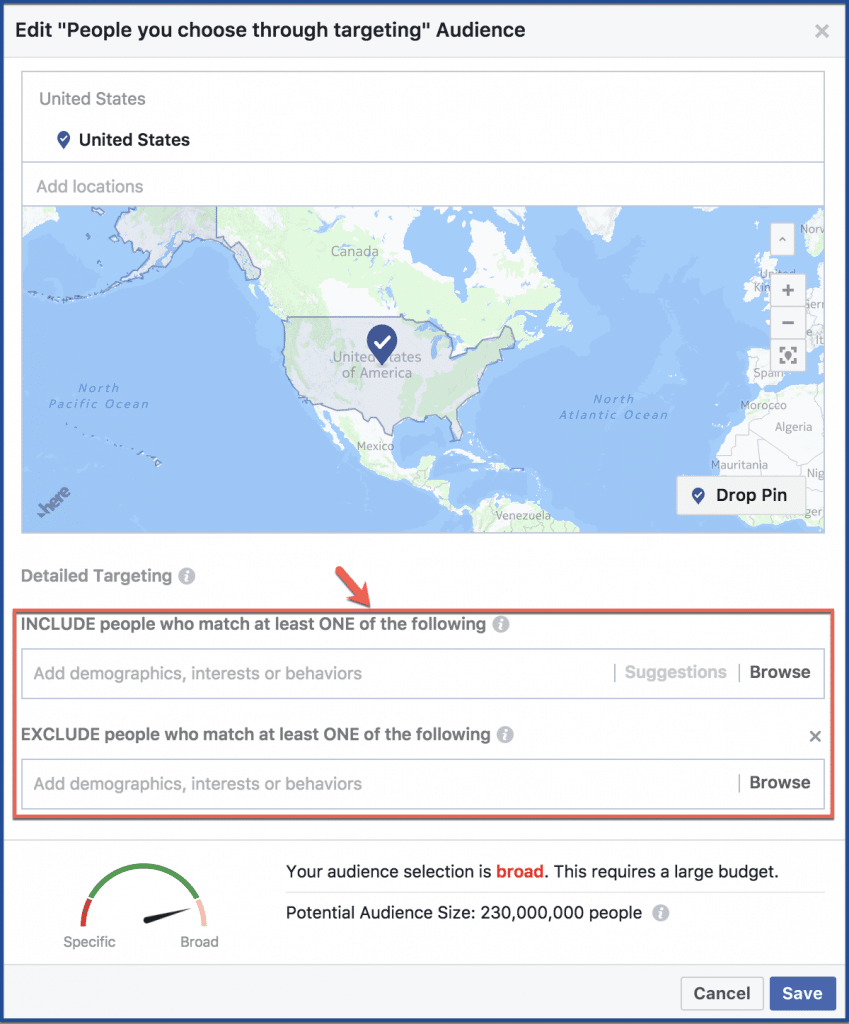
If, however, you want to narrow your audience, you can include or exclude people with certain demographics, interests, or behaviors. For example, you can include individuals who work in marketing or advertising by typing the keywords “marketing” and “advertising” in the search engine. Conversely, you can choose to exclude individuals who work in finance or law by typing in those keywords. Narrowing your target audience lowers your costs and ensures that the individuals who see your ads are more likely to click.
Step 5: Add budget and duration
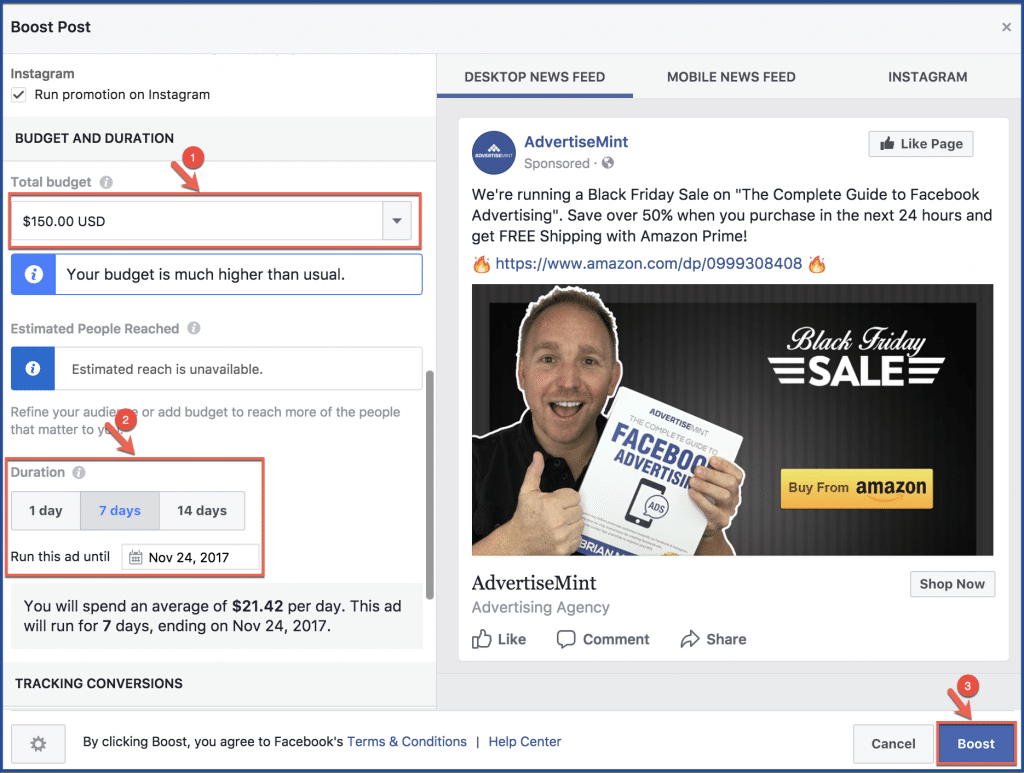
Your budget is the amount of money you’ll spend by the end of the campaign. The example below shows a maximum of $150. As soon as that $150 has been spent, the ad will stop running.
You must choose how long you want your ad to run. For a Black Friday deal, you can run your ad until Black Friday. If you want to advertise to straggling shoppers, then run your ad until the day after Black Friday. After you’re done, click “Boost” to boost your post.
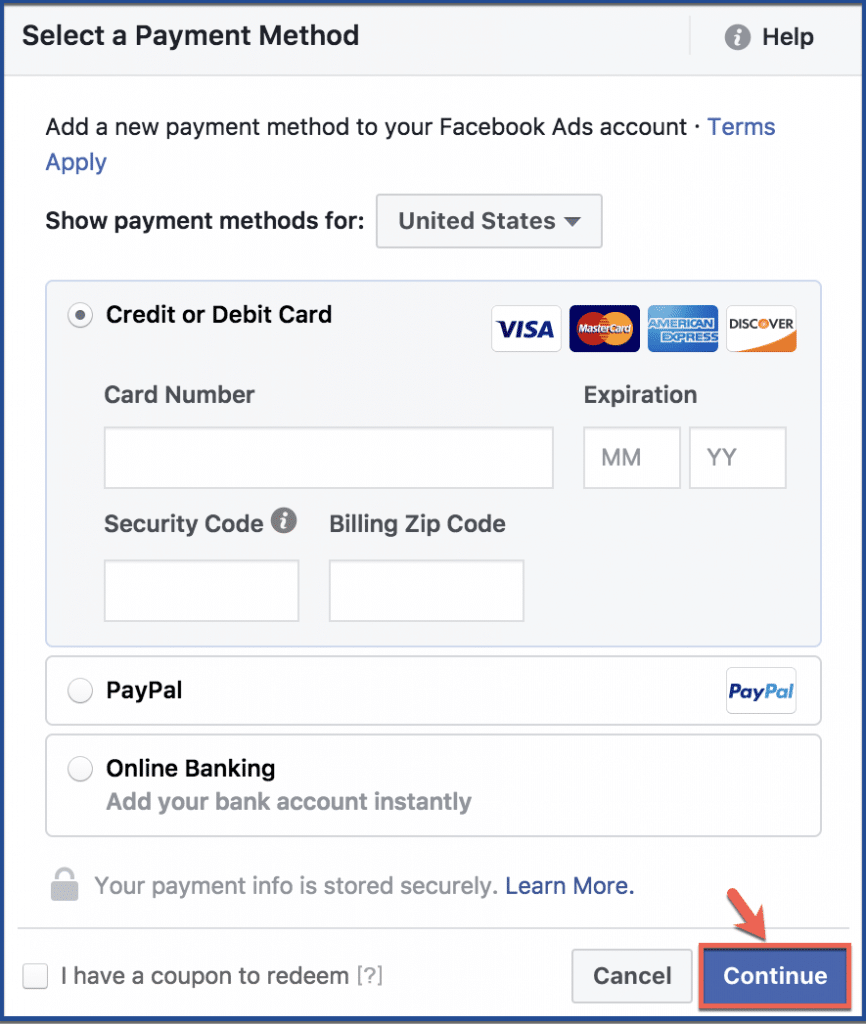
Step 6: Select payment method
Fill in the required information then click “Continue” to finish.
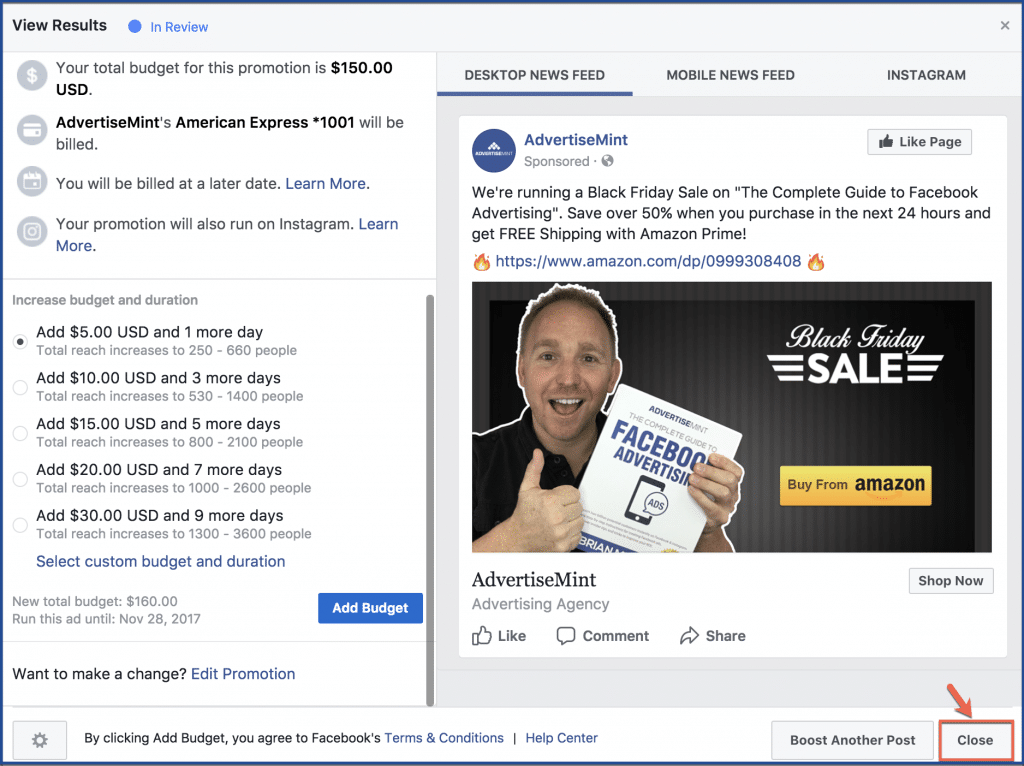
Step 7: Close window
In this last step, Facebook will encourage you to pay more for your boost. This is optional, and you should stick with your initial budget but increase it when your ad performs well. If you choose not to add more to your budget, click “Close.”
Give yourself a congratulatory pat on the back because you created your first Facebook ad. Now that’s done, you might want to prepare your email strategies, similar to the ones MailMunch offers in this article.

