Like most entrepreneurs, you’re probably contemplating starting an ad campaign without the help of an ad agency. This is of course doable, but like most entrepreneurs new to Facebook advertising, you are likely to begin your ad campaigns with boosted posts. Of all the Facebook ads that exist, this is the easiest to do. If you want to learn how to create a Facebook Boosted Post, follow the steps below.
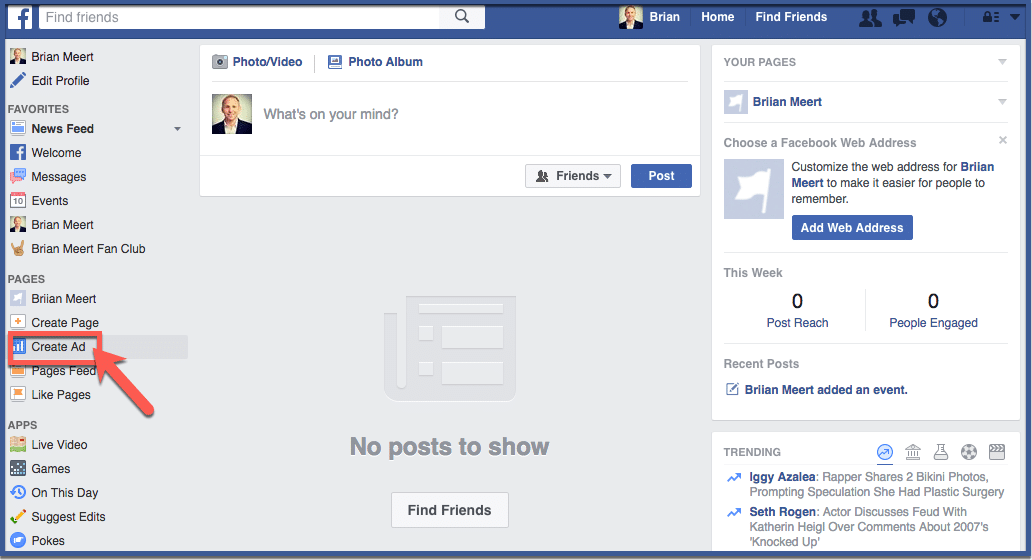
Step 1: Click create ad
Go to your news feed at facebook.com and click “Create ad” located under “Pages” on the left column of your page.
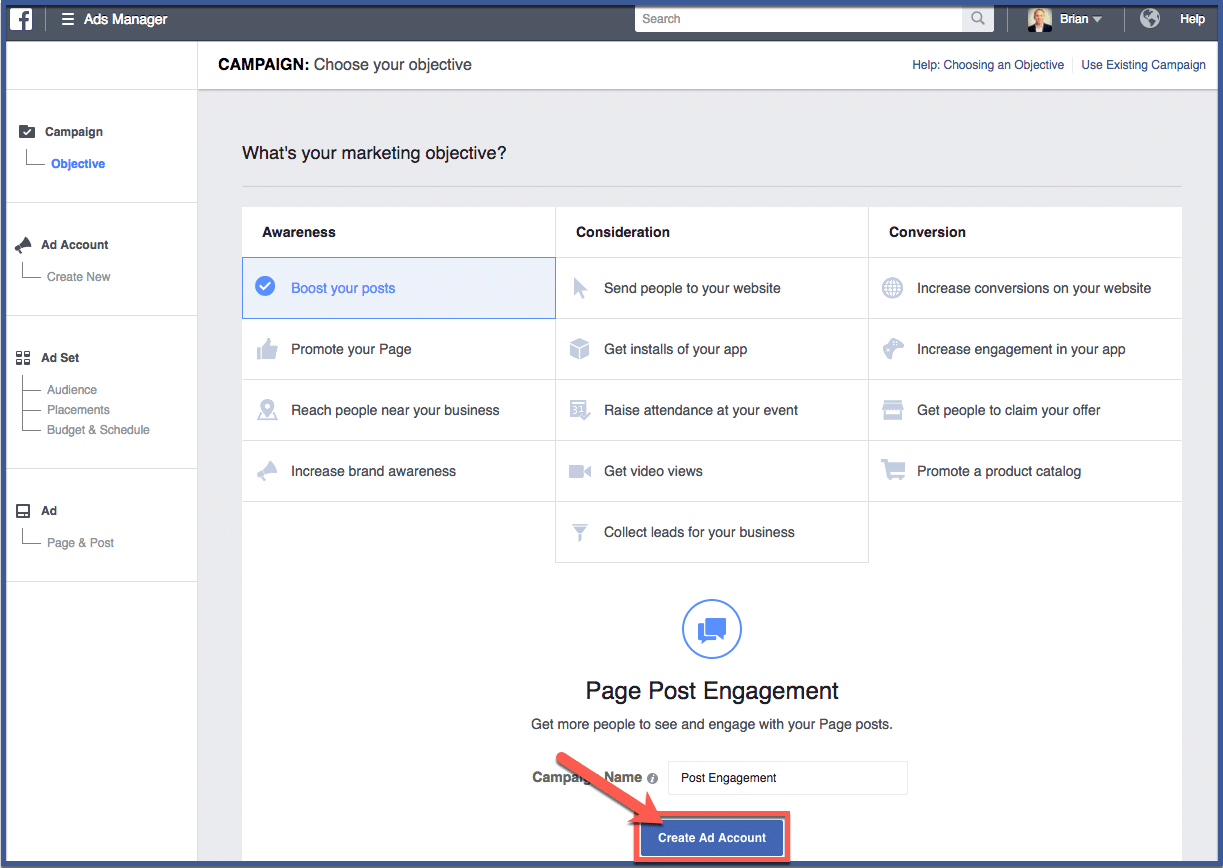
Step 2: Choose your objective
Objectives are the goals you want to achieve through your ad. Most businesses new to Facebook advertising choose “Boost your posts” as it is the easiest way to create an ad. However, you can select a variety of objectives such as sending people to your website, increasing engagement in your app, or promoting a product catalog.
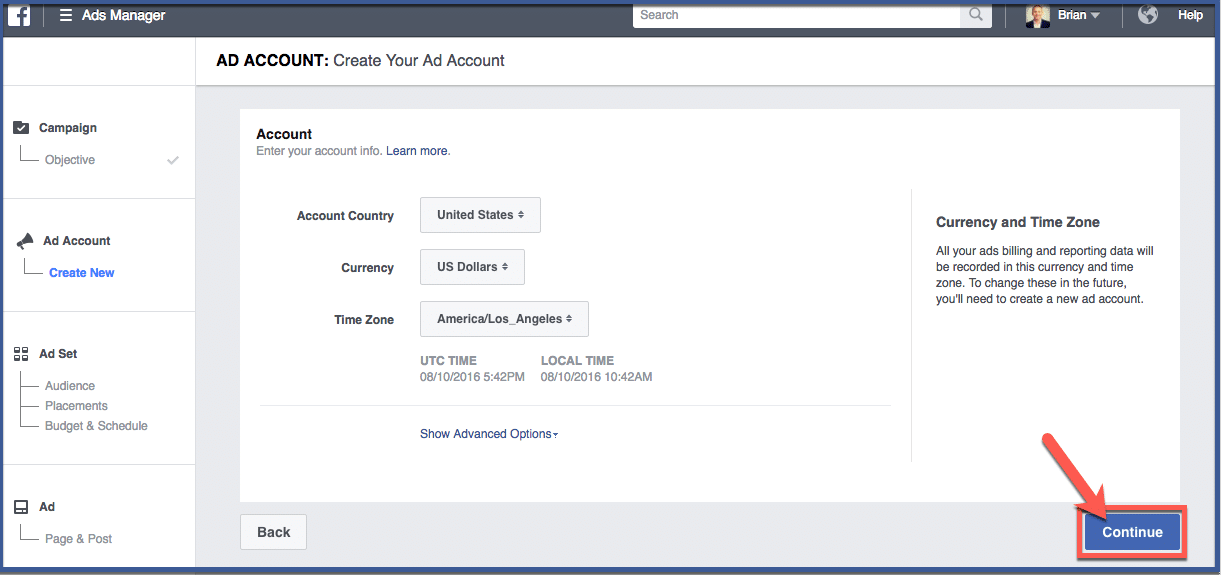
Step 3: Create your ad account
Fill in the required information. Select your country, currency, and time zone. All your ad billing and reporting will be recorded in the currency and time zone you selected. Then click “Continue“.
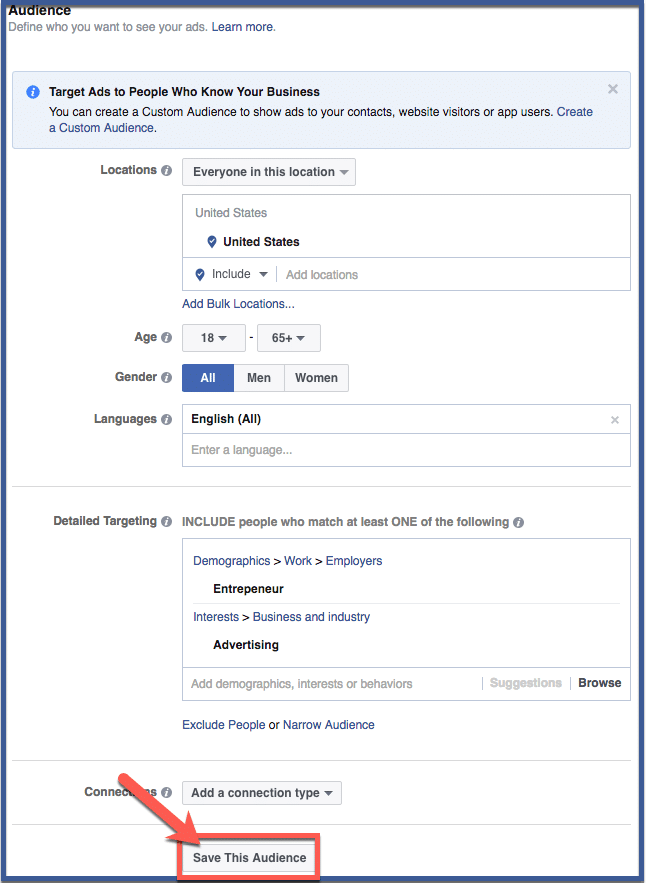
Step 4: Choose an audience
Choose who you want your ad to be targeted to. You can choose a location specific to a country, state, or city. You can choose to widen or narrow your audience by adding more preferences in interests, geography, or demographics. Fill in the information then click “Save This Audience“.
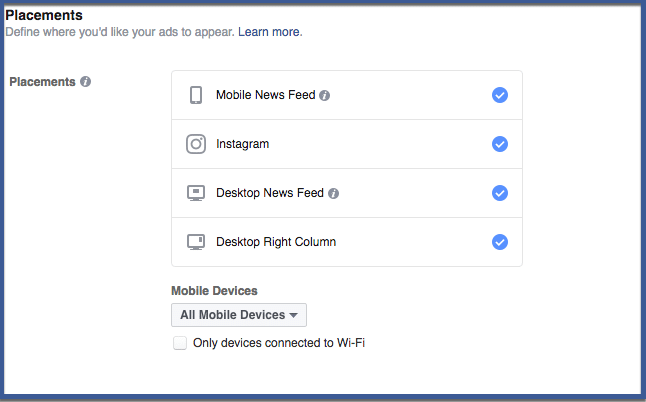
Step 5: Choose your placements
Choose where you’d like your ads to appear. You can send your ads to users’ phones, within the news feed or right column of their desktops, on Instagram, or all of the above. After you choose, scroll down to the next section.
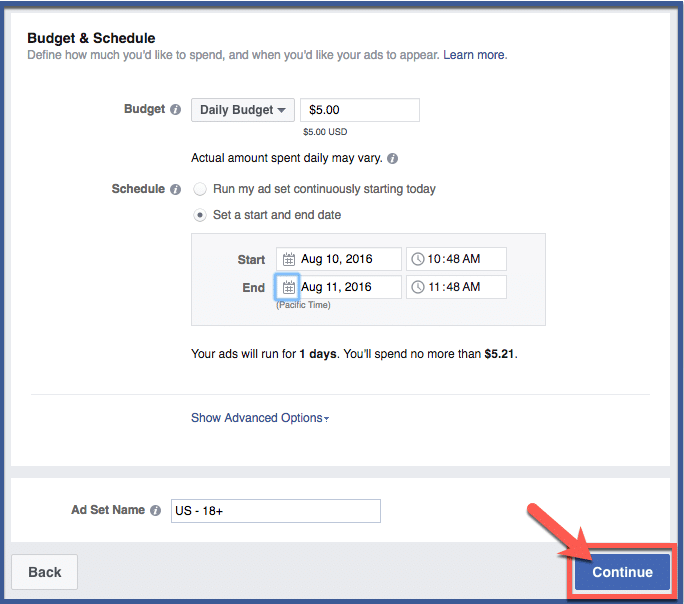
Step 6: Choose your budget and schedule
You can adjust your budget here. Set a schedule then click “Continue“.
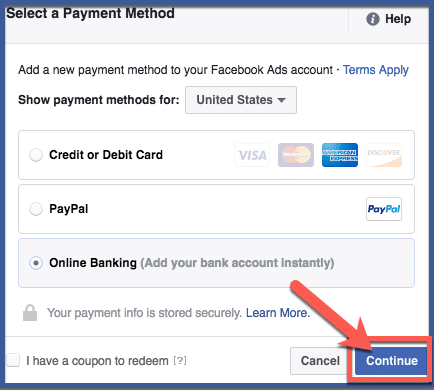
Step 7: Select a payment method
You can choose to connect your Paypal, online banking, or credit card to your ad account. After you choose, click “Continue“.
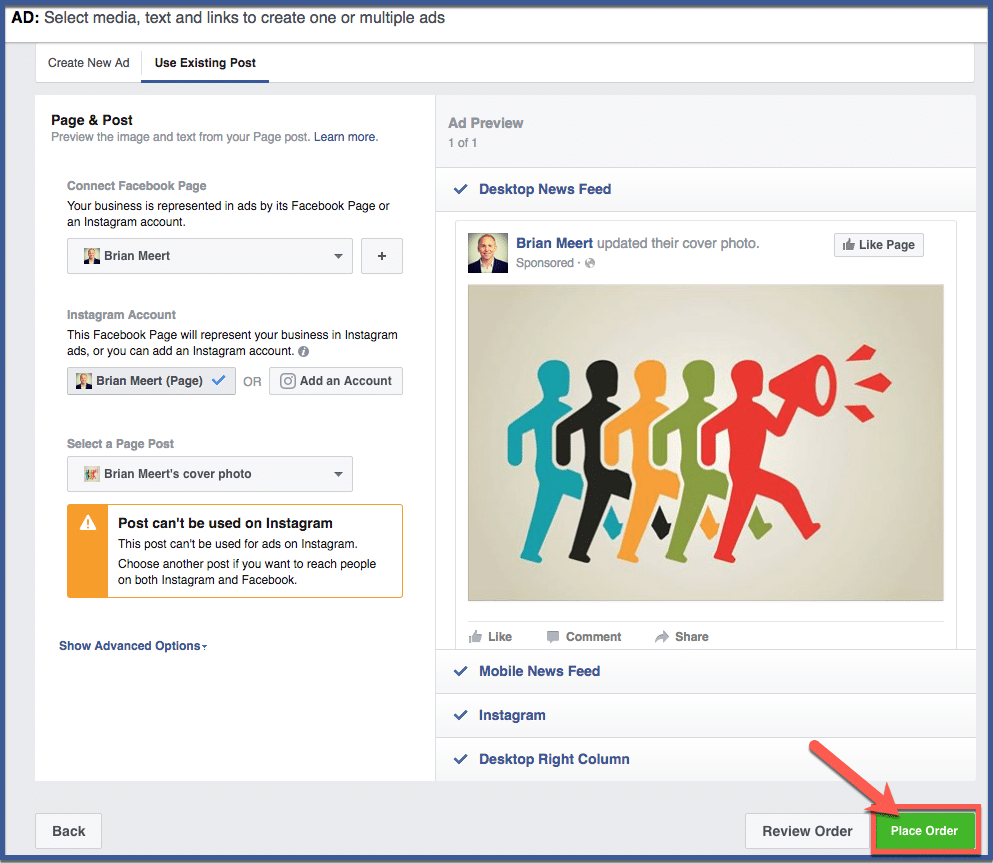
Step 8: Place order
This section shows you a preview of your ad. Click “Place order” to finalize your purchase.
Step 9: You’re done!
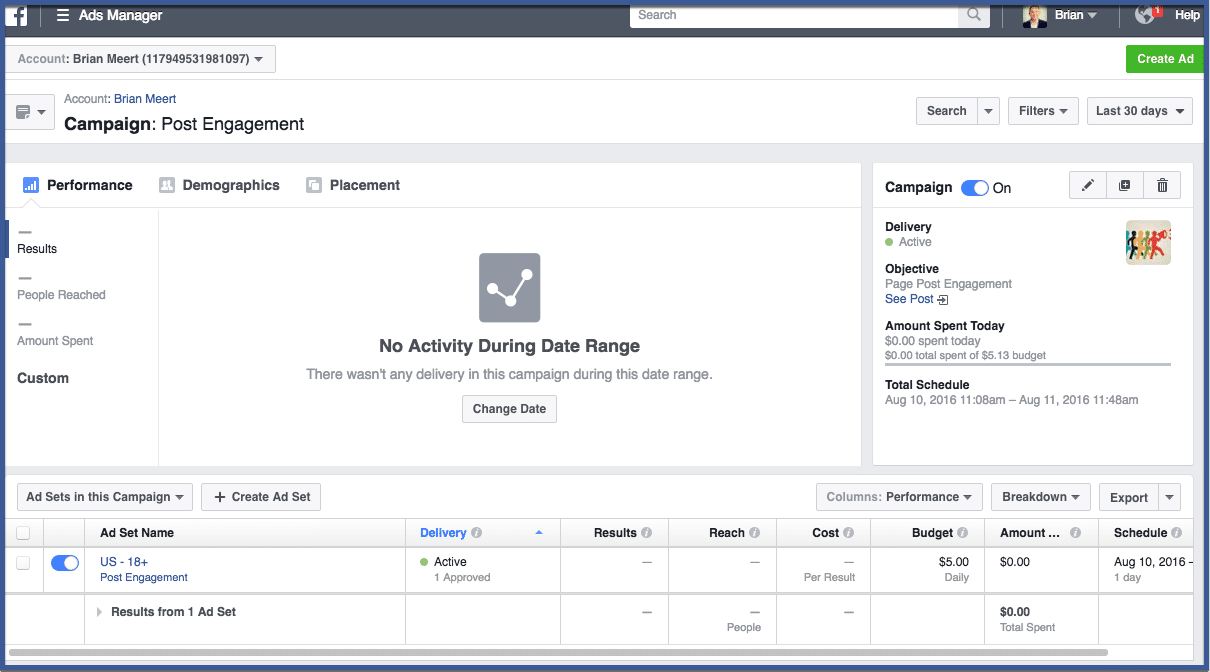
Congratulations! You’ve created your first ad! In this page you can track your ad performance.
Related articles
