Custom Conversions allows you to optimize and track for specific actions without making adjustments to your already existing pixel code, replacing the pixels placed on individual success pages. Custom Conversions, then, works differently than Standard Events, with which you can alter the Facebook pixel on specific pages.
Those who hate tinkering with code will love Custom Conversions as it is a more convenient way to optimize and track your customer’s actions. Setting up your custom conversions is fast and easy. Simply follow the steps below to track your conversions using custom conversions on Ads Manager.
Step 1: Click “Create Custom Conversion”
Go to custom conversions on Ads Manager. Once there, click “Create Custom Conversions“.

Step 2: Create a Custom Conversion
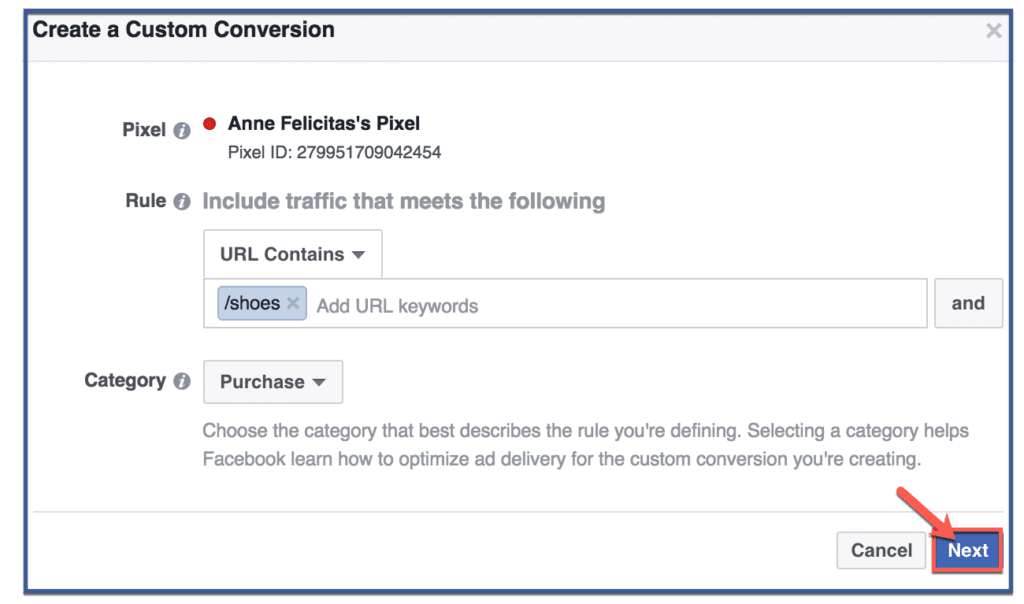
Afterward, fill in the required information to create a custom conversion. By filling out these rules, you are helping Facebook determine whether a customer who visited your website converted. Choose “URL Contains” then type the URL keywords. By doing so, you are telling Facebook where in your website you want it to track. In the example below, I used “/shoes” to tell Facebook I want to track customers who landed on my page with these keywords on the URL. Then choose a category. For mine, I chose “Purchase“. By choosing this, Facebook will track for purchases. After you have filled the fields, click “Next“.
Step 3: Create a Custom Conversion
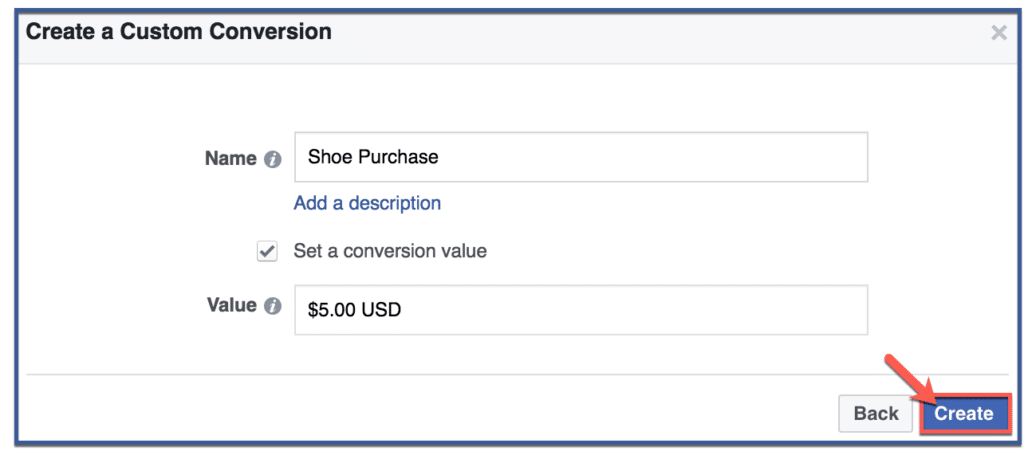
Give your Custom Conversion a name and value. Then click “Create“.
Step 4: You’re Done!
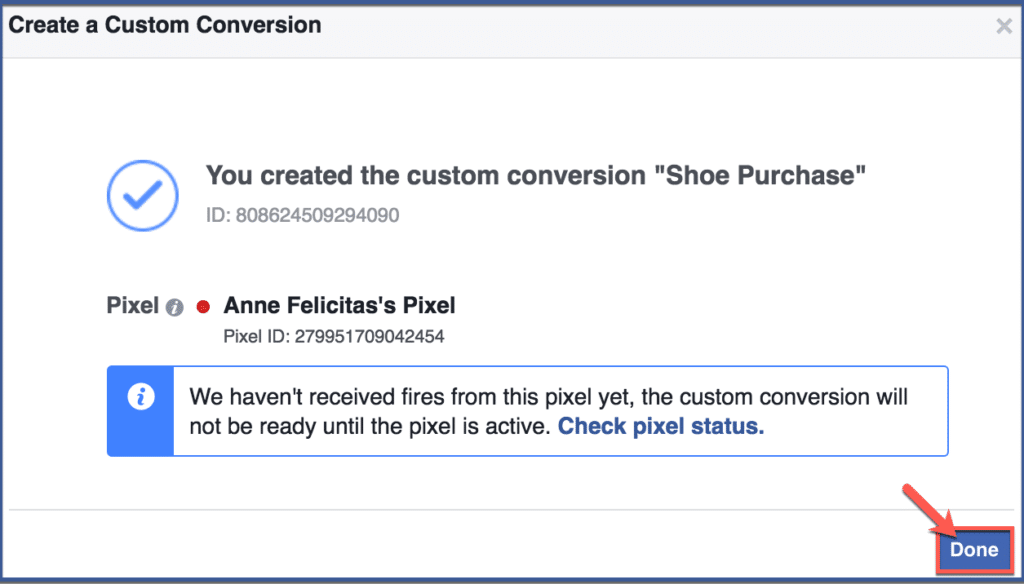
Click “Done” to finish.
Recommended Articles Related to Facebook Advertising:
