You might have heard of a Facebook Custom Audience but not a Facebook Website Custom Audience. Although Website Custom Audience is a type of Custom Audience, it functions differently than a Custom Audience. While the latter allows you to upload an existing customer list to Business Manager, a list containing people to whom you can target ads, the former allows you to create a list of people who have visited your website with the help of the Facebook Pixel.
Website Custom Audience is a great tool because it allows you to target a relevant audience. People who have visited your site are likely more interested in your business than those who haven’t—that’s why they visited your web page in the first place. For example, if a group of customers viewed an item you are selling online but did not make a purchase, you can use Website Custom Audience to target those customers and encourage them to revisit the page and make a purchase.
Before you can track these customers, however, you must first create and install the Facebook Pixel. If you have not created and installed a Facebook Pixel, visit How To Create a Facebook Pixel.
Building a Website Custom Audience is easier than you’d expect. Simply follow the five steps below to Create a Website Custom Audience.
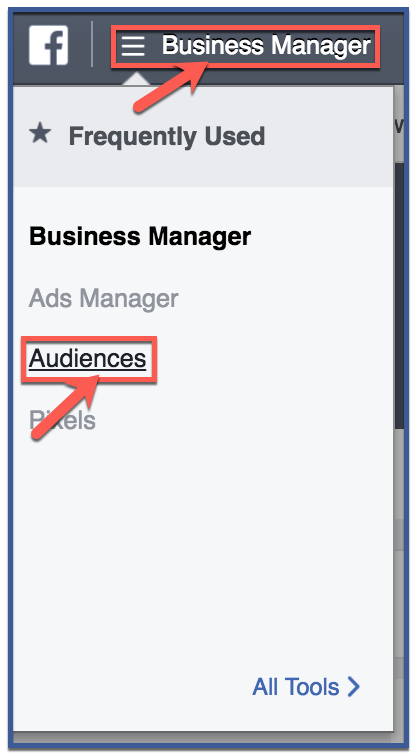
Step 1: Click “Business Manager” & “Audiences”
Go to Business Manager. From the homepage, click the “Business Manager” tab then click “Audiences” on the drop down menu.
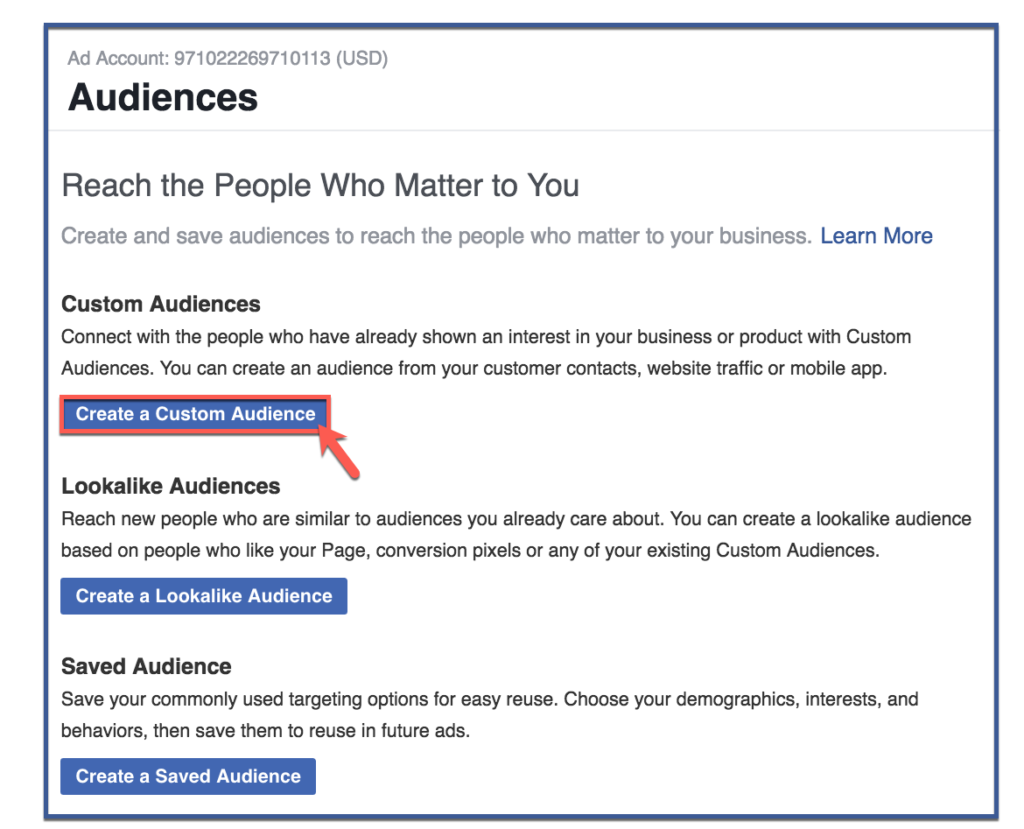
Step 2: Click “Create a Custom Audience”
Click “Create a Custom Audience,” the first option from the list.
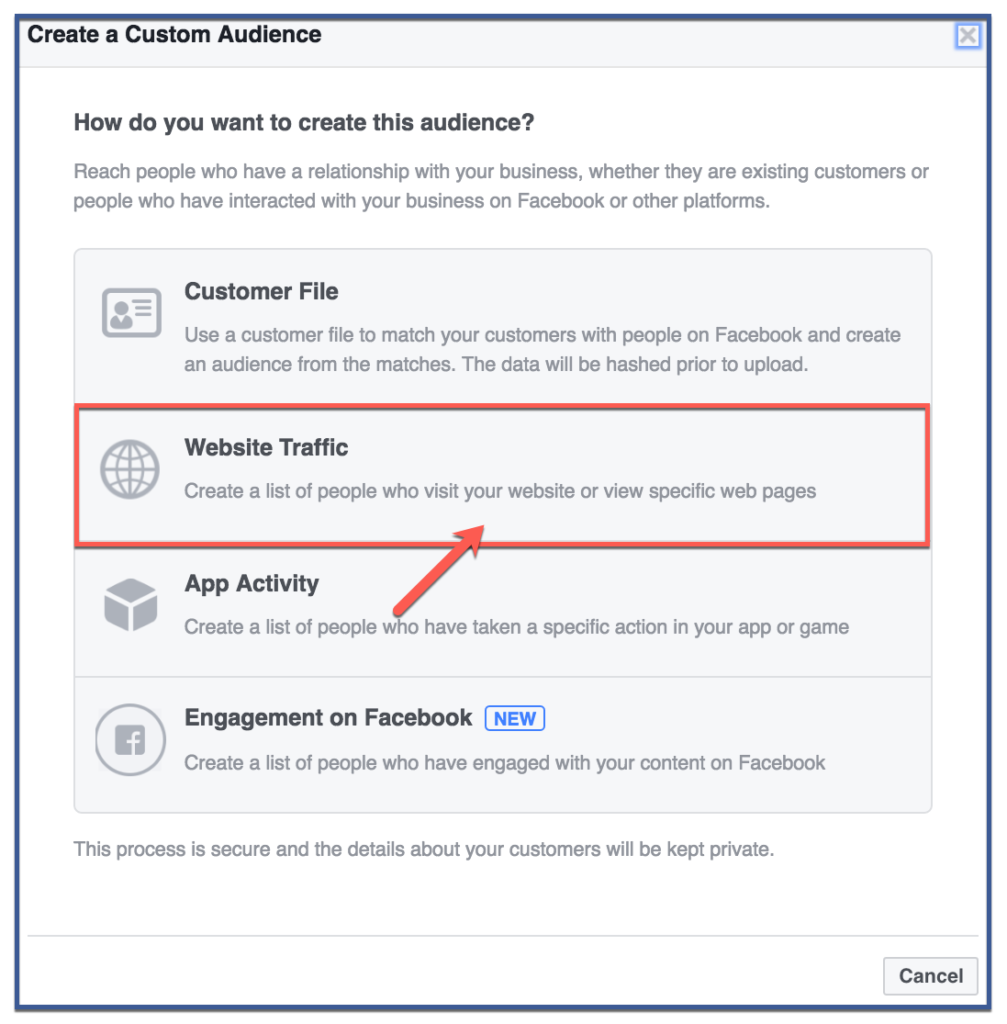
Step 3: Select “Website Traffic”
Click “Website Traffic,” the second option provided. This option will create a list of customers who have visited or viewed specific pages of your website.
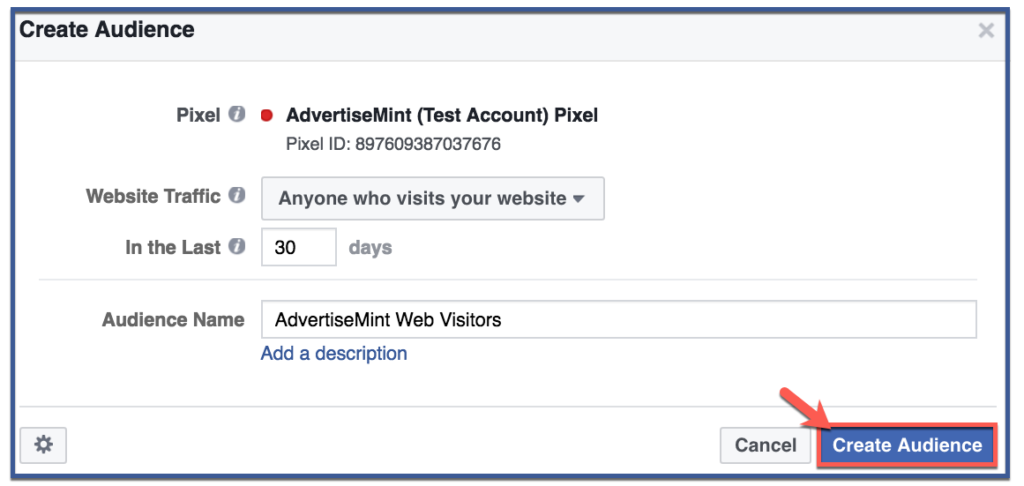
Step 4: Click “Create Audience”
Here, you will be able instruct your Facebook Pixel to create a customer list based on anyone who visits your website. You can also instruct your pixel to track people who have visited specific web pages, who have visited specific web pages but not others, or who have visited your website in a certain amount of time. You can then choose the number of days you want your pixel to track and assign a name to your audience list. Once you’re done filling the fields, click “Create Audience“.
Step 5: You’re done!
That’s it! You’ve created a website custom audience for remarketing.
Recommended Articles Related to Facebook Advertising:


